Sunday, 30 June 2013

Chicken Savoyarde

  photo SAM_6699_zpsf3214260.jpg

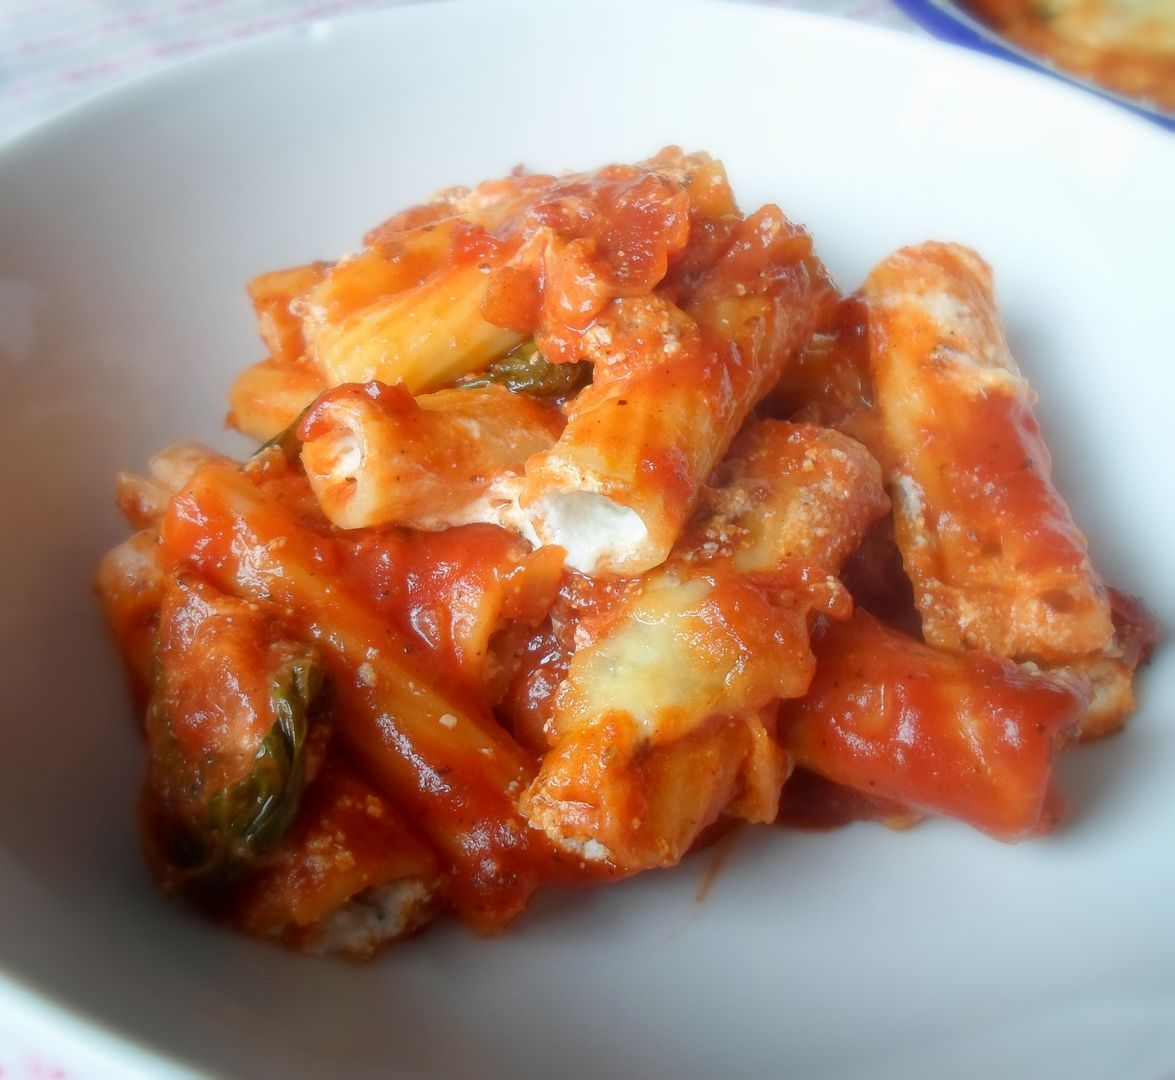
This is actually something which I cooked a few weeks back but held off showing you because it seemed like too many chicken recipes in a row!  (Not that you can ever eat too much chicken in my opinion, but . . . there ya go!)   I didn't want you getting bored.

  photo SAM_6703_zpsfad0606e.jpg

One of my favourite fresh herbs has to be tarragon.  It has long velvety green leaves and  a lovely distinctive aniseed flavor which I quite enjoy, going very well with fish and chicken.  I use it in my Cod Fish Cakes  and tartar sauce, which is gorgeously delish if I don't say so myself!  I haven't made them in a while now . . . hmmm . . .

 photo SAM_6701_zps04f33fed.jpg

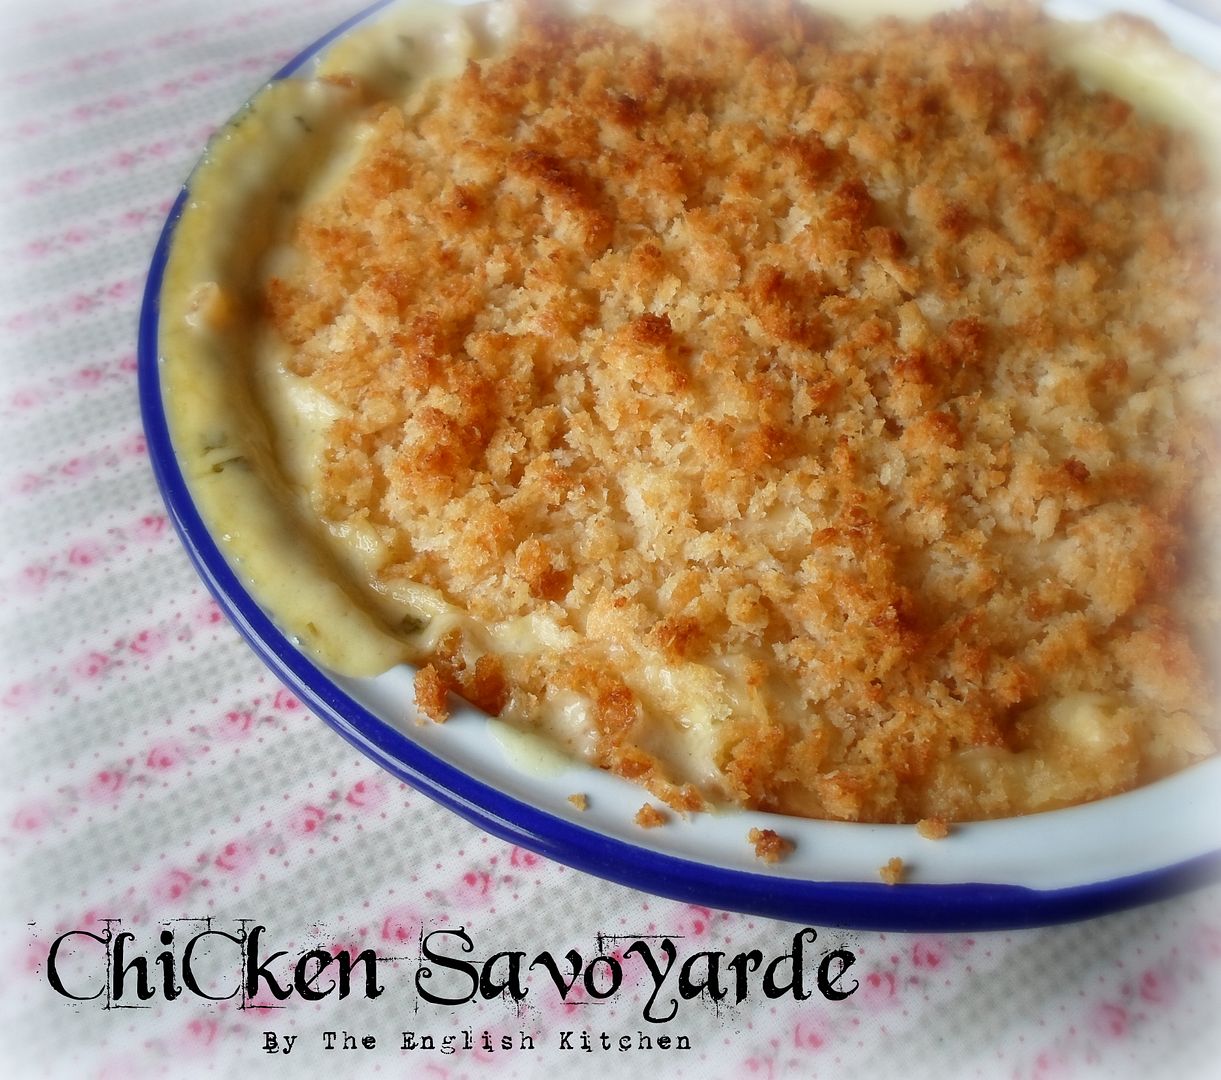
It's used a lot in French Cookery, particularly with chicken (think Chicken Tarragon here) and makes wonderfully flavourful vinegars and oils.  It is one of my favourite herbs that I grow in my garden and it's doing quite well at the moment . . . so when I found myself in the position of having some leftover roasted chicken a week or so ago I decided to combine the two and make one of our favourite chicken casseroles . . . Chicken Savoyarde . . .


 photo SAM_6716_zpseb03a8e4.jpg

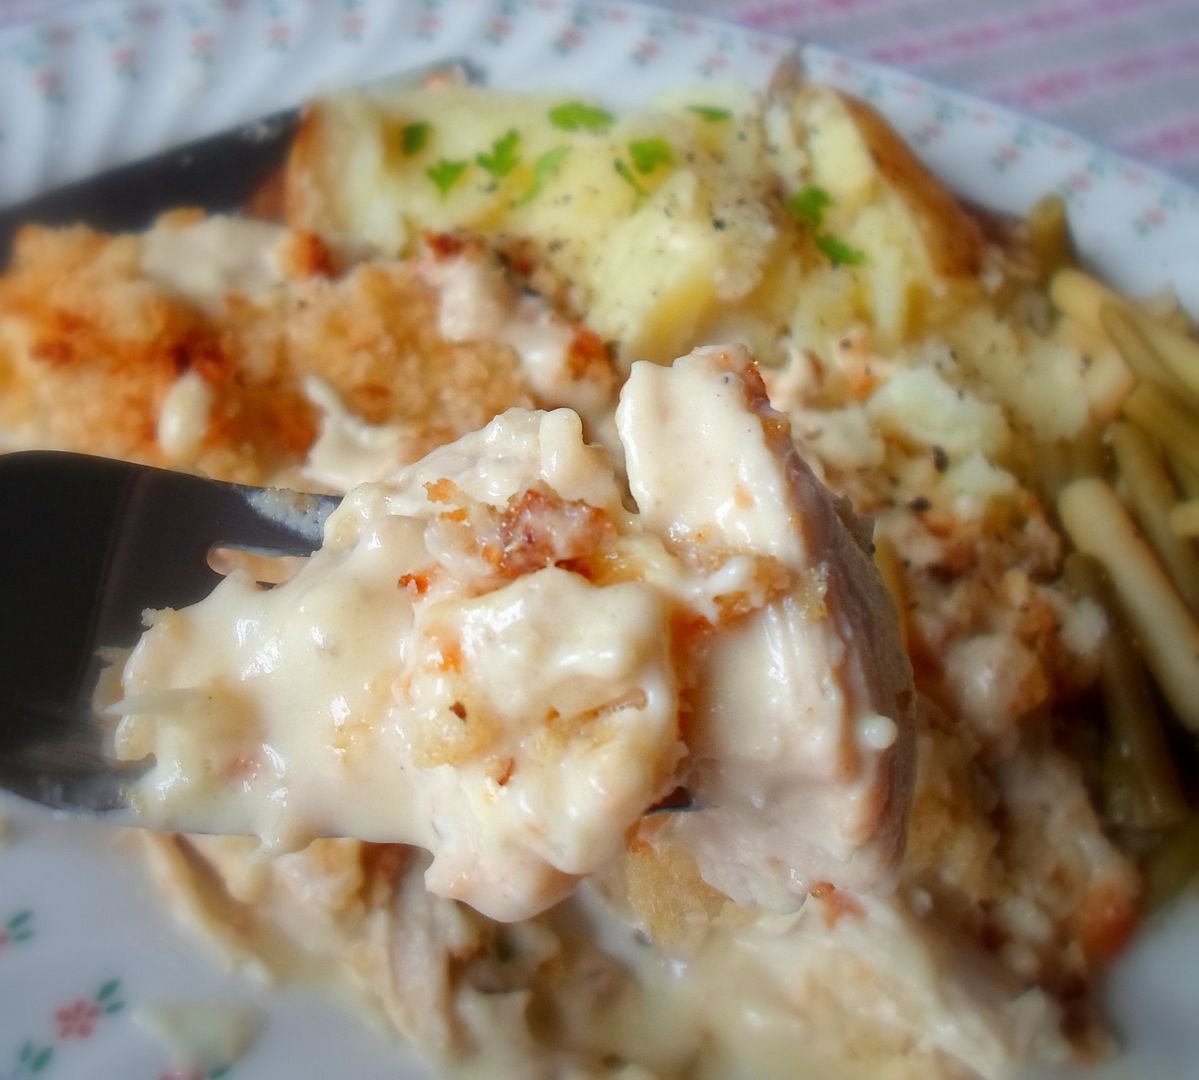
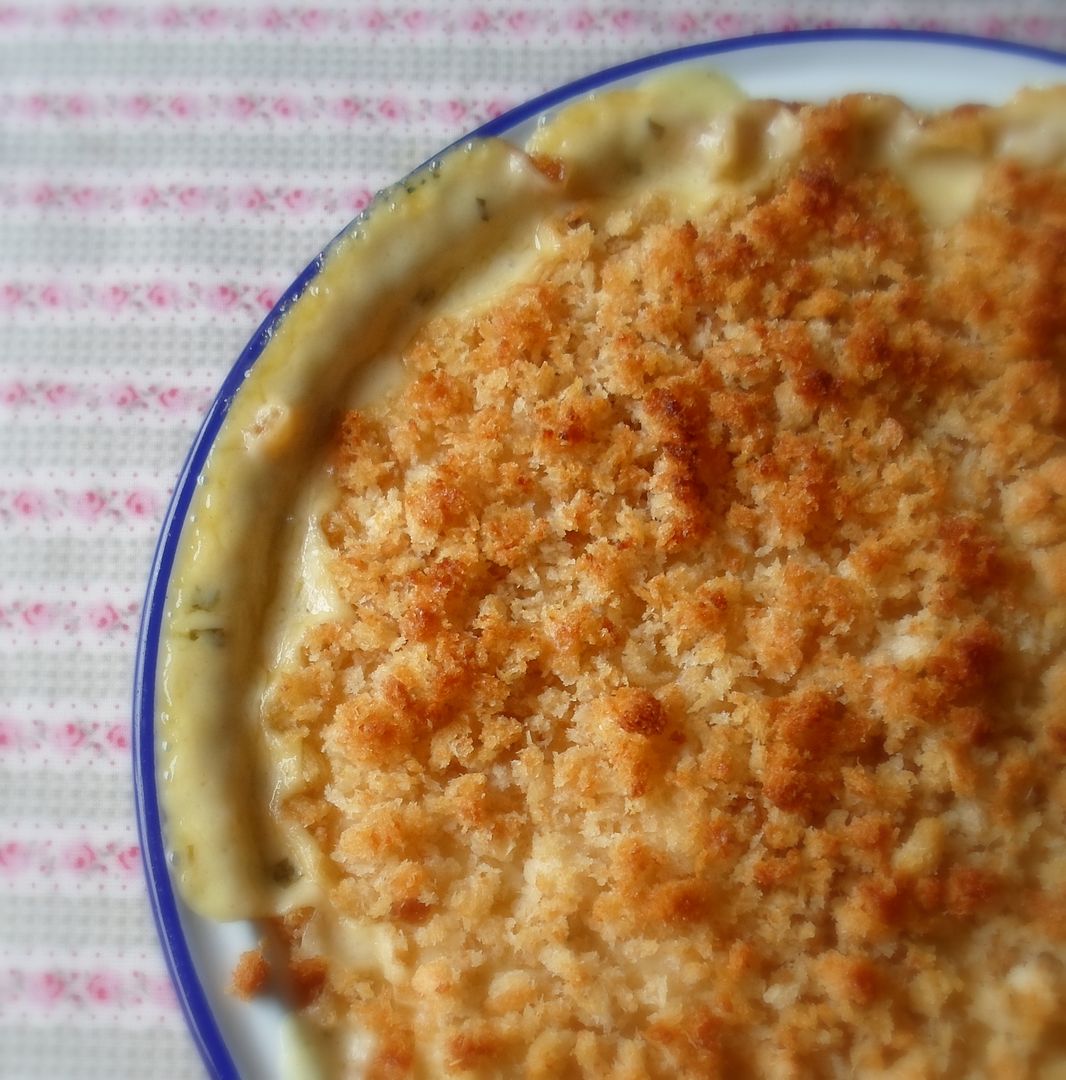
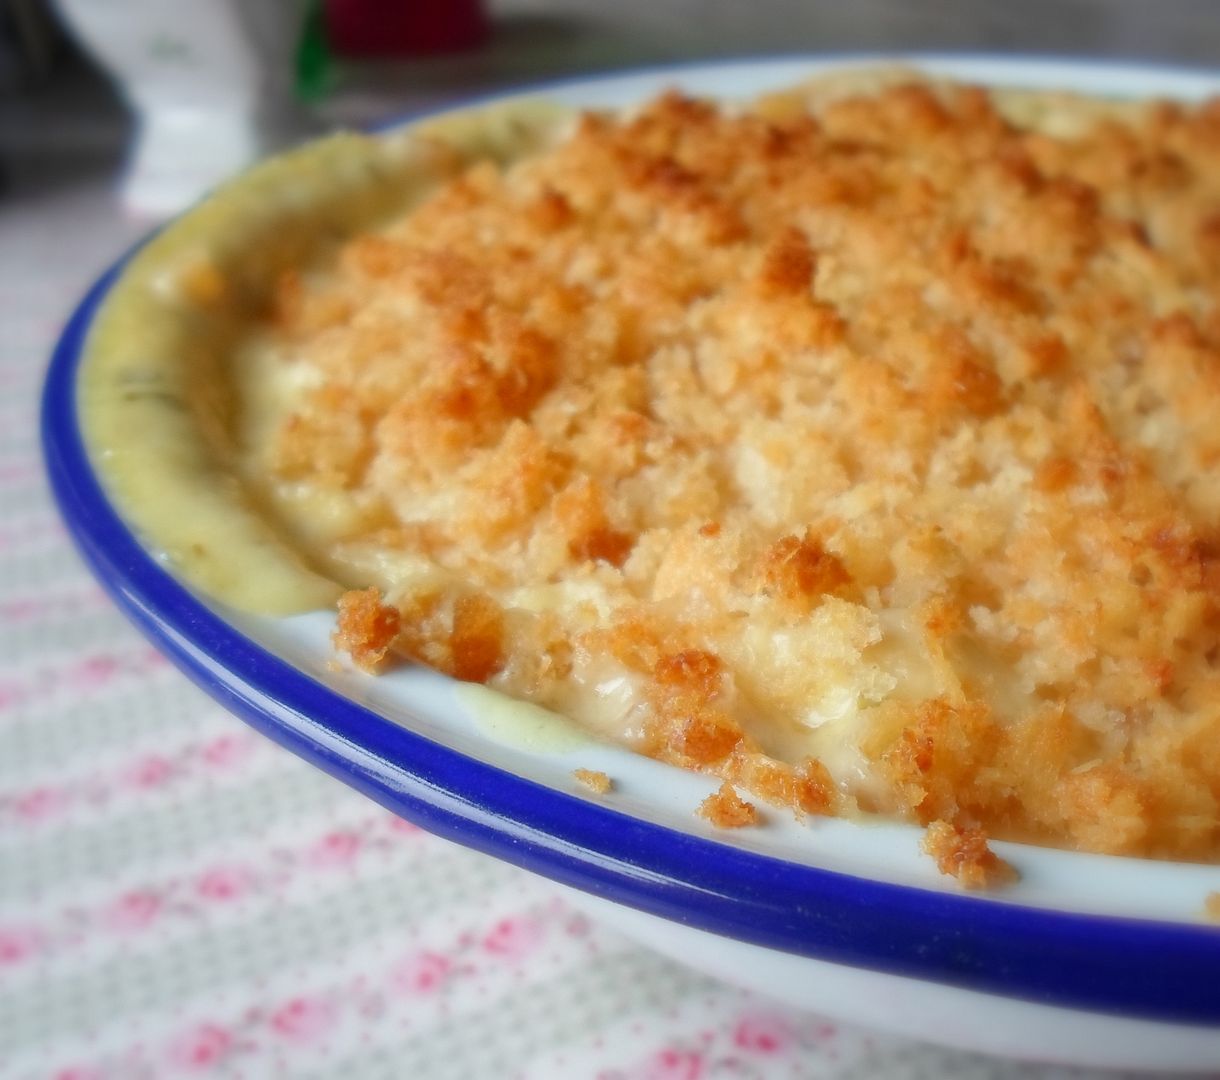
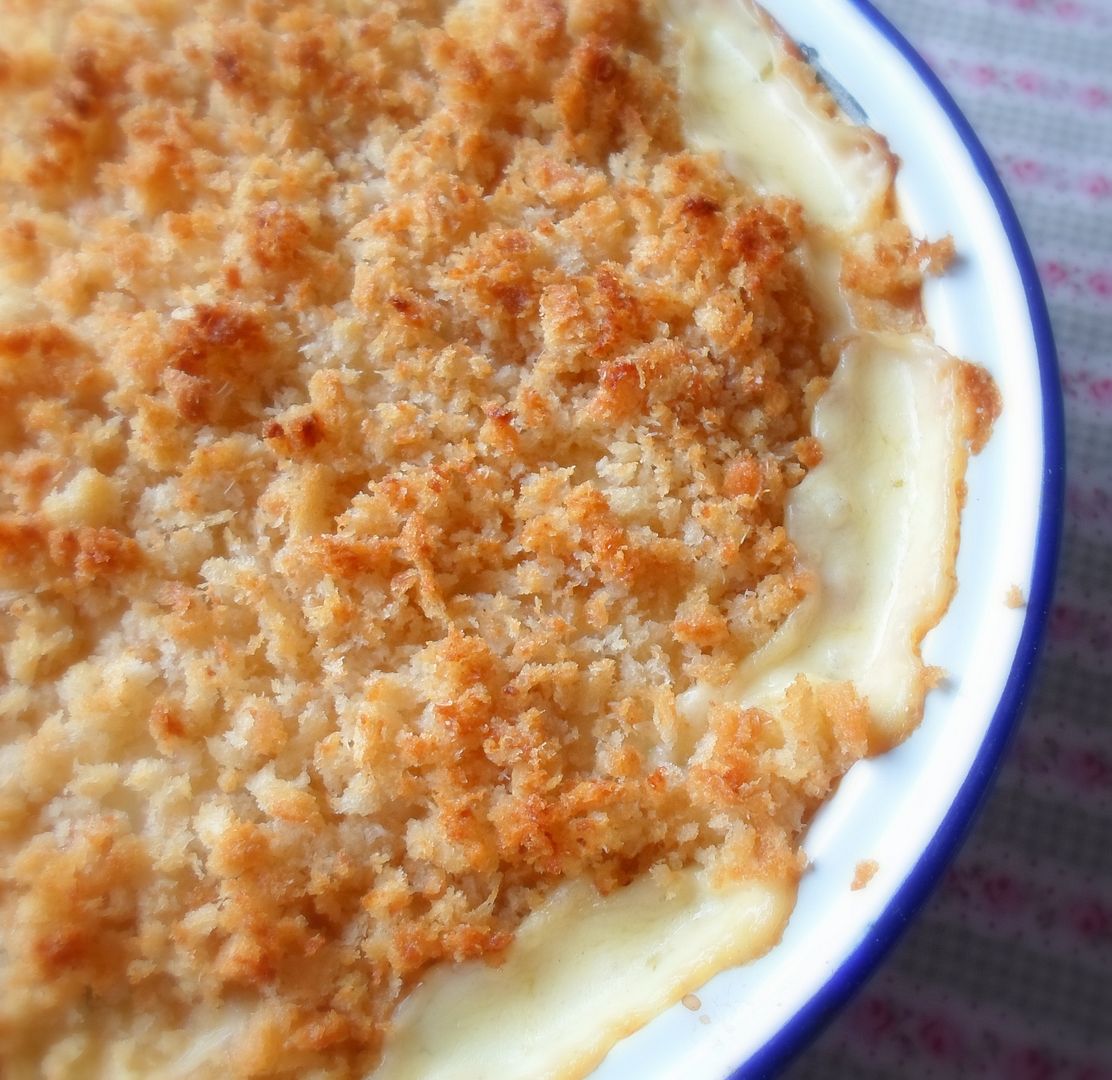
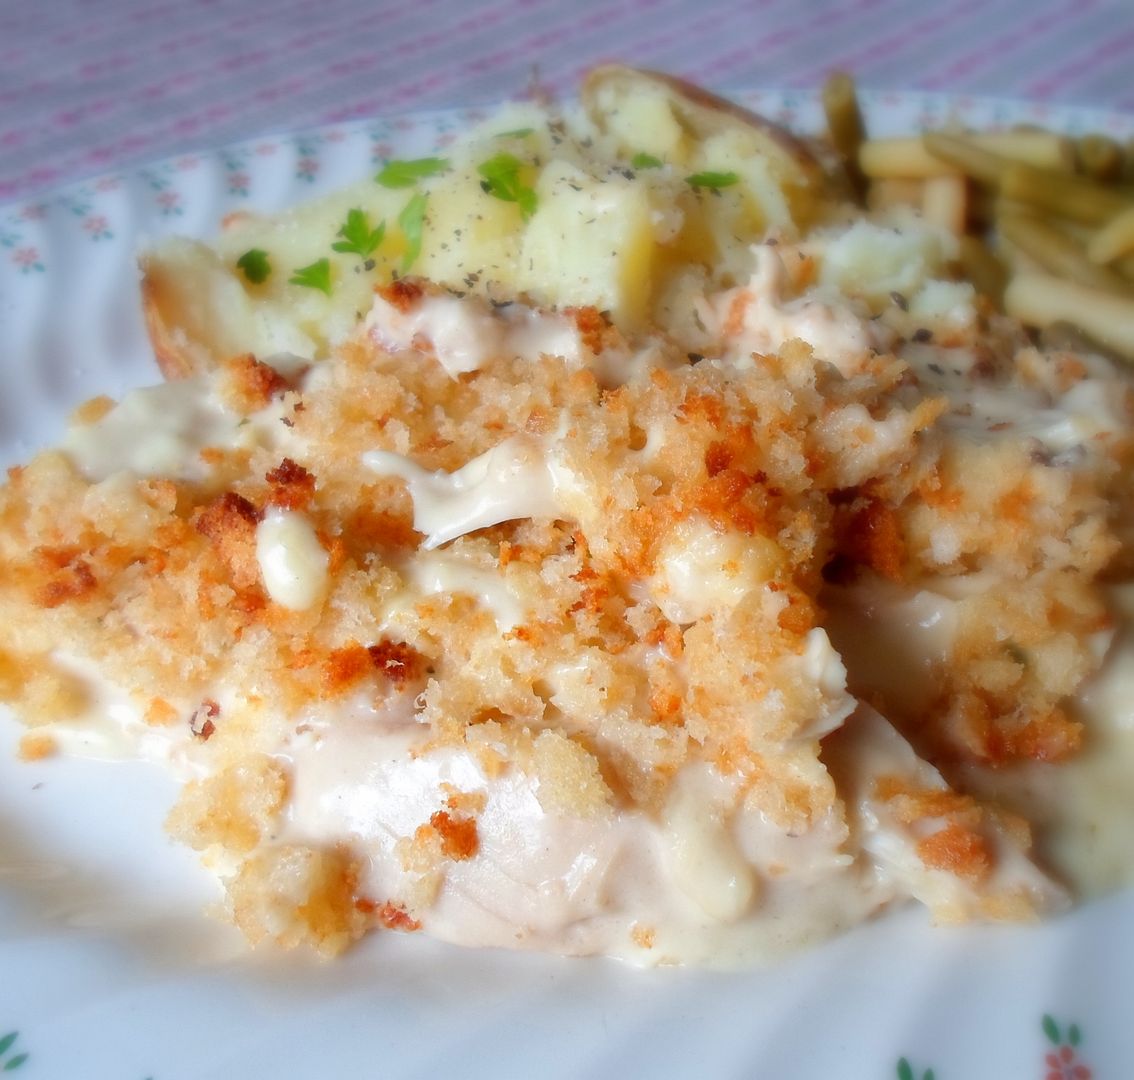
This is a deliciously comforting chicken dish, composed of gently poached chicken (or leftover chicken if you have it) in a wonderfully rich mustard and tarragon cream sauce . . . this casserole is special enough that you could fix and serve it to company . . .

  photo SAM_6707_zps5ed18d22.jpg

Actually it is the perfect company dish because you can make it up completely ahead of time, the night before in fact . . .  and then just  top it with the crumbs and heat it up in the oven while you are visiting with your guests.

 photo SAM_6708_zpsbb9c229d.jpg

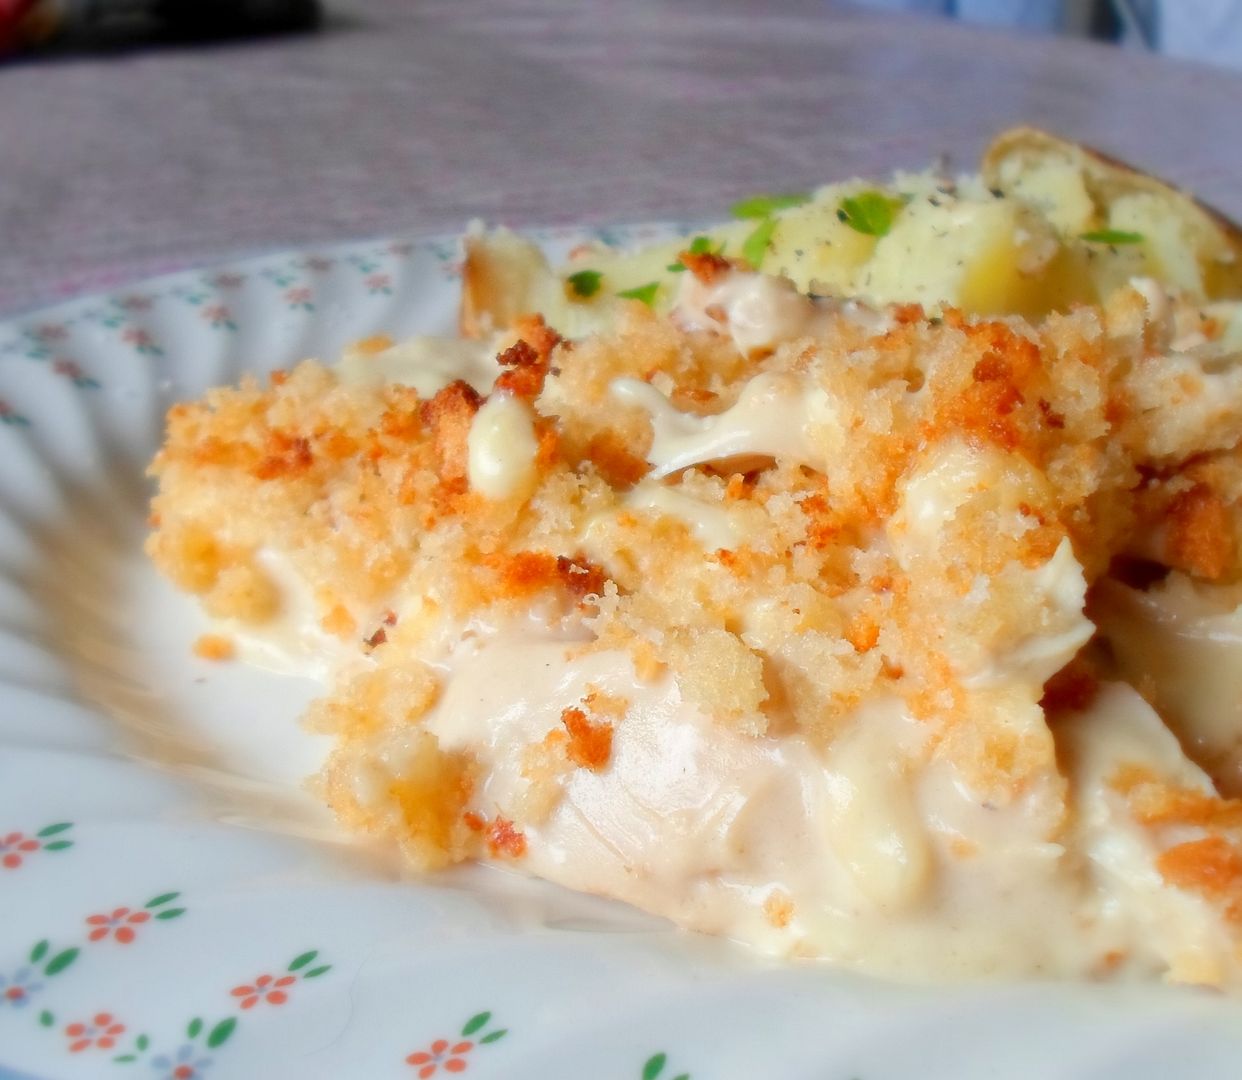
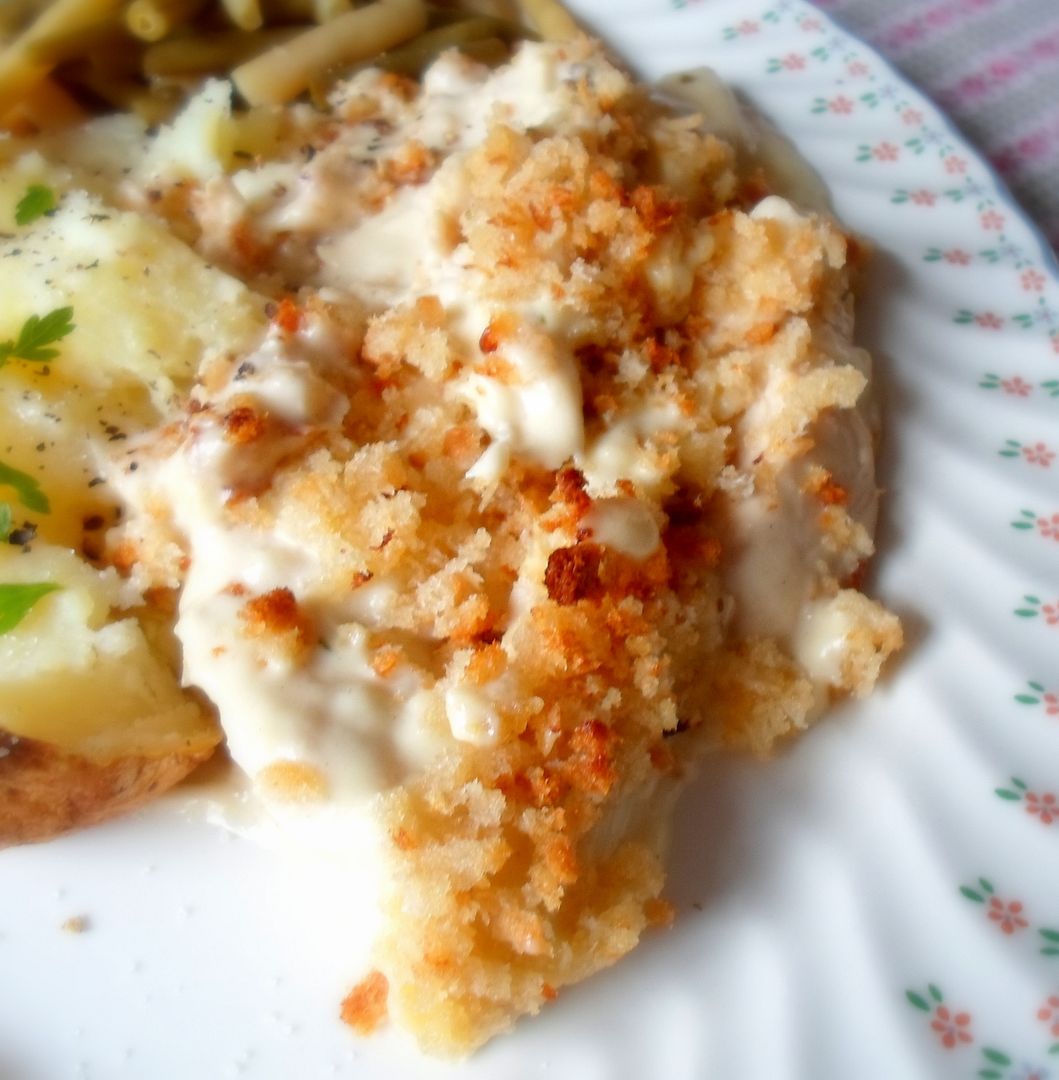
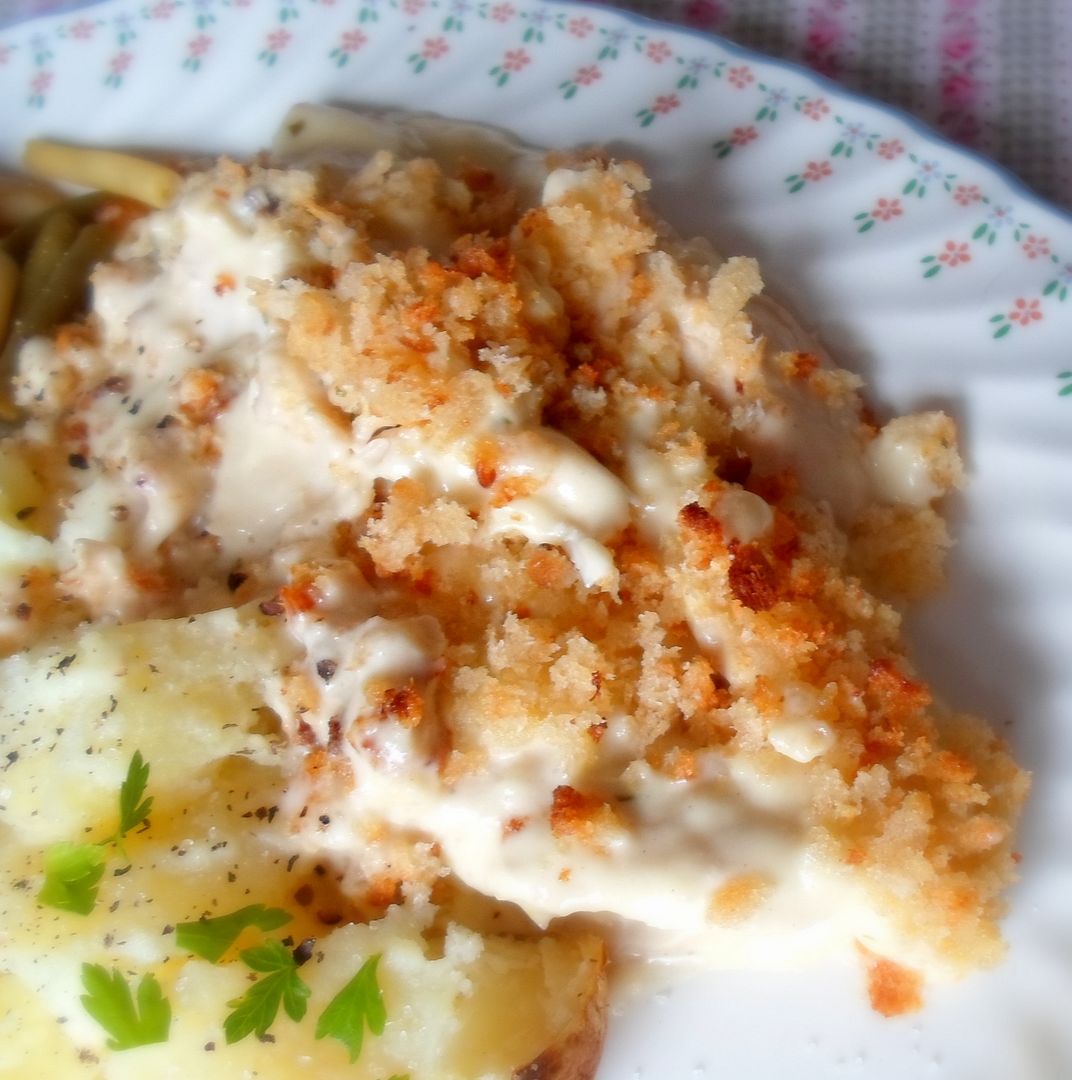
I like to serve it with steamed baby new potatoes and a green vegetable . . . like broccoli.  Broccoli is very good with it.  I am particularly fond of baby stem broccoli . . . oh, and asparagus.  That is also nice.  But then again . . . peas and early beans are coming into their own at the moment too . . .

 photo SAM_6709_zps3744bced.jpg

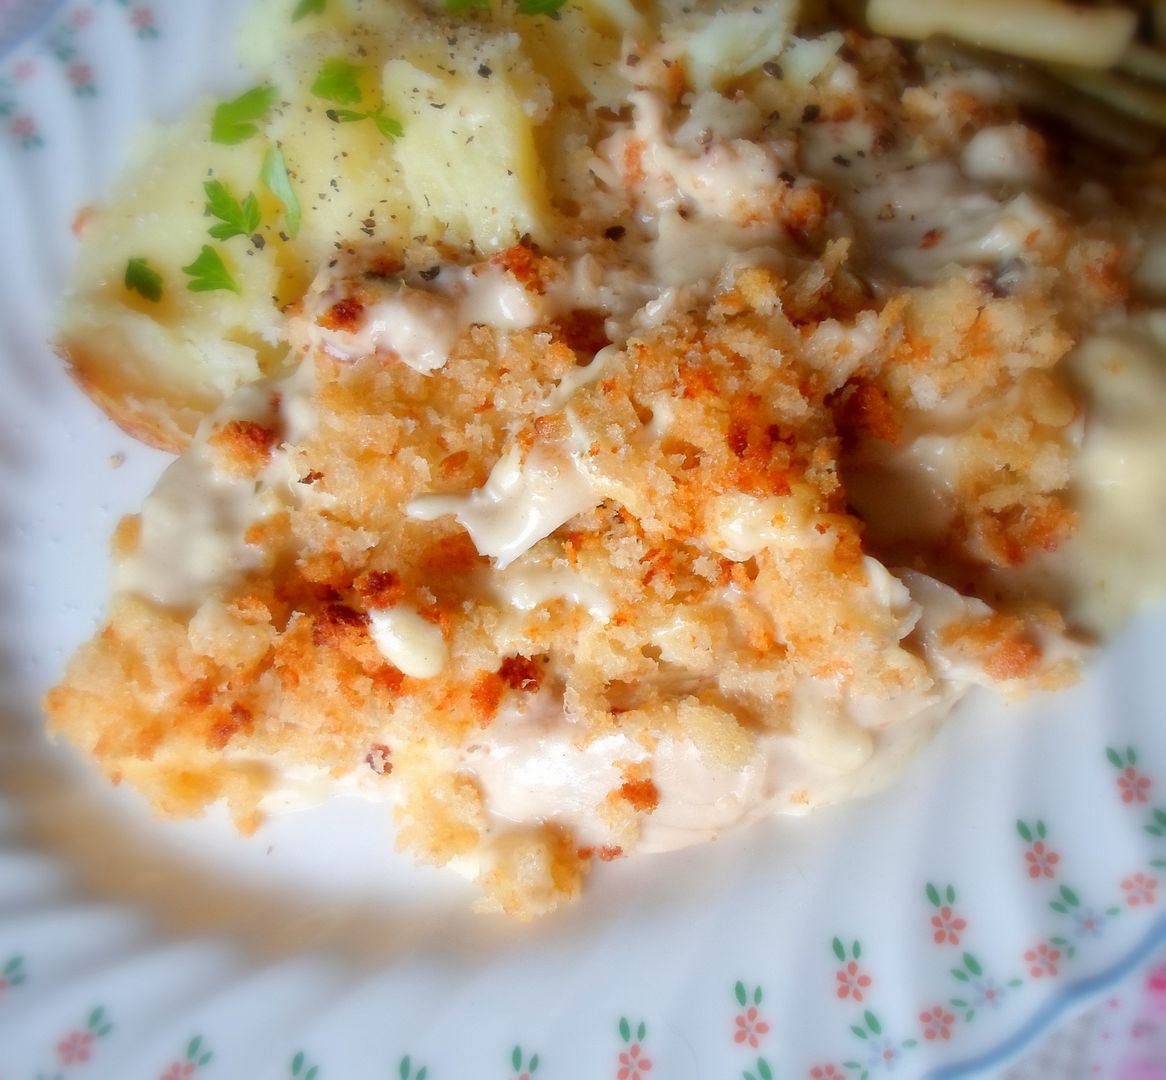
By all means poach your own chicken to use in this if you want.  You won't regret it and it won't heat your kitchen up too much . . .  It's not that hard to do and ensures nice moist meat . . . but leftover roast chicken is awfully good too.  I love the soft velvety and creamy sauce against the moist chicken and that cheesy bread crumb crunch on top is just . . . oh . . . la . . . la

  photo SAM_6698_zpsc084c3a8.jpg  

*Chicken Savoyarde*
Serves 6
Printable Recipe

This is not much more than a glamorous chicken casserole and so very easy to make. It's a great way to dress up leftover turkey or chicken if that's all you have, but well worth the extra effort and expense of buying a chicken purposely to poach and dress up in this simple but decadently delicious manner. This will have them scrambling for seconds.

For cooking the chicken:
1 (4 1/2 lb) free range chicken, organic if possible
2 small onions, cut in half and stuck with two cloves
2 carrots, peeled and cut in half lengthwise
3 stick of celery, halved (preferably with some leaves attached)
2 leeks, trimmed and well washed
2 bay leaves
2 springs of thyme
salt

For the sauce:
60g (4 TBS) butter
60g plain flour (generous half cup)
415ml of the stock, reserved from poaching the chicken (1 3/4 cup)
285ml dry white wine (generous cup)
225ml double cream (1 cup)
180g gruyere cheese, grated (3/4 cup)
1 TBS Dijon mustard
2 ounces tarragon leaves, chopped (scant quarter cup)
sea salt and freshly ground black pepper to taste

To top:
60g of fresh white bread crumbs (1 cup)
30g  of grated strong cheddar cheese (1/4 cup)
2 TBS of grated Parmesan cheese

 photo SAM_6712_zpsf1623f18.jpg


To Poach the chicken: Put the chicken into a large pot along with cold water, barely enough to cover it. Add the vegetables and herbs and a good sprinkling of salt. Bring to the boil, then reduce the heat immediately and poach very gently for around an hour and a half. Once cooked thoroughly and tender, lift the chicken very carefully out of the poaching liquid onto a plate and allow it to cool. Strain the poaching liquid through a fine sieve, and set aside to cool. Once cooled, lift off any surface fat. I like to use paper kitchen toweling for this. I just keep sweeping it over the top and it lifts and absorbs all the grease. You could also put it into the fridge to chill and the fat would harden to the point where you can just lift it off quite easily.

Remove all the meat from the chicken carcass, discarding any fat, bone or gristle. Cut into large bite sized pieces and place in a lightly greased gratin dish.

 photo SAM_6713_zps8f7cceda.jpg


To make the sauce: Melt the butter in a large saucepan. Add the flour and cook over medium low heat for at least three minutes, without browning. Gradually whisk in the hot chicken stock, white wine and the cream. Cook and stir until bubbly and thickened. Whisk in the gruyere cheese, mustard and tarragon. Taste and adjust the seasoning as needed with some sea salt and black pepper. Simmer for about 20 minutes over low heat.

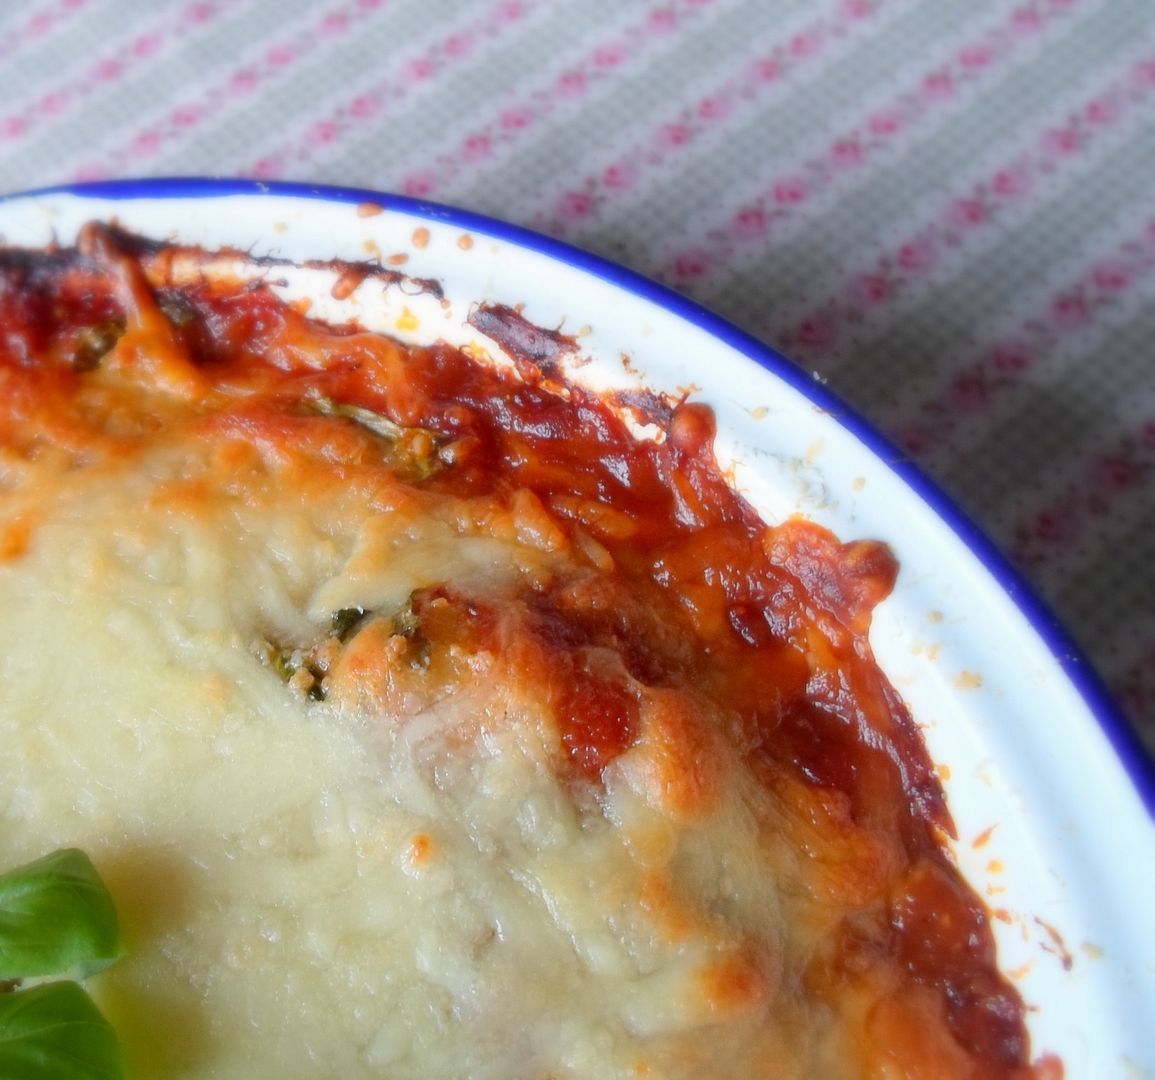
Pre-heat the oven to 230*C/450*F. Pour the sauce over the chicken in the gratin dish. Mix the bread crumbs and Cheddar and Parmesan cheeses together and sprinkle evenly over top. Bake the dish in the heated oven for 20 to 25 minutes, until golden brown and bubbly. Remove from the oven and serve.

We like to have this with steamed baby potatoes and a green vegetables.  Don't think about the calories!

Note - If you can't get fresh tarragon, it is acceptable to use dried.  Use half the amount in that case.

Saturday, 29 June 2013

Whole Lemon Muffins

 photo SAM_6750_zps670ce321.jpg

Just look at what I was recently sent to try out.   Yes, that's a lovely Tassimo machine by Bosch.   My daughter Eileen, in Canada, got one of these as a wedding gift last year, and I was green with envy, so when Tassimo contacted me several months ago asking me if I would like to try one out I didn't have to think twice before I gave them a resounding yes!

Before anyone says anything, yes . . . I am a Mormon, which means I don't drink tea or coffee, but that's doesn't mean I don't enjoy a good hot chocolate once in a while!  I have had another pod hot drinks machine for several years now and I thought it made pretty good hot chocolate . . . until now.

We've been using the Tassimo machine here at Casa de Rayner for about two weeks now, and I have to say in all honesty . . .  the Tassimo makes better hot chocolate than my old machine, seriously.  Not a word of a lie.

  photo SAM_6831_zps0b5e54b2.jpg

Why I think it's better:

1.  There are more than one variety to choose from and they are easily accessible.  (Half the time I couldn't get my hands on the hot chocolate pods for our old machine.  I have been able to find the Tassimo pods at my grocery store, as well as on line through the Tassimo shop, and Amazon.)

2.  The pods are easy to store and easy to use.   They don't drip across the floor when you're trying to move them from the machine into the bin for disposal.

3.  The offer 40 different flavoured pods from hot chocolate . . .  to green and black teas, chai tea . . . and just about every kind of coffee you can imagine.  (Espresso, Costa, Cote D'Or, Carte Noir, etc. and in Canada . . . Tim Hortons!  Decaf and regular!)

  photo SAM_6756_zps71af46f0.jpg

4.  There is no guess work involved in using the pods.  Each pod contains a simple and unique bar code which the machine reads (it's genious) and then uses to create whatever it is you are having . . . perfectly and in quick time!

5.  The Tassimo machine only uses and heats up enough water for the drink you are making.   It is exact, which means you haven't wasted any energy or water.

6.  Tassimo’s fresh water flow-heater ensures that instead of heating the entire reservoir, you get the right amount of water at just the right temperature for a perfect delivery of your chosen drink!

  photo SAM_6833_zps349037a2.jpg

7.  It tastes great!  (Well the hot chocolate does anyways!  I have tried all three different kinds.  Cadbury's, Sucho and Milka.  All fabulous!)

In short I love it!

  photo SAM_6754_zps9f39ceac.jpg

Did you know that 100% of the coffee in Tassimo drinks now comes from Rainforest Alliance Certified™ farms. On these farms, natural ecosystems are preserved by growing coffee in harmony with nature. Farmers and their communities benefit from training, education and access to healthcare to help them build a more sustainable future.   That all sounds very good to me!

 photo SAM_6836_zps32f47571.jpg

Just look at that tasty cup of hot chocolate!!

Of course it goes without saying that it's always nice to have a little bit of what you fancy when you are enjoying such a nice drink, and so I baked some of my Whole Lemon Muffins to have with our chocolates!

 photo SAM_6848_zps54a5d3e8.jpg

These muffins are gorgeously delish.   You use a whole lemon, ground up (peel and all) to make them, which gives them a fabulous lemon flavour!

 photo SAM_6845_zps77ee2cd4.jpg

There are also chopped walnuts in them, for an added dimension of flavour.  I do so love toasted walnuts and lemon . . . together they are just wonderful!

  photo SAM_6843_zps456ec34d.jpg

Add to that a gorgeous lemon drizzle icing and you have one very spectacular muffin indeed!  The only down side being (and that all depends on how you look at it) is that the recipe makes rather a lot.

 photo SAM_6839_zps1c1353e9.jpg

Twelve rather large Texas Sized Muffins if you are so inclined, or twenty four regular sized ones, which is a lot of muffins!  Mind you . . . I did cut the recipe in half (it is possible) and got 9 medium large ones.  I had never cut the recipe in half before, so it was nice to know that I could do so without any problems.   Of course they do freeze well also.  Just freeze them before glazing and then glaze them when you are ready to thaw and eat them!!

 photo SAM_6844_zpsae3fae05.jpg

*Whole Lemon Muffins*
Makes 12 very large muffins  
These muffins are fantastic.  An entire ground lemon goes into the mix, giving these the ultimate in lemon flavour.   The addition of a healthy dose of Greek Yogurt ensures that they are moist.  These have to be my absolute favourite all time muffins.  They are meant to be baked in Texas Size muffin tins, but you can bake them in normal muffin tins, giving you roughly twice the number of muffins.  Decrease the baking time by about 5 or 6 minutes in that case.

1 medium unwaxed lemon
1 cup toasted walnuts
1 cup unsalted butter, at room temperature
1 1/2 cups sugar
3 large free range eggs
2 tsp vanilla extract
2 3/4 cups plain flour
1 tsp bicarbonate of soda
1 tsp baking powder
1 tsp salt
1 2/3 cups whole fat Greek Yoghurt
For the drizzle glaze:
1 cup icing sugar
few drops vanilla
lemon juice to give you a thick drizzle icing  

 photo SAM_6846_zpsf862dc17.jpg  

Preheat the oven to 180*C/350*F/ gas mark 5.   Butter a 12 cup texas size muffin tin very well, or spray with nonstick cooking spray, or line with paper liners.

Wash the lemon well.  Cut into quarters.  Remove any pips and discard.  Put all of the lemon into the food processor and blitz until the lemon is completely ground up.  Scrape out into a bowl.  (You can add some of the sugar to make this a bit easier if you wish.)  Scrape the lemon out into a bowl.  Tip in the toasted walnuts and blitz them until they are coarsely ground.  Set aside.

Cream together the butter and sugar until light and creamy.  Beat in the eggs, one at a time.  Beat in the vanilla.  Whisk together the dry ingredients.  Add them a third at a time, alternating with the yoghurt, beginning and ending with flour mixture.  Stir in the lemon and nuts.  Spoon the batter into the muffin tin, dividing it equally amongst the cups.  Bake for 30 to 35 minutes, until the tops spring back when lightly touched and a toothpick inserted in the centre comes out clean.

Allow to cool in the tin for ten minutes, then remove to a wire rack to cool completely.

Whisk together the ingredients for the drizzle until thick and smooth.  Drizzle over the cooled muffins.  Allow to set before serving.  Save in an airtight container.

Many thanks to Tassimo for sending me this fabulous machine.  All opinions are my own.
Feel free to follow them on Facebook .


Friday, 28 June 2013

Swiss Diamond Giveaway winner!

 photo Swiss-Diamond-Logo_zps43e5f8d5.jpg
 
  I forgot to tell you who the winner of the Swiss Diamond pan is.  I used a random numbers generator and it picked number 10 so Jayne Townson, you are the lucky winner.  Contact me via mariealicejoan at aol dot come to give me your relevant details so that the Swiss Diamond people can send your pan out to you!
 
 
7hippopotamussaid...
Wow, this pan looks fantastic. I've signed up on facebook as jayne townson. Twitter @7hippopotamus


 photo 6732c_2_zpsa6be3338.jpg


Many thanks to all who were such good sports and left comments and signed up to the Swiss Diamond Facebook page.  I wish I could give each of you a new pan.   I am enjoying mine tons and tons.  I use it every day almost and fall in love with it all over again each time!   Congratulations Jayne!

Candy Crush Cookies

  photo SAM_6932_zps33db21cb.jpg

 One of my favourite games to play is called Candy Crush.  You have to match different coloured candies in groups of three, and there are different challenges to meet in each level.  I find it quite addictive really.

 photo SAM_6931_zps09cb024f.jpg

I wanted to bake some cookies today and use up some bits and bobs which needed using.   Some chocolate covered crispie cake and cupcake decorations.   You could just use crisp rice cereal if that's all you have.  

 photo SAM_6928_zpsf4b63e4c.jpg

I also used some crushed digestive biscuits for a part of the flour.  You will want them very fine.  I used my stick blender which has a mini food processor attachment.  (I am awfully fond of that attachment.  I use it a lot!)

 photo SAM_6940_zps99e1ff23.jpg


Into them as well went semi sweet chocolate chips, and then I shaped them into balls and pressed them into my whoopie pie tin, which I have found to be largely not that good for use as a whoopie pie tin, but which works really well with these types of biscuits.  (cookies)  


 photo SAM_6939_zps161ed0b4.jpg


I partially baked them, basically just until they were set and beginning to brown.  I then removed them from the oven and threw some mini marshmallows on top, returning them to the oven for a further few minutes to melt the marshmallows and finish the cookies off.

 photo SAM_6942_zpse217a971.jpg

I pushed some cut up green and blacks dark milk chocolate into the melted marshmallow along with some fudge bits when I took them out of the oven for the final time.  The heat from the cookie melted the choclate beautifully and once they were completely cool . . . the chocolate held the fudge bits in place as well.

 photo SAM_6929_zpsd56db209.jpg

All in all . . . these were quite, quite satisfying . . .  I named them Candy Crush Cookies after my favourite game, because just like the game, these are also very addictive!

 photo SAM_6938_zps17bb4a37.jpg

*Candy Crush Cookies*
Makes 24
Printable Recipe

A bit of this and a bit of that makes for one really tasty cookie!  Bet you can't eat just one!

1/2 cup butter, softened
3/4 cup soft brown muscovado sugar
1 large free range egg
1 teaspoon vanilla
1 1/3 cups plain flour
3/4 cup digestive biscuit crumbs, about 12 (can use graham cracker crumbs)
1 teaspoon baking powder
1/2 teaspoon salt
1 cup semi sweet chocolate chips
1 container of chocolate covered crispie cake sprinkles
(about 1/2 cup)

To finish:
mini marshmallows
one bar green and blacks chocolate, or other
good quality chocolate, coarsely chopped
mini fudge chunks

Preheat the oven to 180*C/350*F/ gas mark 4.  Butter a whoopie pie tin very well.  Set aside.  (If you don't have one of these you can just shape into balls and flatten them slightly on a buttered baking sheet, but they won't look the same.  They will spread more and be flatter.)

Cream the butter and sugar together until light and fluffy.   Beat in the egg and vanilla.  Whisk together the plain flour, baking powder, salt and biscuit crumbs.  Stir into the creamed mixture.  Stir in the chocolate chips and crispie sprinkles.  Shape into large balls the size of a walnut.  Place one into each recess in the whoopie pie tin.  Press down lightly.

Bake in the preheated oven for about 8 minutes.  Remove from the oven.  Drop some marshmallows into the centre of each.  Place back in the oven and cook for 4 to 5 minutes longer, until the marshmallows have begun to turn golden and melted.  Remove from the oven.  Drop a few bits of chocolate on top along with some fudge chunks, Pressing them down slightly.  Allow to stand in the pan for about 10 minutes before loosening with a sharp knife and and removing to a wire rack to finish cooling completely.

Re-butter the pan and repeat with the remaining cookie dough.

Store in an airtight container.

Thursday, 27 June 2013

Pressed Picnic Sarnies

 photo SAM_6882_zps51561734.jpg  


I just adore Boursin cheese.  It's a soft and creamy cheese which is spreadable and comes in lots of delicious flavours.  I am partial to the Black Peppercorn one and the Herb and Garlic one.  I use it quite a lot.  It's excellent stirred into sauces, or mixed with the flesh of baked potatoes and stuffed back into the skins for fabulous double baked spuds!    It's nice on a cheese board and lovely spread onto crackers, or crisp celery sticks!    


 photo SAM_6883_zps4ab743da.jpg  

They now come in packs containing six individual portions and I was sent samples of both the Black Peppercorn and the Herb and Garlic to try out!  Scrummo!!  These are the perfect size to take on summertime picnics or pop into portable lunches for school or work . . . or even just to munch on when you are feeling a bit peckish.  

 photo SAM_6885_zps935cddd7.jpg  

We've been having such fabulous weather lately that yesterday I decided to put some of it to good use and make some tasty Pressed Picnic Sarnies to share with the Toddster . . . with the view in mind of taking ourselves off into the Welsh countryside . . .   

 photo SAM_6877_zps5fff2335.jpg  


These are the easiest and the tastiest of picnic sandwiches.   They are simply layers of meat and cheese and vegetables compressed between two layers of crisp chewy Italian Slipper bread, or Ciabatta as it is called.  

  photo SAM_6878_zps6758e079.jpg  

You can choose your own favourite filling ingredients, but what I have shown you here is what I like to use . . . ham, turkey, salami . . . three tasty slices cheeses . . . gouda, emmenthal and edam . . . crisp and peppery rocket and sweet basil leaves . . . sweet pickled hot peppers and sweet gerkins . . . roasted red and yellow peppers, ripe tomatoes and marinated olives . . .  


  photo SAM_6888_zps5d55f93a.jpg  

You line the bottom half of the loaf with a good layer of tangy grainy mustard mayonnaise . . . and the inside of the top of the loaf with a tasty layer of Boursin cheese.  This helps to prevent the bread from getting soggy.   You wrap all of those layers tightly in cling film and then compress them just so . . .    


 photo SAM_6890_zps8e3c3fd1.jpg

You do need to make these ahead of time so that you can give them plenty of time for the flavours to meld together and blend into the perfect mix of deliciousness.   Three hours will do it, but ideally overnight is best if you have the time. 


  photo SAM_6892_zps33ccea77.jpg  

When you are ready for your picnic, just slice open the covering and cut that tasty baby into five or six thick slices which are then ready to wrap and pack for your portable meal!   Unless of course it is raining . . . which it is today.  We picnicked in the confines of our lounge as we watched it pelt against the windows.  Sure . . . it would have been nicer to be gazing out upon a field of lovely sheep . . . but that's England for you  . . . when life hands you lemons and all that . . . you know how it goes.   


 photo SAM_6889_zps620400a7.jpg   


*Pressed Picnic Sarnies*
Makes 5 to 6 servings
Layers of color and beautiful flavors.  Perfect summer picnic fare!

1 Ciabatta loaf, cut in half length wise
(If you can get them the sun dried tomato or olive Ciabatta makes for a really fun sandwich)
3 tablespoons grainy mustard mayonnaise
Garlic and Herb Boursin cheese
1/4 pound thin sliced roast turkey
1/4 pound thin sliced ham
1/4 pound thin sliced German Salami
4 slices gouda cheese
4 slices of edam cheese
4 slices emmental cheese
Roasted bell peppers
sliced sweet gerkins
sweet pickled jalapeno peppers (or any other hot pickled pepper you like)
chopped marinated olives
thinly sliced red onions
thinly sliced ripe tomatoes
Fresh basil leaves
Fresh rocket leaves  

 photo SAM_6899_zps85927a64.jpg

Spread the mustard mayonnaise on the bottom of the ciabatta. Pull out some of the inner bread on the top half and discard.  (You can blitz it into bread crumbs and freeze it for another time.)  Spread the insides of the top half of the ciabatta with the Boursin cheese. Sprinkle the chopped olives over top and layer on the slices tomatoes, and some more  rocket leaves.  On the bottom crust of the ciabatta, layer rocket leaves and some basil leaves.  Add the sliced red onions. Layer on the meats.  Top with the cheeses.  Add a layer of roasted peppers, gerkins, and jalapenos.  Cover with top layer of ciabatta.  Press down lightly.  Wrap the  entire ciabatta tightly with several layers of plastic cling film, making sure it is well covered.  Place the wrapped ciabatta onto a chair and sit on it.  (I know this sounds silly, but it's the secret to a nicely pressed sandwich!)   Refrigerate at least 3 hours or overnight.  Remove from the refrigerator.  Cut way the plastic wrap and cut into individual sandwiches.  You should get 5 or six sandwiches depending on the size of your Ciabatta!  These are delicious!

Many thanks to the people at Boursin Cheese for sending me these tasty samples!


Wednesday, 26 June 2013

Baked Stuffed Rigatoni

  photo SAM_6769_zps06ceaf9f.jpg  

Are you like me?  Do you like to browse Pinterest looking for tasty things to cook and to eat?   Do you pin them and make note of them?   How many of them do you actually go back and cook?   Or do you just use your pins to inspire you?  I do a bit of both.  

I peruse and pin . . . then I get inspired and then I cook.  Sometimes exactly from the pin . . . and sometimes I use the pin as a starting base and then run with the ball! 

  photo SAM_6772_zps351570c5.jpg  

A few weeks back I was greatly intrigued by a recipe I saw on Pinterest for a Skillet Baked Stuffed Rigatoni by Heather Christo, which you can see here.   It was a bit fiddly, but it looked fabulously delicious, and not all that difficult to do!

 photo SAM_6767_zps9070b070.jpg  

The really fiddly part was stuffing the rigatoni.  They aren't huge actually, so you will want to make sure you don't cook the pasta until it is flimsy as you are going to have to poke a piping bag into those.  Things I learned from this process . . . room temperature cheese is easier to pipe, and do not overcook the pasta or it will split.

 photo SAM_6768_zpsbd870bec.jpg

mmmm . . . little pasta tubes stuffed with cheese . . . layered with fresh basil and slathered with marinara sauce . . . dusted with more cheese and then baked . . . what's not to like????  Of course, there can never be enough cheese and so I added some Dolcelatte to the filling, because . . .  I had it, it needed using and I love it!

 photo SAM_6778_zpsd2ee4e60.jpg

I also added a nice layer of mozzarella to the top.   Heather didn't do this, but once again, I had it to use and I used it!

 photo SAM_6781_zpsb513b9ee.jpg

Scrummo!   I enjoyed this the other day whilst the Toddster was enjoying the rare treat of a Steak and Kidney (ugh!!) pie. 

 photo SAM_6776_zps3ecdc8f7.jpg

Coz . . . I have taste, and he doesn't.   (I jest people, I jest!)  Seriously though this was really tasty . . . however fiddly.  Think cheese lasagne . . . except stuffed into eensie peensie  tubes.

Would I go to all that fuss again?  Probably not, but at least I gave it a go!   Much easier to just layer the stuff in a dish and bake it.   The end result would probably taste the same!  But if you aren't afraid of a bit of fiddle, by all means go for it! 

 photo SAM_6770_zpsb120cd26.jpg    

*Baked Stuffed Rigatoni*
Serves 4
I am not usually one for fiddly recipes, but this looked so good I couldn't resist.   I was right.  It was delicious!

1/2 pound of rigatoni pasta
8 ounces ricotta cheese, room temperature
4 ounces soft goats cheese, room temperature
2 ounces dolcelatte cheese, room temperature
fine sea salt and freshly ground black pepper to taste
1 large jar of good quality marinara sauce (about 3 cups)
a large handful of fresh basil leaves
2 ounces freshly grated Parmesan cheese
a handful of grated mozzarella cheese
Preheat the oven to 180*C/350*F/ gas mark 4.  Butter a round baking dish.   Set aside.

Cook your rigatoni until almost al dente, according to package directions.  You don't want it quite al dente.  While the pasta is cooking beat the soft cheeses together in a bowl and season to taste with salt and pepper.  Place into a disposable plastic pastry bag, snip the end and push down all the way, ready for piping.  Drain the rigatoni well and rinse in cold water.  Drain again.  

Place half of your marinara sauce into the bottom of the baking dish.  Top with the basil leaves, reserving a few for the top.  Fill your rigatoni noodles with the cheese mixture.  (It works best if your noodles are not quite cooked and the cheese is at room temperature.  Then you don't have blow outs and the cheese goes in quite easily.)  Lay the filled tubes in the dish in a circular pattern, one layer at a time.   Once you have filled them all and they are in the dish.   Pour the remaining sauce over top, spreading  it out to cover.   Scatter on a few torn basil leaves and the grated Parmesan cheese.  Scatter the Mozarella over top of all.  Bake for 15 to 20 minutes, or until the top is golden and the dish is bubbling.   Serve hot!

Twitter Delicious Facebook Digg Stumbleupon Favorites More