Thursday, 30 April 2015

Roasted Onions with a Parmesan Cream

 photo 1_zps9q2pismv.jpg


I guess I didn't check the size of the bag of onions I was buying in that online grocery order too closely . . .  because it ended up being huge!  I decided to create something with some of them that we would both find delicious.  We love gratins . . .  and so I thought an onion gratin type of dish would work really well.


 photo DSCN1572_zpshnx2y2uw.jpg

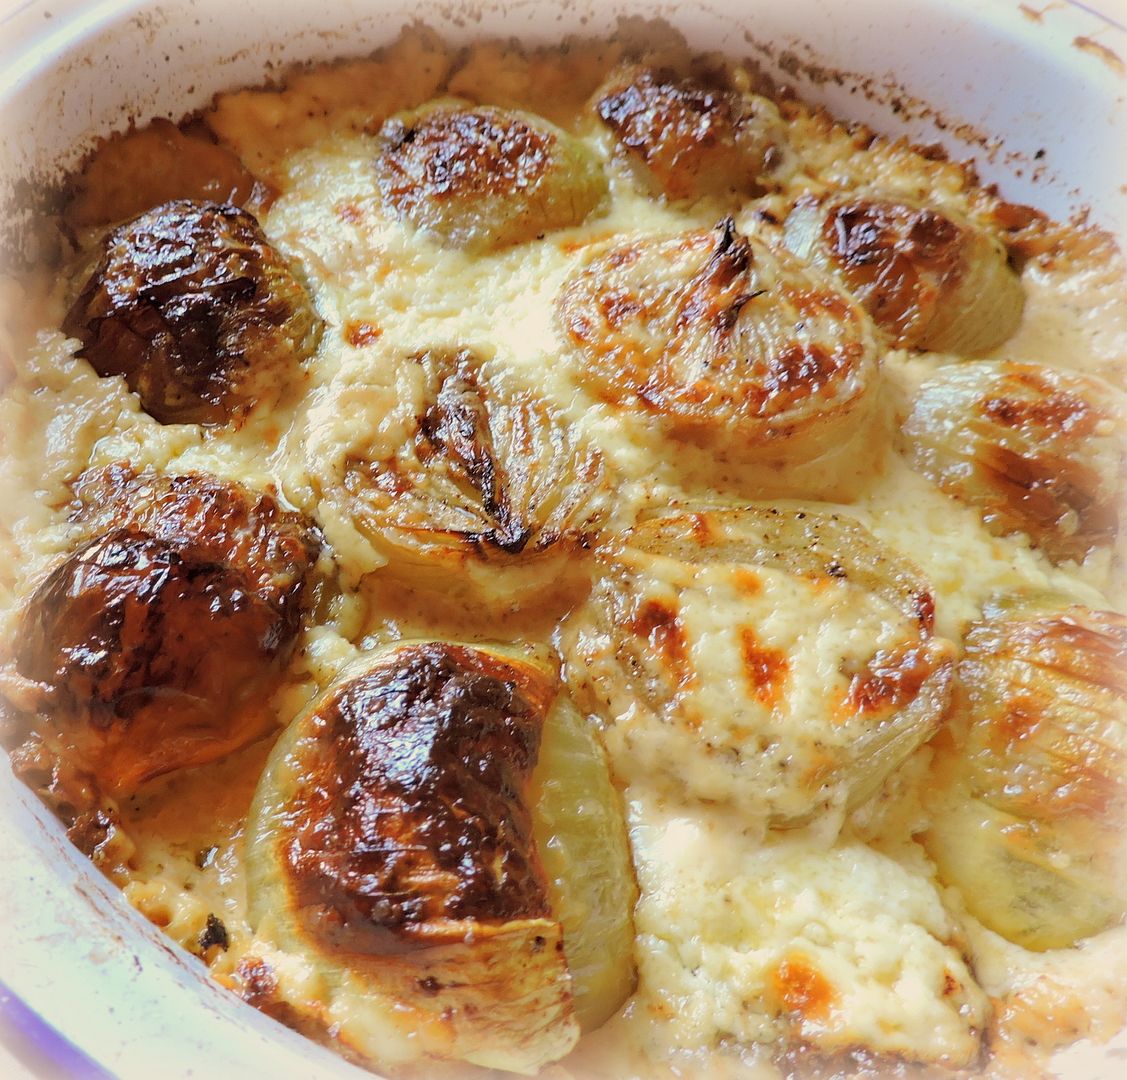
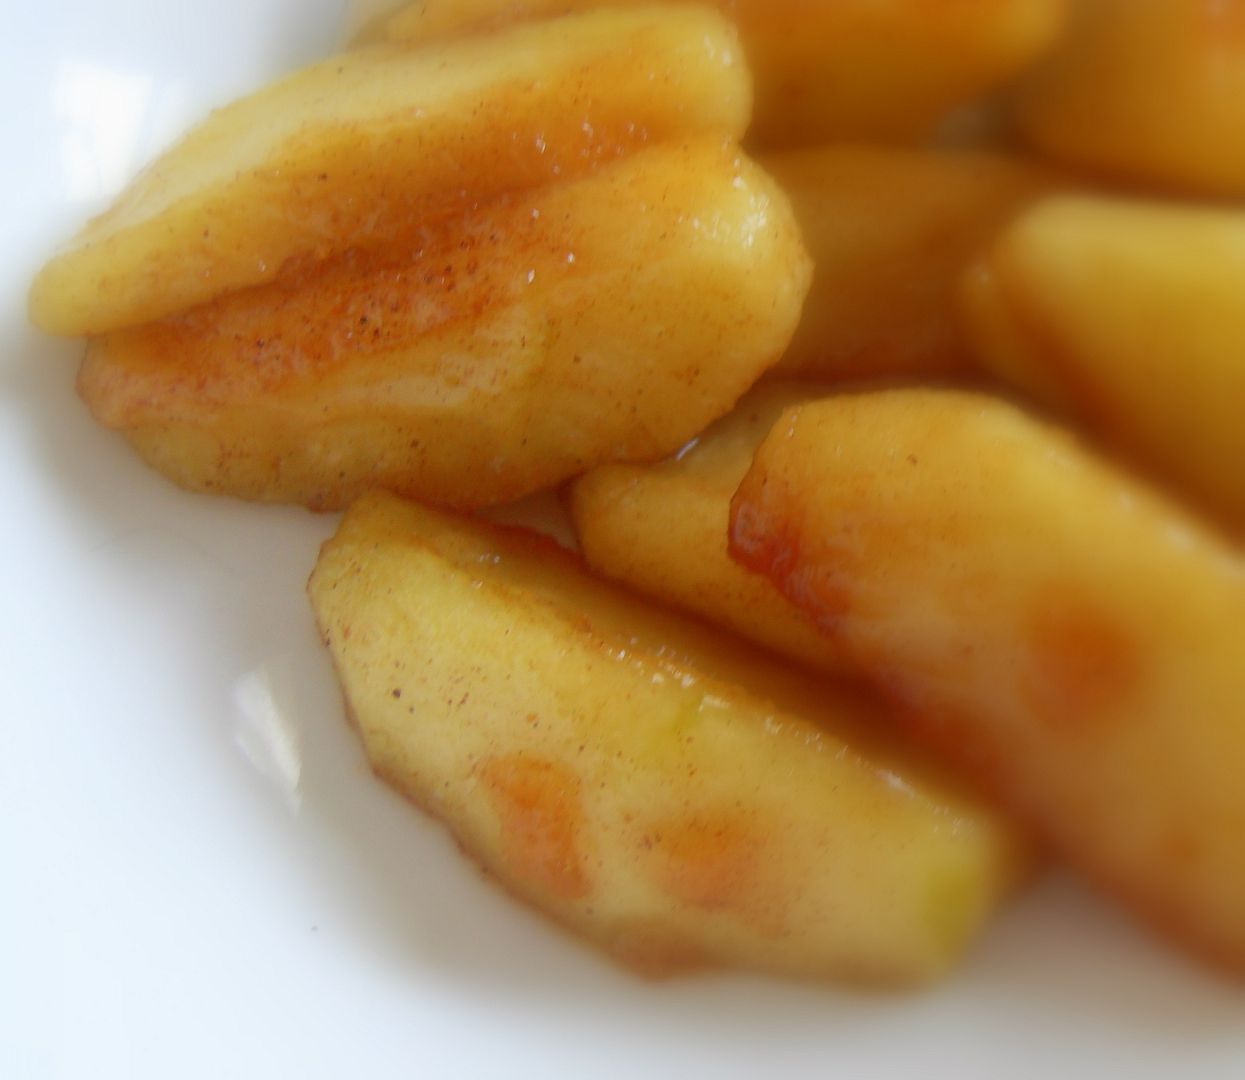
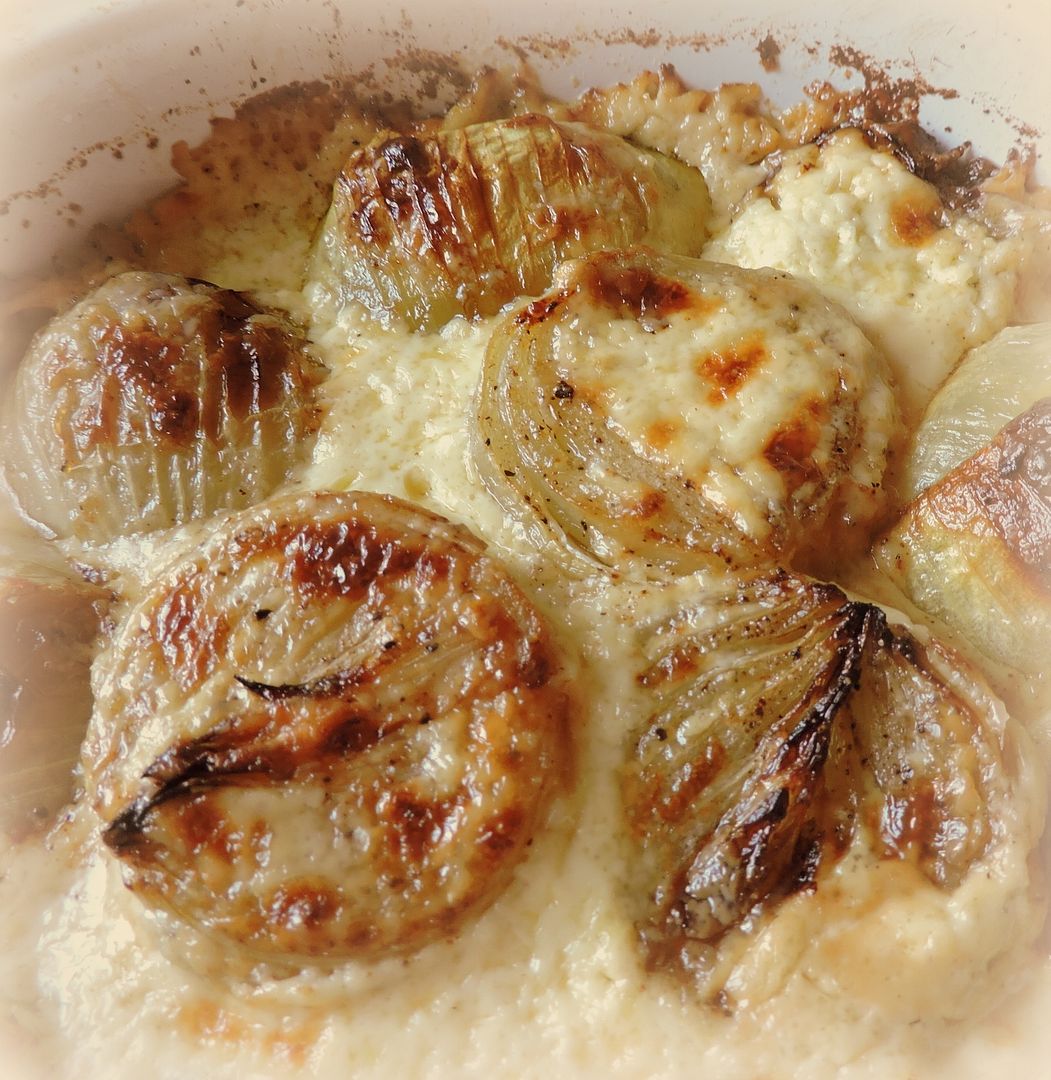
I roasted the onions in a hot oven first of all, in a mix of butter and olive oil.   This slightly caramelized them, helping to bring out their natural sweetness.  I do so love the flavour of caramelized onions don't you?

  photo DSCN1573_zps790xcvsf.jpg

I whisked together some double cream (naughty naughty) a bit of Dijon mustard and some Parmesan cheese, which I poured over and around the onions.

 photo DSCN1574_zpsgtghoehb.jpg

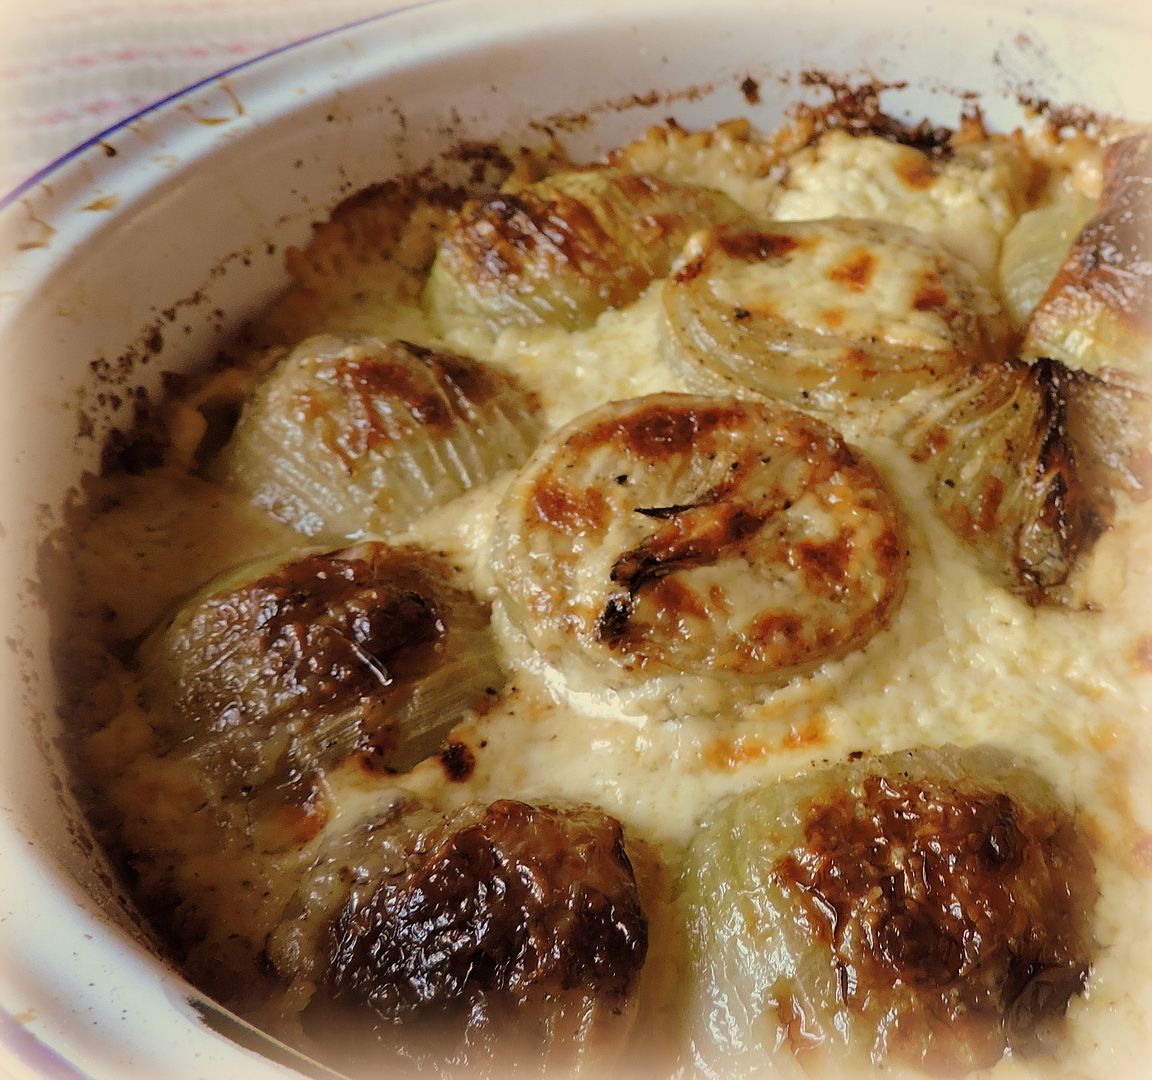
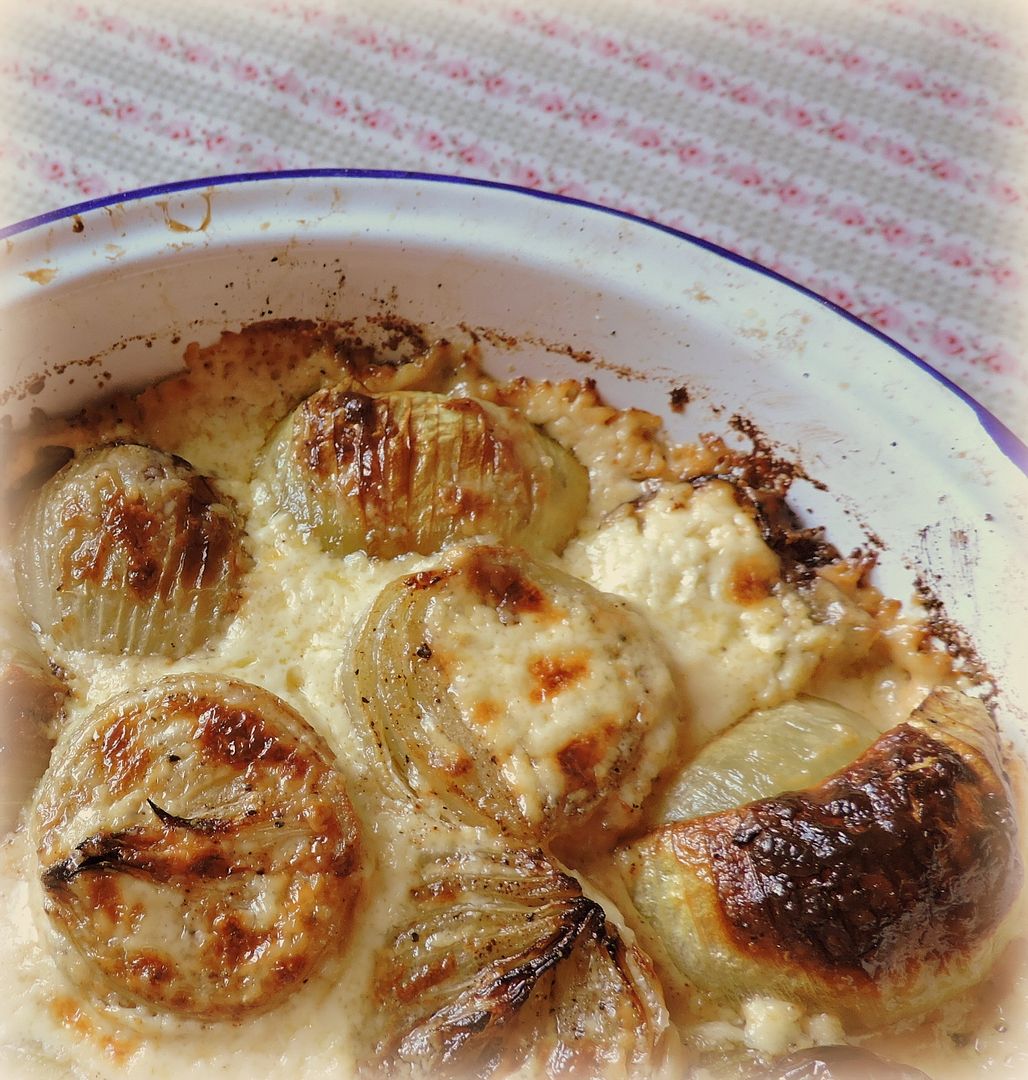
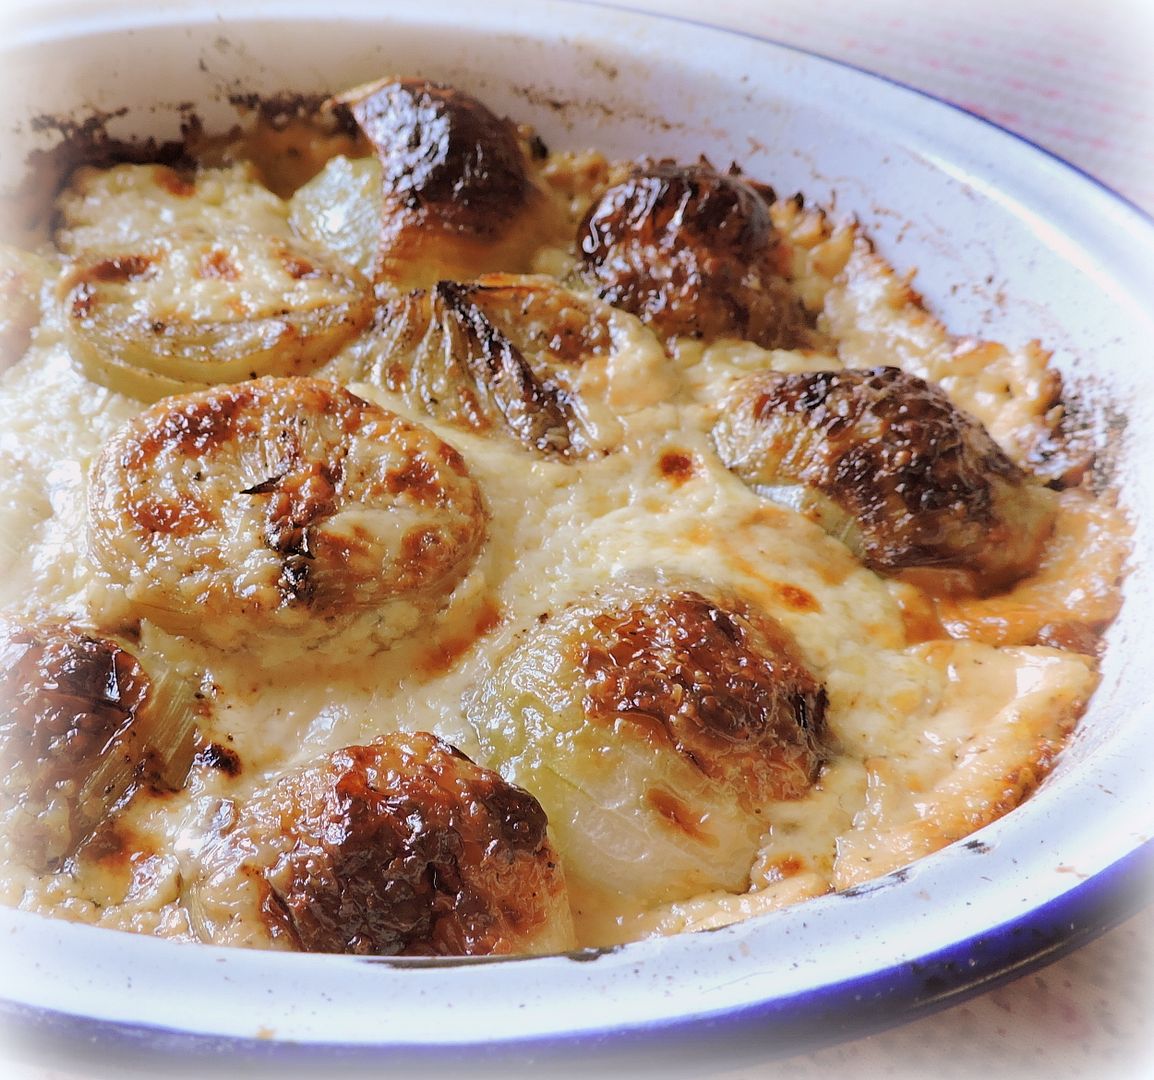
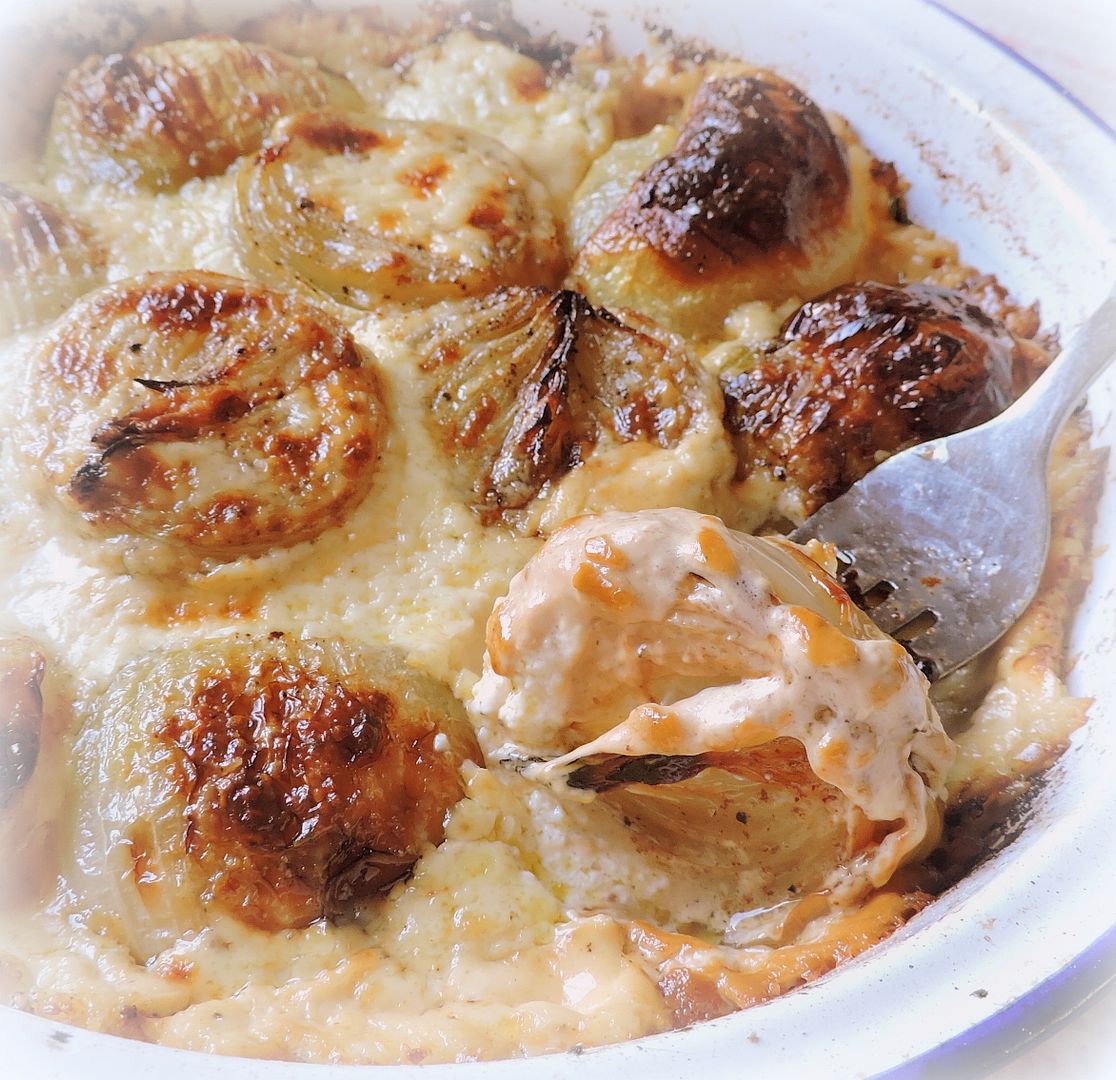
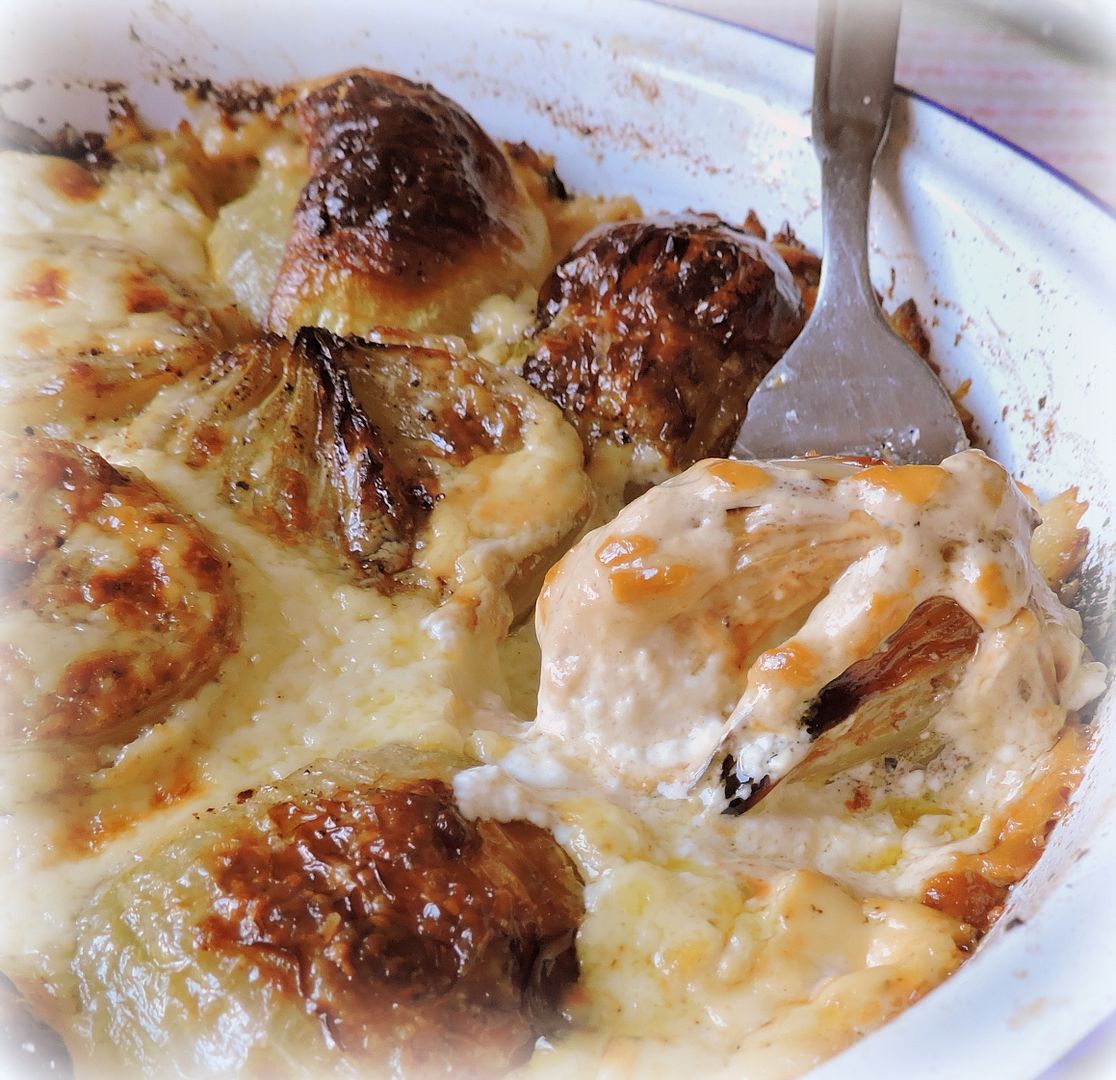
They were then returned to the oven until the cream was golden brown and bubbling and all of the lovely onion juices had melded withit to create a very delicious sauce.   You could add some garlic to the cream as well if you wished . . . a small clove crushed would be enough.

 photo DSCN1575_zpsimcb7ik8.jpg

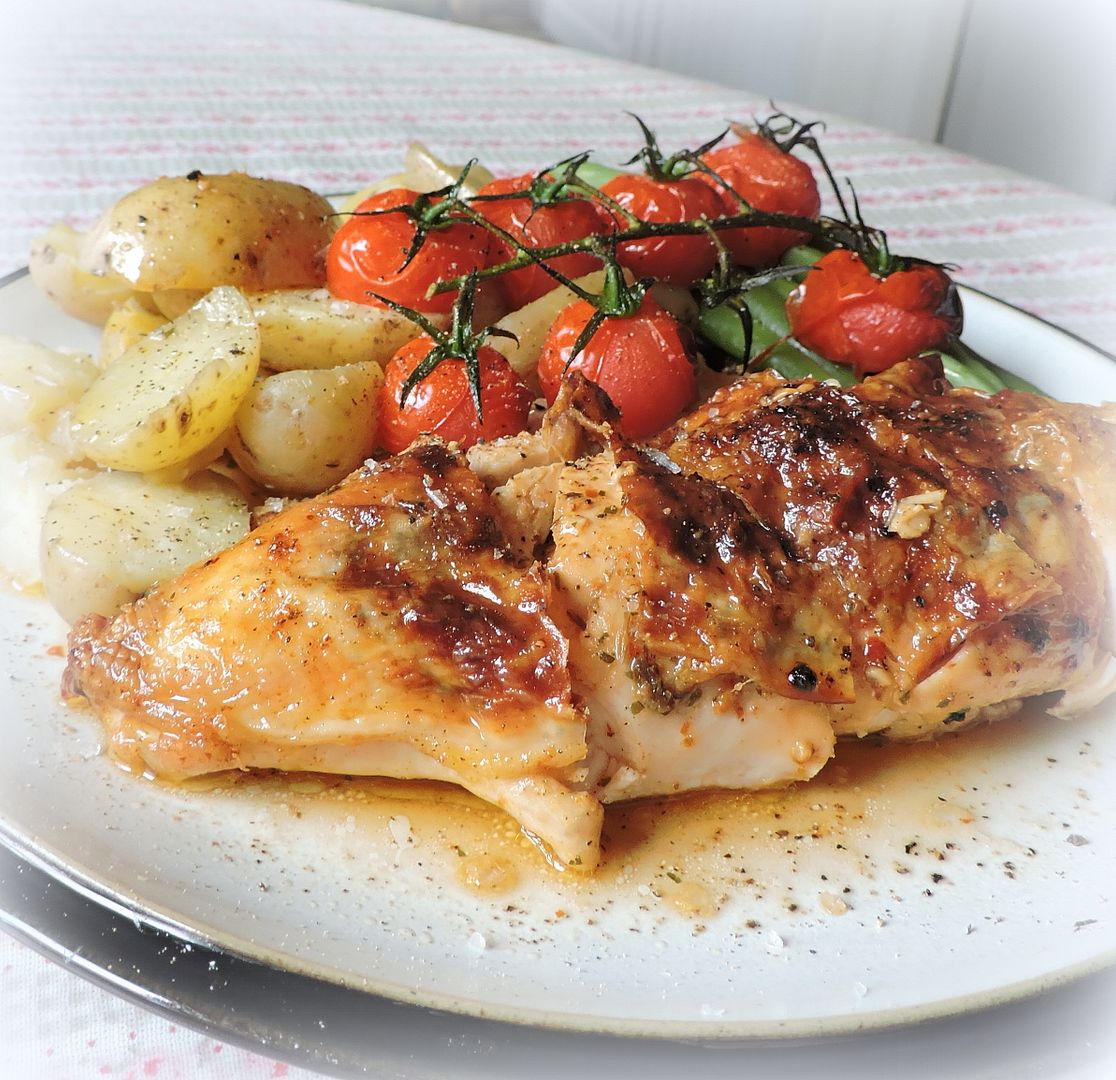
Altogether this was very satisfying and we both quite enjoyed it.   With a bit of crusty bread it went down a real treat.

 photo DSCN1577_zps1jzrz9tw.jpg


*Roasted Onions with a Parmesan Cream*
Serves 4 (as a side)
Serves 2 (as a main)
These are delicious and so simple to make.   You can have them as a side dish, or a vegetarian main with a grain and a few other vegetables.


8 medium onions
1 TBS butter
1 TBS light olive oil
salt and black pepper
225ml of double cream (1 cup)
1 TBS Dijon mustard
60g of finely grated parmesan cheese (1/3 cup)
salt and black pepper to taste

 photo DSCN1580_zpsysrzq3qd.jpg


Preheat the oven to 230*C/450*F/ gas mark 7.   Have ready a shallow baking dish large enough to fit the onions cut in half and laid out in a single layer.

 photo DSCN1582_zpsie6iuhiu.jpg

Put the butter and oil into the baking dish.  Put it into the oven to heat while you prep the onions.  To prep the onions, peel, leaving the root end intact as much as possible and then cut them in half down through the centre through to the root end.  If you have been careful enough to keep the root intact, the onions will stay together when they cook.  Remove the baking dish from the onion.  Place the onions into it in a single layer, cut side down.  Season with salt and black pepper.  Roast in the heated oven for 15 minutes.  Remove from the oven and flip over.  Season again and return to the oven to roast for a further 15 minutes, until beginning to caramelize a bit on the edges.  Remove from the oven.

 photo DSCN1583_zpsosd13abi.jpg


Whisk together the cream, mustard, and Parmesan.  Pour this around the onions, drizzling some over top as well.  Return to the oven for 15 minutes until bubbling and golden brown.  Serve hot.

 photo DSCN1584_zps7f0ouiid.jpg

Wait til you see what I did next!


  photo DSCN1585_zpsehji81sa.jpg

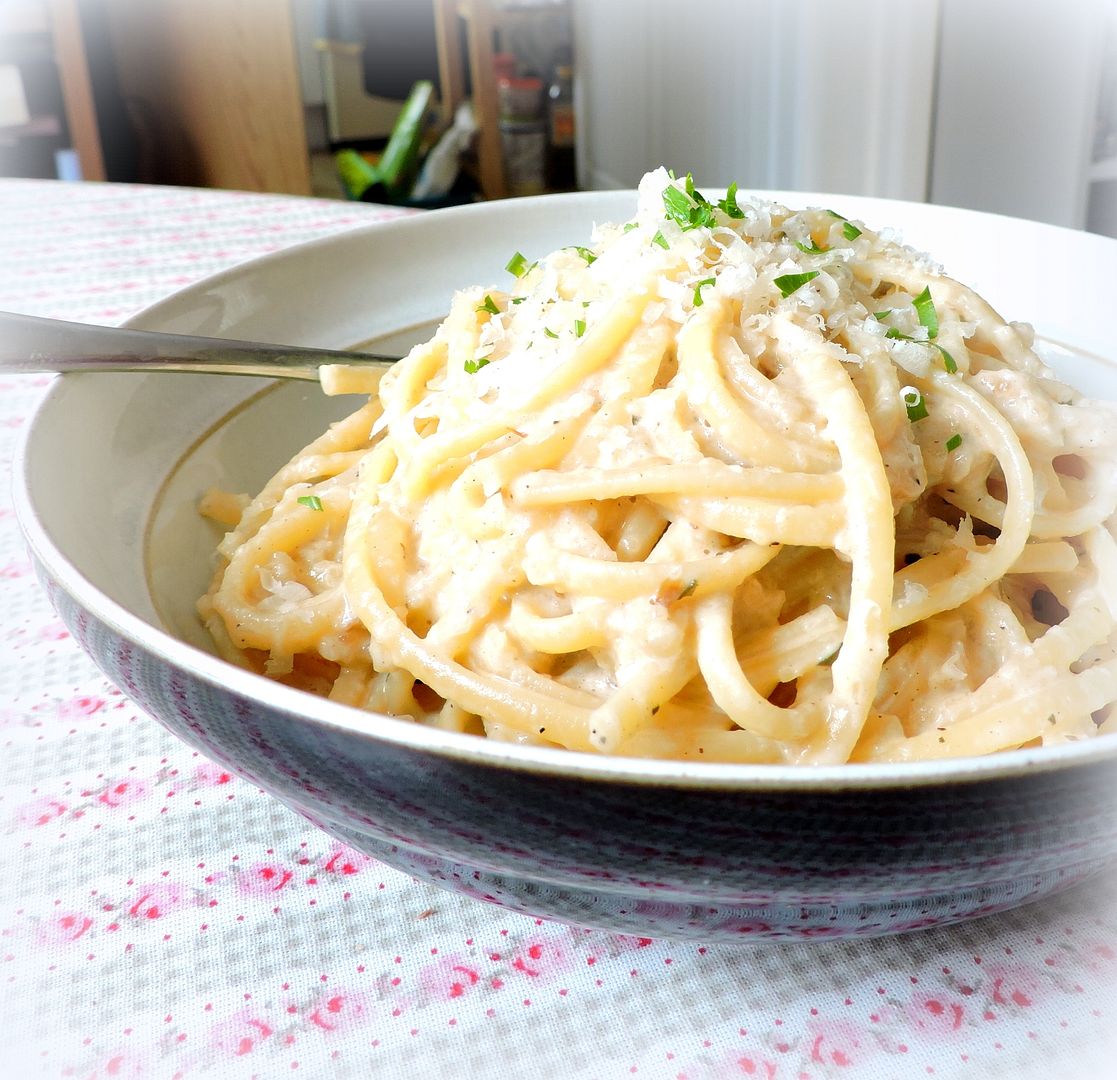
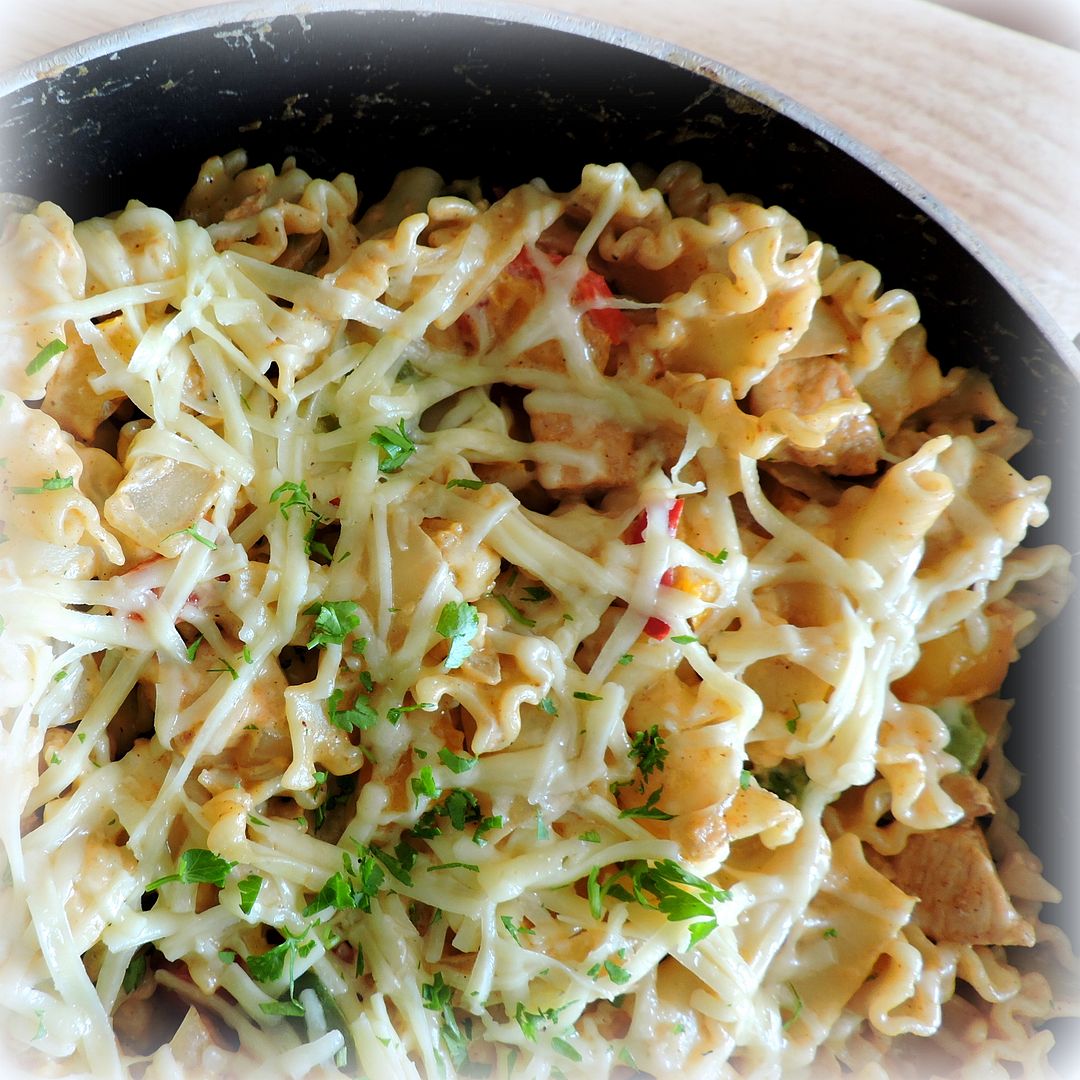
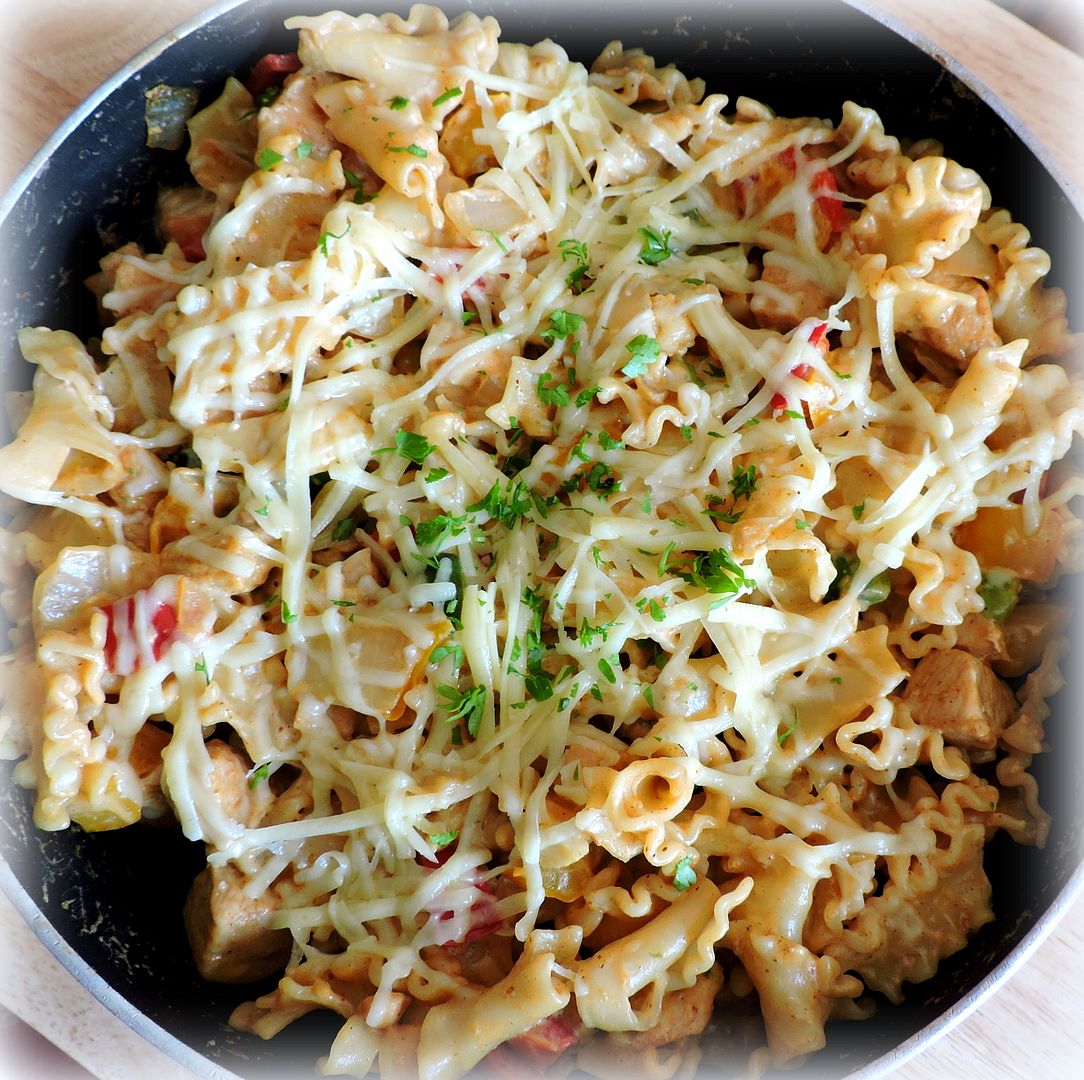
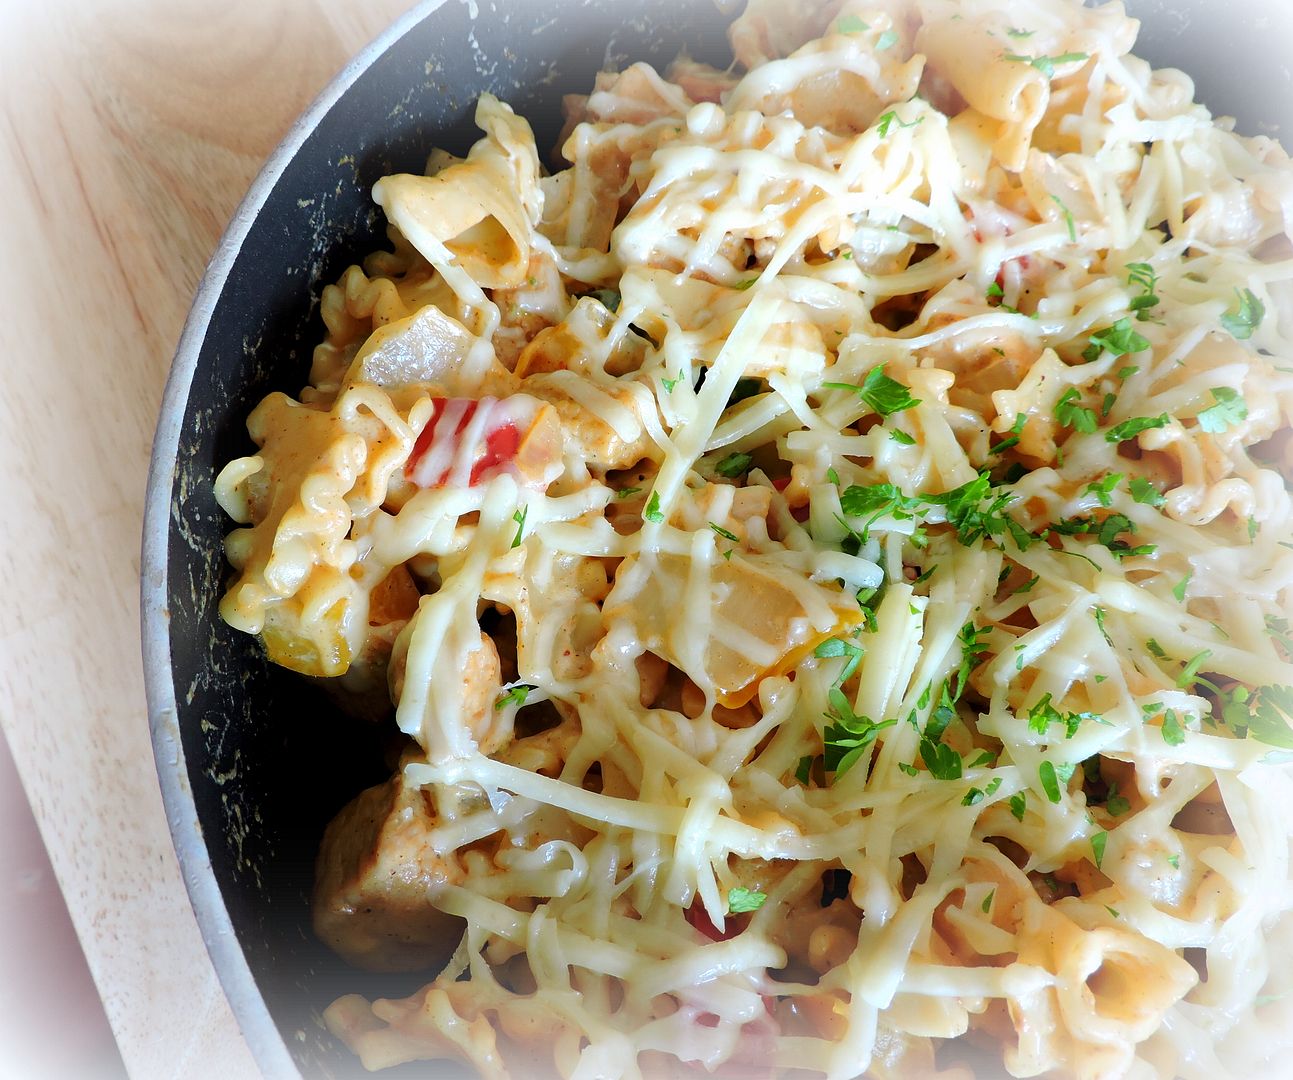
I hate to waste anything and so I used the leftovers to create a simple pasta dish for us to enjoy the day after.  It was as simple as cooking some pasta, pureeing the leftovers and tossing the whole lot together.  Boy was it good!

 photo DSCN15851_zpshs14awit.jpg

*Pasta with a Roasted Onion and Cream Sauce*
Serves 2
A little something I created to use the leftovers from my Roasted Onions with a Parmesan Cream.  It was delicious!  You will need a blender or food processor.


1/2 recipe of Roasted Onions with a Parmesan Cream
2 ounces of dry pasta (linquine or spaghetti, or whatever you choose)
Hot pasta water
Grated Parmesan Cheese to serve

 photo DSCN1586_zpskqw89xqh.jpg


Put a pot of salted water on to the boil.   Blitz the leftover onions, plus any cream, in a food processor until fairly smooth.  You may want a bit of texture, but not huge chunks.  Set aside.  Drain the pasta, reserving about 125ml (1/2 cup) of the cooking water.   Return the pasta to the saucepan, along with the onion cream and enough of the pasta water to loosen it up into a sauce.  Heat through and then serve hot with some grated Parmesan Cheese scattered over top.

Wednesday, 29 April 2015

Chicken Fajita Skillet Supper

 photo DSCN1487_zpsyombiyjy.jpg

The other day I found myself with a couple of boneless chicken breasts and some peppers plus a pot of leftover pasta in the refrigerator.  I needed to use the peppers and the chicken and I didn't want to have to throw the pasta away and so I decided to throw them all together and make a simple and quick supper for us.

 photo DSCN1488_zpstdgkdztk.jpg

I quite like Mexican Food and I had some Fahita paste pots in the cupboard.  Peppers and onions are an integral part of Fajita's so I thought why not use the elements of Fajita's to make a skillet type of dish, except use pasta  instead of tortillas as it were . . .

  photo DSCN1489_zpsgyvipqcy.jpg

I simply browned the chicken along with the peppers and some onions in a large skillet.   I added garlic as well.  Then I stirred in  a couple fajita pots and added the pasta.

 photo DSCN1490_zpsat9hvosx.jpg

I stirred in some cheese along with some creme fraiche to create a sort of a sauce, once again heating it through.  Finally I threw some more cheese on top and allowed it to melt down into the whole dish . . . it ended up being quite, quite delicious.  A happy combination of found things and ingenuity to create something more than edible and filling.   Ariana took the leftovers to work for her lunch, and happily so.

 photo DSCN14871_zps94uhnuny.jpg


*Chicken Fajita Skillet Supper*
Serves 4

Just something I threw together using what I had in the cupboard and fridge.  It was delicious. 

1 TBS oil
3 boneless skinless chicken breasts, cut into chunks
1/2 each green, red and yellow pepper, cut into cubes
1 onion, peeled and cut into cubes
2 cloves of garlic, peeled and minced
about 2 cups of leftover noodle type flat pasta shapes (farfalle, malfalda, etc.)
2 pots of fajita paste seasoning (alternately you can just use one envelope fajita seasoning)
salt and black pepper to taste
250g of cheddar cheese, grated (2 cups) divided
225g of creme fraiche (1 cup)

 photo DSCN1491_zpsbhh0ueig.jpg

Heat the oil in a large skillet.   Add the chicken breasts and cook until browned on all sides.   Add the vegetables, onions, garlic and faijita paste.   Cook, stirring fequently, until the vegetables are tender.  Stir in the pasta, creme fraiche and half of the cheese.  Heat through.  Taste and adjust seasoning as required with salt and pepper.   Sprinkle the remaining cheese over top and serve.

Tuesday, 28 April 2015

Cherry Tomato and White Bean Salad

 photo DSCN1501_zpsbg6luxmr.jpg

Because of my present eye problems, I did an online grocery shop at the end of last week.  I just didn't feel like pushing a grocery cart through a shop with all the poor lighting etc.   I don't mind shopping online . . .  but this time most of my fresh items arrived with short use by dates.  That I DO mind.  YES I am one of those annoying people who pick the produce etc. from the back of the row where it is fresher when I am shopping!

 photo DSCN1502_zpsnorls6xk.jpg

 In any case I ended up with three pots of tomatoes that were due to expire within two days of my grocery order arriving.  This meant if I wanted to use them at their optimum, I needed to use them pretty much right away.

 photo DSCN1503_zpsjshp0dio.jpg

I ended up creating a Tomato and White Bean Salad, which went down a real treat!  Not only was it delicious, but it was very colourful also!

 photo DSCN1504_zpsv6vbqntz.jpg

And it lasted a couple of days.   The dressing has a nice punch  . . .  using fresh lemon juice, garlic and shallots  . . .  also basil and parsley, and olive oil  . . .  for a nice mix of flavours.

  photo DSCN1505_zpszpw8hqjz.jpg

With it's fresh and punchy dressing, bright colours, meatiness from the beans and sweetness from the tomatoes this was a real winner. I served it with some grilled fish and it was fabulous.

 photo DSCN1514_zpsv3urmi3u.jpg


*Cherry Tomato and White Bean Salad*
Serves 4

A delicious and colourful salad that is filled with lots of flavours and textures.   
 

3 TBS olive oil
2 banana shallots, peeled and finely diced
1 large clove of garlic, peeled and minced
1 1/2 TBS fresh lemon juice
1 tsp caster sugar
1 TBS basil flakes
1 tsp dry parsley flakes
fine seasalt and freshly ground black pepper to taste
1/2 pound each yellow and red cherry tomatoes, halved
1 425g tin of white beans, drained and rinsed (15 ounce)
1 TBS chopped fresh flat leaf parsley to garnish 
 

Whisk the olive oil, diced shallots, crushed garlic, lemon juice, basil, parsley and seasoning together in a bowl.   Tip in the beans and halved tomatoes.   Toss to coat.  Let stand for at least half an hour for flavours to infuse. Scatter with fresh parsley and serve.

Monday, 27 April 2015

Roasted Bone In Chicken Breasts

 photo DSCN1525_zpsdjfvgjio.jpg

We eat a lot of chicken in this house.  Here in the UK we are very lucky that chicken is probably one of the most affordable source of protein when it comes to meat of any kind.  I love the versatility of it, which means you can actually eat it more than once a week and never really get tired of it.

  photo DSCN1527_zpsuvkmcrqv.jpg

It is a well known fact that the less your food is handled before it lands in your grocery cart, the cheaper it will be.  This is why more often than not I will buy my chickens whole and then portion them myself when I get home.  I have shared a fabulous video on how to do just that here.  It's well worth a watch.

 photo DSCN1528_zpsqtvj55el.jpg

This recipe today is really a very simple recipe for roasting bone in chicken breasts that results in moist and tender chicken every time.  I really believe that keeping the bone in and the skin on chicken breasts helps to preserve their flavour and moistness.   It's very simple to dry out boneless, skinless chicken breasts and nothing is more unpalatable . . .

 photo DSCN1529_zps0wxzln6p.jpg

It's more of a technique really, which involves making a type of compound butter  . . .  created by creaming together softened butter and a mix of herbs and seasonings . . .  and then pushing that butter carefully between the skin and the flesh of the chicken breast.

 photo DSCN1530_zpsusl5irvr.jpg

The butter melts . . .  flavouring and helping to preserve the moistness of the meat  . . .

  photo DSCN1533_zpsppsqcm5e.jpg

Because it is cooked at a high temperature . . . it cooks a bit faster and the skin cooks up a bit crisper.  In short it's delicious.  Simple.  Delicious.  Economical.   You can't ask for more than that.  I serve it simply with some vegetables . . .  boiled new potatoes, steamed green beans and some cherry tomatoes on the vine which I roasted along with the chicken in the oven for about the last 10 minutes of cooking time.  (Simply drizzle with a bit of olive oil and seasoning)  These are soooo good.

 photo DSCN1531_zps3vhjfzcj.jpg


*Roasted Bone in Chicken Breasts*
Serves 4


Meat cooked on the bone may take a little bit longer to cook, but it's always tastier and more moist.   These chicken breasts are delicious, with a crisp skin and lovely flavours. 
 

4 single bone in chicken breasts, skin on, trimmed of excess fat
2 TBS unsalted butter, at room temperature
your choice of herbs and spices for the butter (minced garlic, chopped parsley, smoked paprika, thyme, etc.)
fine sea salt and freshly ground black pepper to taste
1 TBS unflavoured vegetable oil 
 

Preheat the oven to 230*C/450*F/gas mark 7.    Line a baking tray with some foil and then lay a rack over top of it.  Cream together the butter and any seasonings you are using. 
 

Season both sides of the chicken pieces liberally with salt and pepper.  Gently loosen a portion of the skin on side of each piece of chicken breast, without tearing it.   Place one forth of the butter mixture inside, beneath the skin.   Gently massage it into the chicken meat beneath the skin, covering it as much as you can.   Seal the skin back up.   Rub the skin of each breast with some oil.  Place the chicken pieces on top of the rack and roast until golden brown and cooked through.  This will take 30 to 35 minutes. 
 

If you wish you can carve the meat away from the bone and ribs, and slice crosswise for presentation.  Serve immediately.

Sweet Freedom

 photo productreivesweetfreedomlogo_zpsbnbk8h9h.jpg

I have been wanting to tell you about two lovely products I was recently sent to try out.  I've spent several weeks using them and I can't let another day pass without telling you all about them.  Sweet Freedom is a company here in the UK which has developed these fabulous little undulgences which taste fabulous but are actually a lot better for you than you might think.   Naturally sweetened with fruit extracts combined with other natural ingredients, their products are naturally lower in calories and low GI, which make them a dieter's dream.

 photo CSICONS_zpsysth2d6r.jpg

These liquid shots of flavour come in a variety of flavours and a convenient flip top container, which is very handy for carrying with you when you are on the run, at work, etc.   They have won Great Taste Awards three years running and no wonder!

  photo 036261_A_zpsebv1u6o0.png

WE've been enjoying the Sweet Freedom Porridge/Tea/Baking one as a healthy alternative to using other syrups drizzled over our breakfast oats and pancakes.    Low GI, 100% natural, GM & Gluten Free, and at only 13 calories per teaspoon this is a great and healthy alternative.  It's delicious and because it's made 100% from fruit, it's naturally better for you than artificial sweetners and sugar.  You can find it on the sugar shelf in Asda, Waitrose, Ocado, and Holland & Barrett for approximately £2.99 rrp.

  photo 029617_A_zpssycvniz0.png 

The other product we I have been enjoying is their new Choc Shot Liquid Chocolate in the Coconut Flavour!  Tastes just like a bounty bar.  I've been enjoying it as hot chocolate, drizzled over ice cream . . .  and I confess  . . .  I have even just eaten it by the teaspoonful just to keep me from indulging in real chocolate.  Sigh . . .  I do love my chocolate.  Like the Sweet Freedom it is also 100% natural,  Low GI/GL,  GM, Dairy and gluten Free.  Stir into hot milk for a faff-free hot drink with no powdery lumps or residue, drizzled over ice cream, brownies, etc. and once again only 14 calories per teaspoon.  Available from Tesco, Sainsbury's, Morrisons, Waitrose, Co-op and Ocado, on the Hot Chocolate Shelf for £3.59 rrp.


Sunday, 26 April 2015

Chard and Cheese Tart


I have to confess that Chard . . .  Swiss Chard, or Silver Beet as it is also called, is one of my favourite vegetables.  I do so love greens.  My mother used to cook us beet greens . . .  with a bit of butter, vinegar, salt and pepper . . .  they were so delicious.


The stems of chard are gorgeous simply stir fried with a bit of butter and then tossed with some lemon juice, salt and pepper. You can treat the leaves much in the same way as you would spinach and use many of the same flavourings as well . . . basil, garlic, cheese . . .


Chard and cheese are just beautiful together . . . with the richness of cheese and the earthy mineral flavour of the chard . . . they are a fabulous combination.


Today I decided to bake us a scrummy Chard and Cheese Tart, making the most of that beautiful marriage of flavours . . .


I used both a sharp farmhouse cheddar and some Parmesan, which together proved to be just perfect with the chard, and then I added a double whammy by infusing the crisp pastry with a touch more cheddar, some thyme leaves and a good grinding of coarse black pepper.


Oh my but this was lovely . . . the crust so buttery and crisp . . . with just a slight hint of herb and cheese . . .


The filling all earthy and rich . . . velvety, and cheesy too. I think I'll have the leftovers for lunch. This was good . . . plain and simple.


*A Scrummy Tart of Chard and Cheese*
Serves 6 or more
Printable Recipe

Chard and cheese are such a beautiful combination, and marry beautifully in this savoury tart with it's crisp cheesy crust and luxuriously rich filling.

For the Pastry:
250g of plain flour (scant 1 1/2 cups)
100g of butter, cold and cut into small dice (6 TBS)
35g of sharp farmhouse cheddar cheese (a generous 1/3 cup)
a tsp of thyme leaves
coarse black pepper
1 large free range egg, beaten
milk

For the filling:
270g of red or rainbow chard (1 pound)
4 thin spring onions
2 large free range eggs
300ml of double cream (1/2 pint, or slightly less than 1 1/4 cup)
50g of sharp cheddar, grated (1/2 cup, 2 ounces)
40g of Pecorino, Spenwood or Parmesan grated (about 1/3 cup)


Sift the flour into a mixing bowl and add the butter. Rub the butter into the flour, working quickly, with your fingertips. Rub until it resembles coarse breadcrumbs. Stir in the grated cheddar along with the thyme, a pinch of coarse black pepper and the beaten egg. Bring together to form a soft ball, adding a bit of milk if necessary.

Dust the work surface lightly with flour. Roll the pastry out in a rectangle large enough to fill a shallow jelly roll pan, about 12 by 15 inches. If you pan isn't nonstick, butter it first. Press the pastry carefully into the pan, making sure that you get it well into the corners. Trim the edges and then place in the refrigerator to chill for a good half an hour. (I used the trimmings to add a bit of thickness along the edges of the pastry just because I like the edges to be a bit thicker. Just brush with a bit of milk and stick them on.

While the pastry is chilling you can cook your chard. I steamed mine over boiling water until it was soft and tender. I then drained it very well and squeezed as much water out of it as I could with my hands. Roughly chop. Place into a bowl. Trim and thinly slice the spring onions. Toss in with the chard and season it with a touch of salt and black pepper. Set aside.

Preheat your oven 200*C/400*F/ gas mark 6.

Take your pastry from the refrigerator. Lay a piece of foil or greaseproof paper in the pastry case and weigh down with some baking beans. Bake in the heated oven for 15 minutes until the pastry is firm. Remove the foil and beans and bake for a further 5 minutes until dry to the touch.

Remove from the oven and scatter the chopped chard and onion mixture over the crust Beat together the eggs and cream. Scatter the cheeses over top of the chard in the pastry case and pour the egg and cream mixture over top. Bake for 20 to 25 minutes until the pastry is nicely crisped and the filling is set. Serve warm or at room temperature.

Saturday, 25 April 2015

Sauteed Apples with Vanilla Mascarpone


 photo Toffee apples_zpsv9klt6x4.jpg

We spent all afternoon today wandering around Tatton Park. What a gorgeous place that is! The gardens were so beautiful and we walked our not so little butts off! (ok . . . hmm . . . MY not so little butt.)


When we got home we were starving and so I threw together a quick Chicken Biryani. (Nothing special, just using a jarred sauce I got at the store, a couple of diced chicken breasts and some basamati rice. Quick and easy.)


While the chicken was in the oven I threw together a delicious dessert for us that turned out fabulous. AND . . . there's no fat in the apples at all . . . truly!


It's just apples, sugar and water . . . oh and a few spices like cinnamon and nutmeg.


Very healthy, very quick and oh sooooooo scrummy!!


Of course the Vanilla Mascarpone had lots of fat in it . . . but if you're feeling indulgent what the hey!! Quite, quite rich and delicious!


I had some non fat Greek yogurt with mine and it was quite yummy as well! Just look at those golden apples and that deliciously rich topping. Go on . . . just try to resist! I love it when something that is sooooo moreishly wanton . . . is actually not all that bad . . . don't you??


*Toffee Apples with Vanilla Mascarpone*
Serves 4
Printable Recipe

Simple, delicious and quite low in fat . . . ok well, the mascarpone is not low in fat, but you could substitute some fat free yoghurt instead if you wanted to.

6 Granny Smith Apples, peeled, cored and cut into eighths
4 TBS golden caster sugar
1 1/2 tsp ground cinnamon
1/4 tsp freshly grated nutmeg
3 TBS water

For the mascarpone:
250g of mascarpone cheese (about 1/2 cup)
1 vanilla pod, split lengthwise

Place the apple pieces into a bowl along with the sugar, cinnamon, nutmeg and water. Give them a good toss together.

Heat a large heavy bottomed skillet over medium high heat. Add the apples mixture, spreading it out into one layer as much as you can. Let them start to caramelize and turn golden on one side, before you flip them over and do the same on the other side, removing them as they become caramelized on both sides.

Split the vanilla pod in half lengthwise. Put the mascarpone into a bowl. Using the tip of a knife, scoop up all the black seeds from the vanilla pod and drop them into the mascarpone. Mix them in well. (Use the split vanilla pod in your sugar jar to infuse your sugar with the scent and flavour. Just plunge it in and let it sit forever. Well, it will last for a very long time at any rate.)

Spoon the hot apples into individual bowls. Top each with a dollop of the Vanilla mascarpone and serve immediately.

Twitter Delicious Facebook Digg Stumbleupon Favorites More