Tuesday, 30 September 2014

Slumgullion . . . Comfort Food at it's best . . .

 photo SAM_7330_zps22600faf.jpg

I mourne the passing of summer into autumn . . . it will take a while for me to get into the swing of the changing light and have my food photos start looking decent again . . .  sigh . . . I find the transition really difficult.   It's especially hard to make dishes such as this Slumgullion look good.  Sigh again . . .


 photo SAM_7333_zpsb5e349c3.jpg

I am sure very family must have their own version of this delicious stove top, one pan dinner.   Its basically just minced steak (I always use the extra lean with less than 5% fat) and a few store cupboard ingredients, put together in a way which is simple, quick and family pleasing . . .

  photo SAM_7329_zps87f02299.jpg

One pound of minced steak, with a few ingredients added such as onions, chopped peppers, celery, some tinned tomatoes and tomato sauce (passatta here in the UK)  and macaroni, with a bit of seasoning.  That's basically all it is . . .  but simple doesn't mean that it isn't incredibly tasty.

 photo SAM_7339_zps7746d51e.jpg

Even my pasta hating husband tolerates this and goes back for seconds.  (Methinks he doth protest too much actually.  I think secretly I am converting him into a pasta lover, but he would be the last one to admit it.)

 photo SAM_7338_zps28e5a651.jpg

This is the kind of meal that is perfect for this time of year.   It's a great family meal and family pleaser. It's economical.  Kids love it.  Its hearty and filling . . .  and it's deliciousy simple. You cannot ask for much better than that.    Now if I could only make it look as good as it tastes!  A simple salad and some garlic toast and you have a fabulous meal!

 photo SAM_7349_zps885736ad.jpg


*Slumgullion*
Serves 6

American Chop Suey, Chinese Hash, Slumgullion.   A rose by any other name.   A one pan dish that is delicious and economical.  

1 TBS canola oil
1 medium onion, peeled and chopped fine
1 red bell pepper, trimmed, seeded and chopped
1 stick of celery, washed and chopped
fine sea salt and freshly ground black pepper
2 cloves of garlic, peeled and minced
2 TBS soy sauce
1 pound extra lean ground beef
1 TBS tomato puree (tomato paste)
1 415g tin of tomato passata (15 ounce)
1 400g tin of chopped tomatoes in tomato juice ((14.5 ounce) undrained
345ml of chicken stock (1 1/2 cups)
230g of dry macaroni (2 cups)  

 photo SAM_7342_zps659f40aa.jpg  


Heat the oil in a large skillet with a lid.   Add the onion, bell pepper, celery and some seasoning.   Cook, stirring occasionally, until the vegetables begin to soften.  Stir in the garlic, Soy sauce, and tomato puree.   Cook until quite fragrant.   Crumble the beef over top and cook breaking up the meat with a wooden spoon, stirring occasionally until the meat is no longer pink.  Stir in the tomato passata, chopped tomatoes, and the broth, scraping up any browned bits.   Cover and reduce the heat to low.   Simmer, covered, until the meat and vegetables are tender, about 20 minutes. 

Stir in the macaroni, cover, and cook, stirring frequently, for a further 20 minutes or so, until the pasta is tender.  Taste and adjust seasoning as necessary.   Serve.

Note - Here in the uk, it may take longer for your macaroni to cook.  It did mine.  I just added a bit of boiling water every now and then to make sure it wasn't sticking.  It turned out perfectly.

Some refreshing new sauces from the Lake District Dairy Co

unnamed

As you know I get sent new products to try out from time to time and a few weeks ago I was sent a lovely hamper from the Lake District Dairy Co, containing their new Cooking sauces along with some fresh ingredients so that I could cook some recipes using the new flavours . . .  Garlic & Herb, Tomato & Basil and Tikka Sauces.

Included in the hamper were all the necessary ingredients so that I could cook Gnocchi with Spinach and Tomat & Basil Quark Sauce, Chicken Tikka & Quark Rice, and Spaghetti Quarkonara.

First a bit about the sauces:

The new Lake Districk Dairy Co. Cooking sauces are ideal for those who are pressed for time and who are health conscious.   Naturally low fat, convenient and naturally nutritious they taste deliciously indulgent, yet because they are made with Quark, they boast half the calories and treble the protein of other stir-in dairy sauces.  They recently won an award at the World Dairy Innovation Awards.   You can simply swap these cooking sauces into recipes as an alternative to traditional dairy ingredients such as creme fraiche or double cream to create  a variety of healthy and flavoursome day to day dishes, from creamy carbonaras to tantalizing tomato bakes.

  photo SAM_6991_zps04f2f014.jpg

The first recipe I tried was Chicken Tikka & Quark Rice.  The sauce itself was delicious as was the finished dish, however the recipe was inconsistent with the ingredients sent, with uncooked rice being called for in the recipe and a pouch of already cooked rice being sent in the hamper.  I decided to go with the recipe and used uncooked rice.

 photo SAM_6993_zps176dc447.jpg

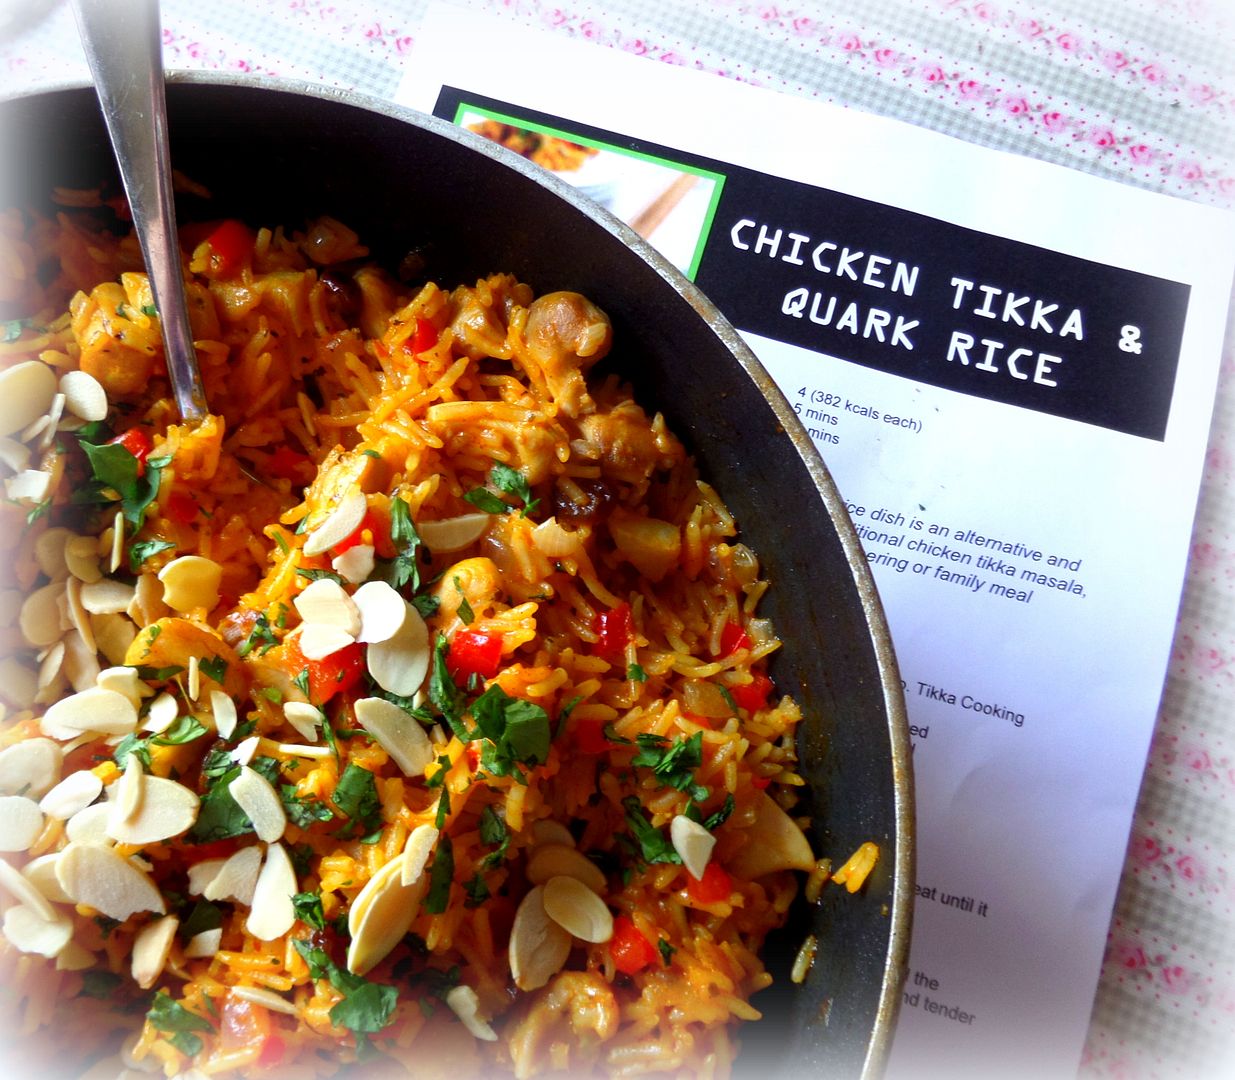
This was our favourite of all the dishes cookes.   Coming in at only 382 calories a serving, it was quite satisfying and very delicious.  We all really enjoyed this.


(click on photo to enlarge recipe)

The Lake District Dairy Co - Naturally Low Fat Tikka Cooking Sauce
(RRP £1.75 per 200g pot)
One of the nation's favourites - a beautiful blend of herbs and spices for perfect curry dishes with minimal fuss.  contains NO preservatives or artificial flavours
Nutrition (per 100g)
75 kcals, 4.5 g Sugar, 2.6g Fat, 0.6g Saturates, 0.74g Salt

 photo SAM_6974_zps43792d9a.jpg

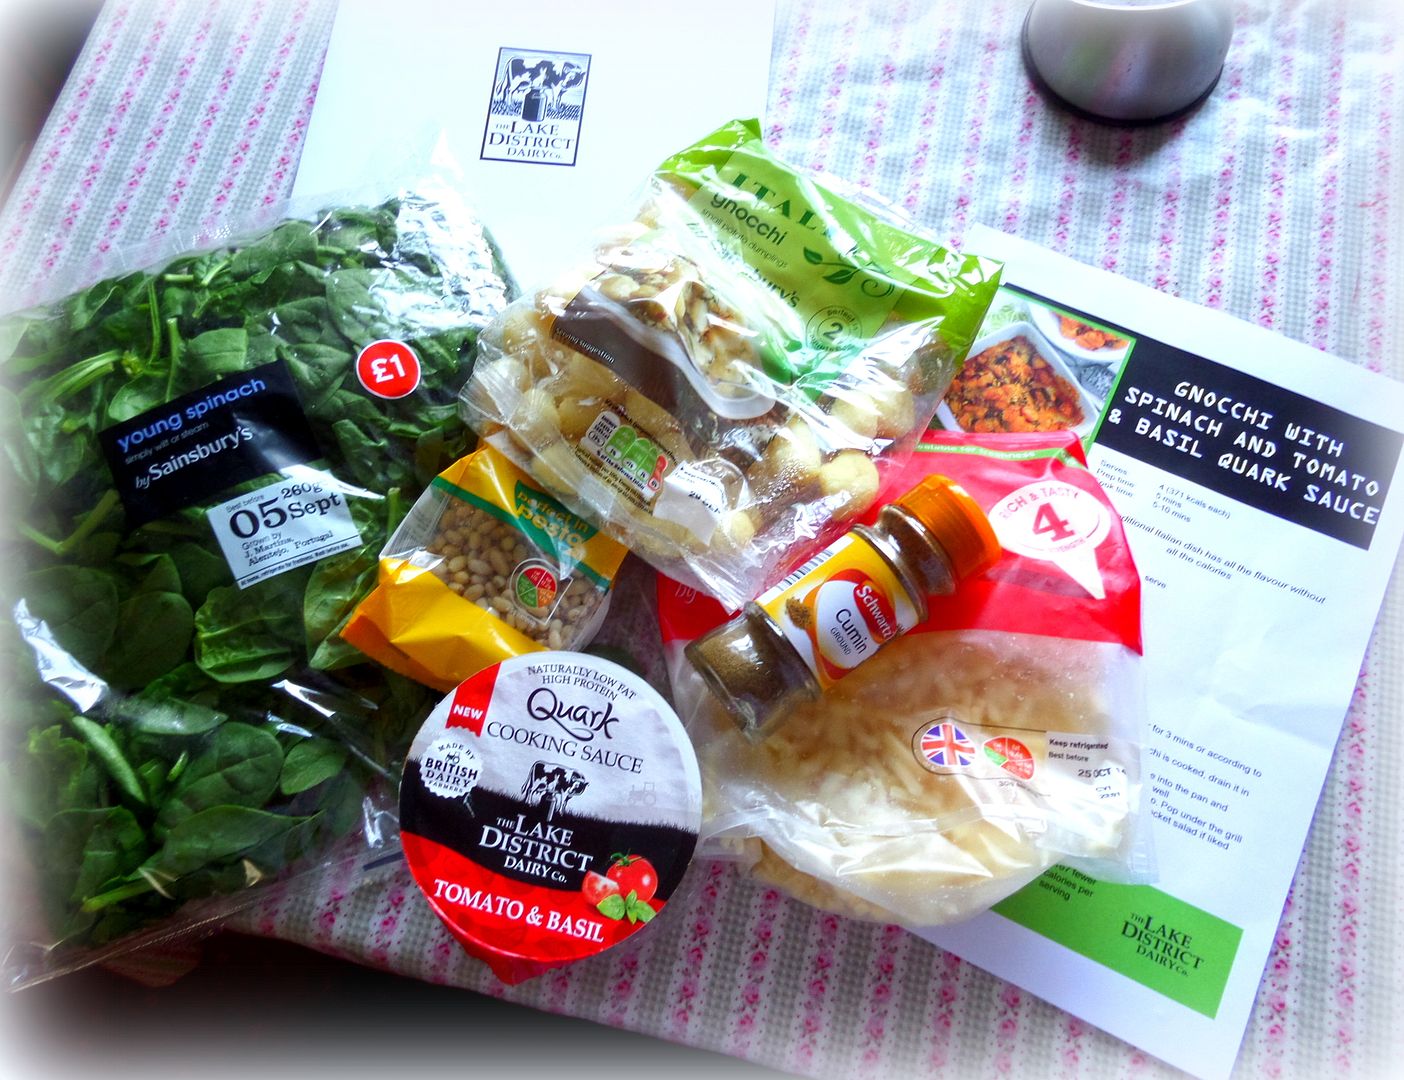
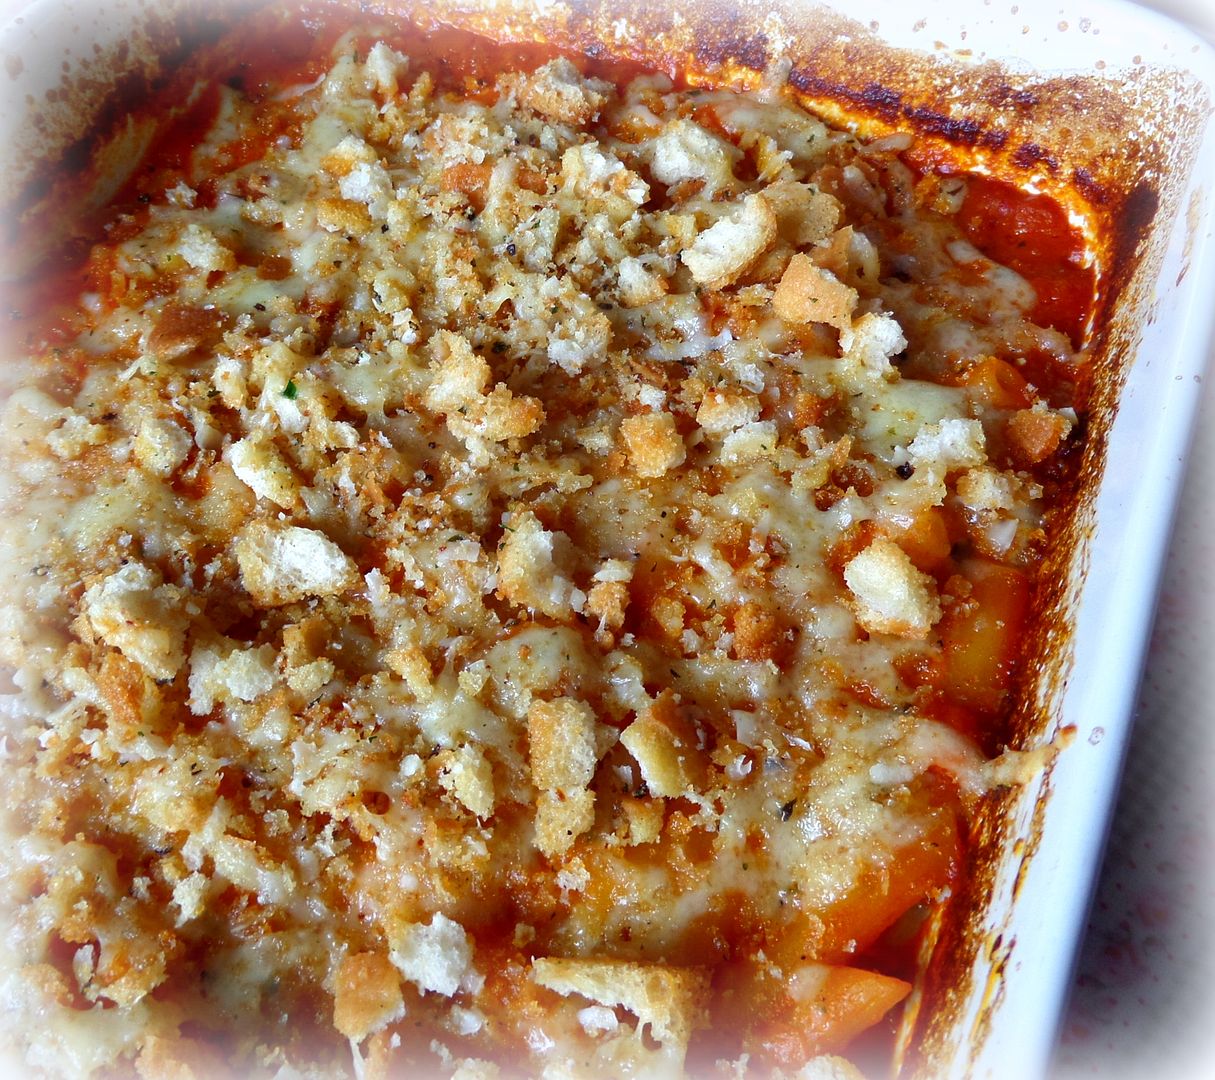
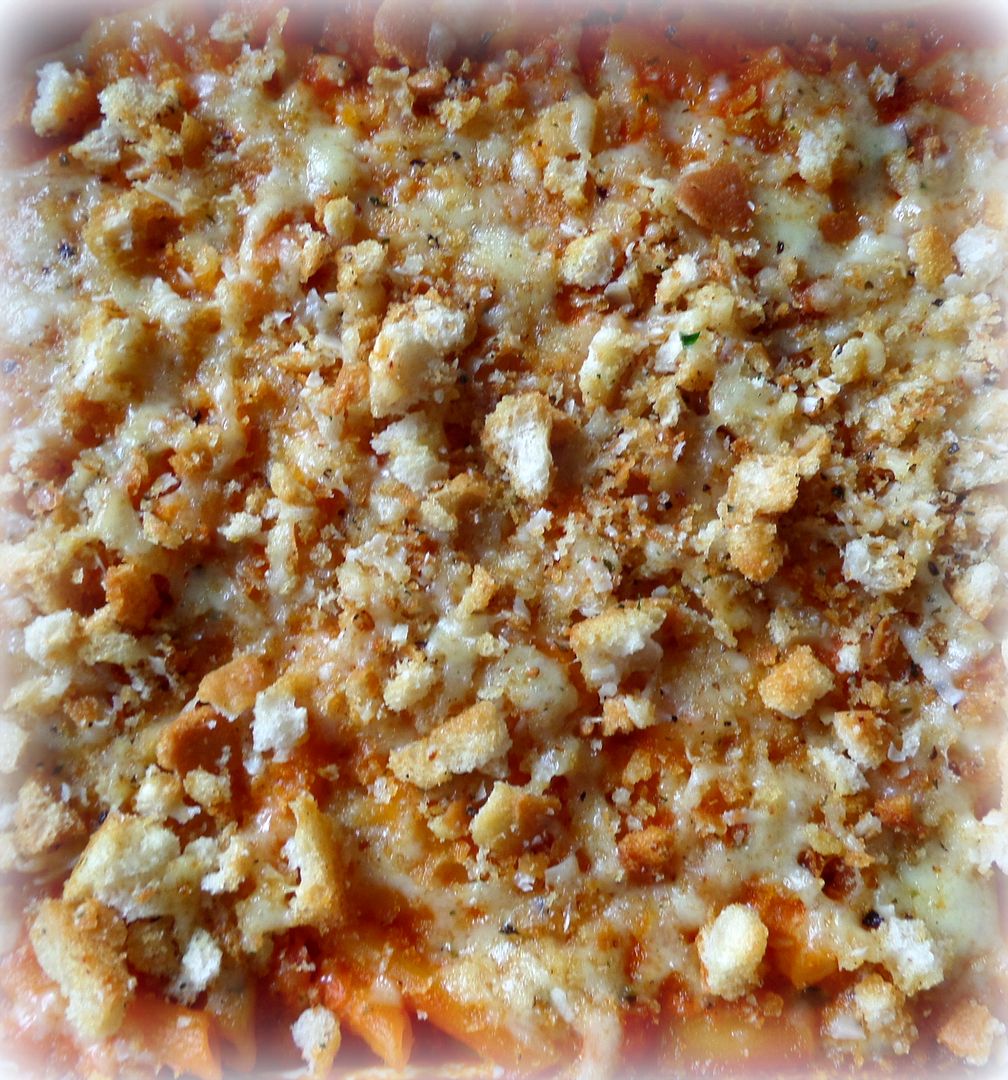
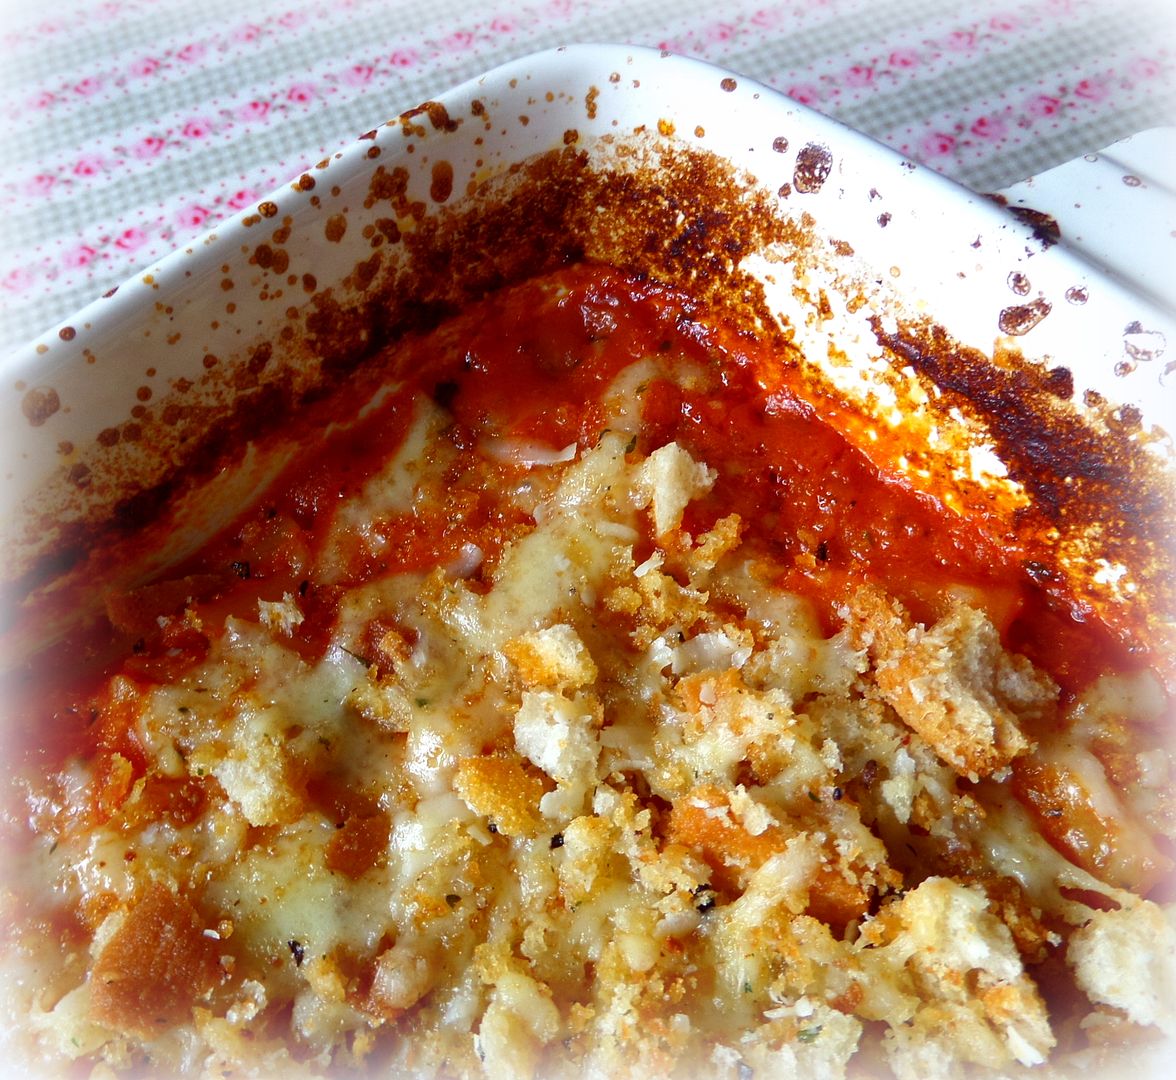
The next dish I cookes was Gnocchi with Spinach and Tomato & Basil Quark Sauce.  Everything for the recipe was included.  It went together very easily and I found the sauce to be quite delicious.

  photo SAM_6977_zps0f7cd754.jpg

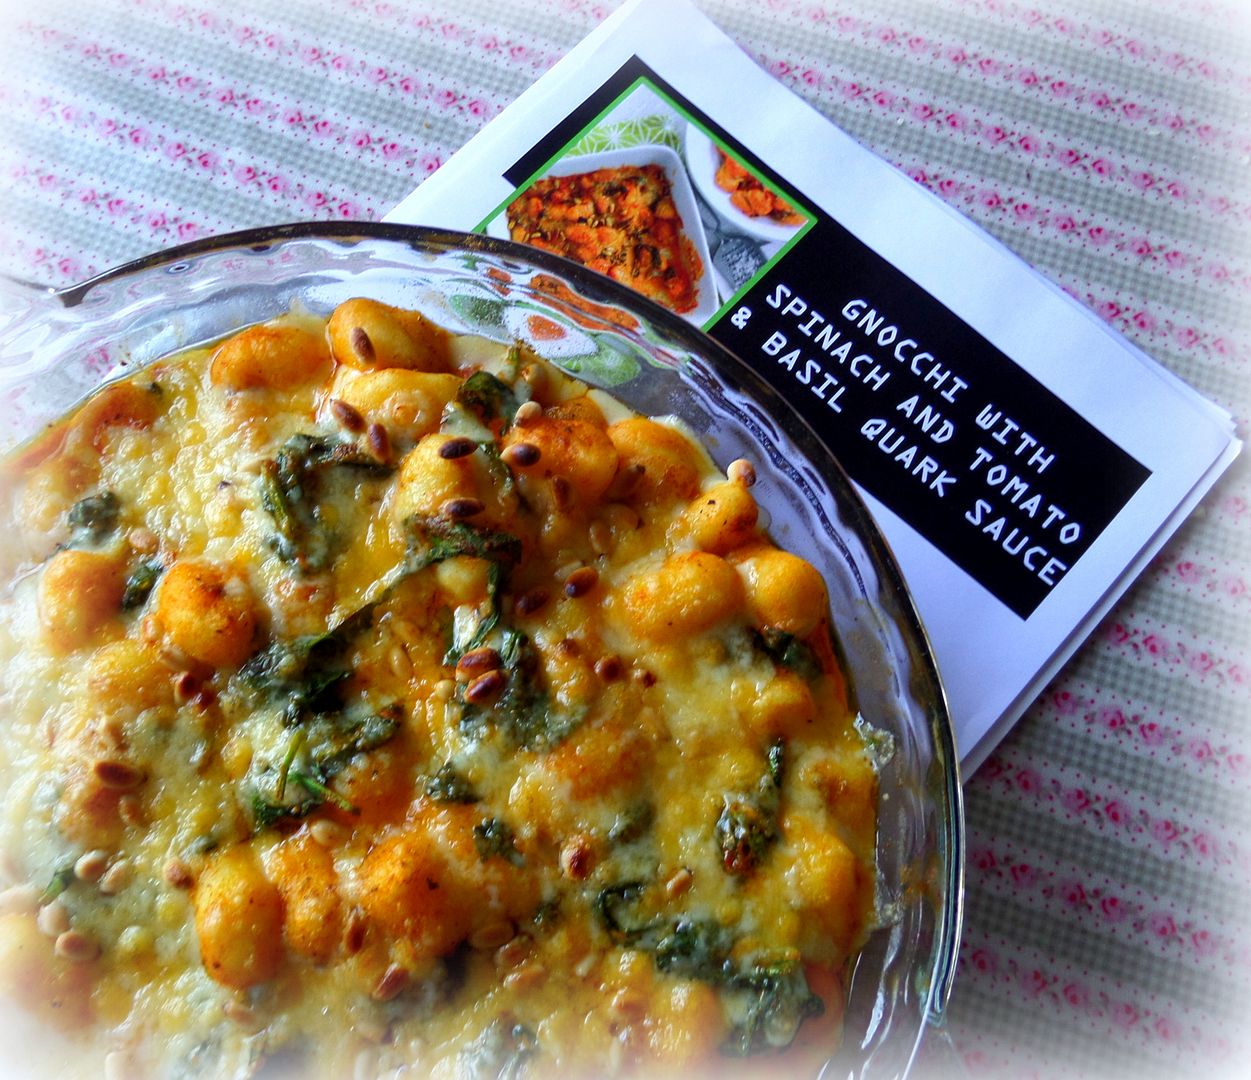
The finished dish was attractive and very tasty.  We all really enjoyed this as well.


(again click on photo to enlarge recipe)

The Lake District Dairy Co. - Naturally Low Fat Tomato & Basil Cooking Sauce
(RRP £1.75 per 100g pot)
Great for adding a sumptuous Italian twist to meat and pasta dishes.
Contains NO preservatives or artificial flavours.
Nutrition (per 100g)
79kcals, 6.3g Sugar, 2,8g Fat, 0.6g Saturates, 0.83g Salt

 photo SAM_6982_zpsd1a89e04.jpg

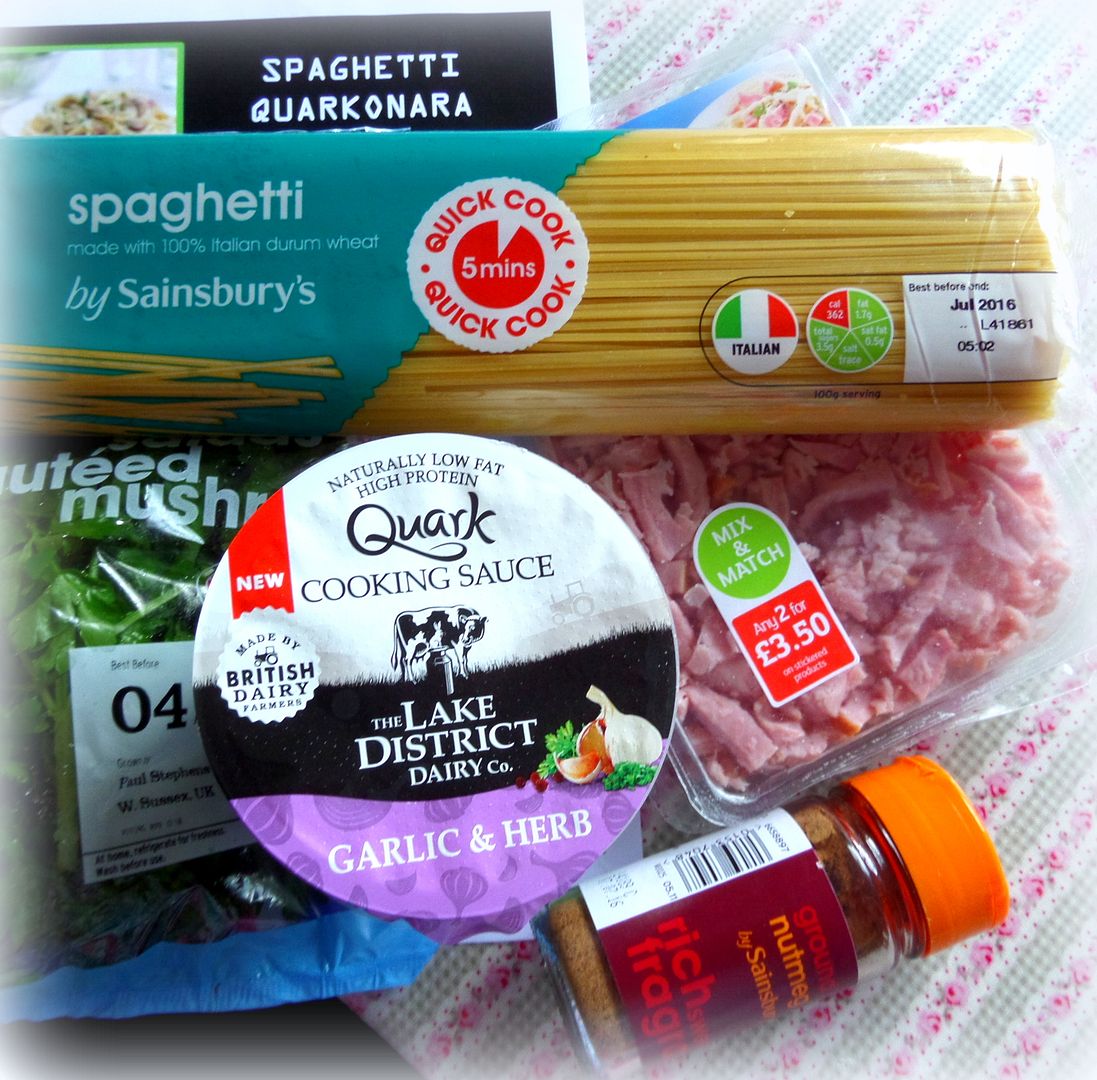
The final recipe which I cooked was Spaghetti Quarkonara using their Garlic & Herb Sauce.   I have to say that we did not enjoy this recipe at all.   First of all, I thought there was too much pasta per sauce ratio, and I would never use quick cooking spaghetti myself.  I would like to try it again, using regular spaghetti and less pasta per sauce.

 photo SAM_6984_zpsc62f6f6b.jpg

The ham added nothing to this recipe.  You couldn't even taste it really.  I added peas because I thought it could use some colour, but again, this wasn't our favourite dish


(Click on photo to enlarge)

The sauce itself was quite flavourful, but this recipe let it down in my opinion.  I would use the sauce again in another way, but not this recipe.

The Lake District Dairy Co. - Naturally Low FAt Garlic & Herb Cooking Sauce
(RRP £1.75 per 200g pot
Smooth and indulgent, with a deliciously fresh garlic taste - great for mixing with fish, chicken or pasta.
Contains NO preservatives or artificial flavours
Nutrition (per 100g)
76 kcals, 5.6g Sugar, 1.5g Fat, 0.4g Saturates, 0.74g Salt

For more information about The Lake District Dairy Co. Quark, including delicious recipe suggestions to suit every occasion, visit www.lakeDistrictQuark.co.uk and follow @LDDCQuark on Twitter.

Over all I found the sauces themselves to be filled with flavour and I love that they are all natural and relatively low in fat which make them a great option for someone who is looking for convenience along with healthy options.  Many thanks to The Lake District Dairy Co. for sending this lovely hamper to me. 

Monday, 29 September 2014

Biscoff (Lotus) Granola

 photo SAM_7320_zps4dcdc32a.jpg

I think you would pretty much have to live under a rock to not know what Biscoff, or Lotus cookies are.   They are those gorgeous little caramel flavoured biscuits that they hand out in coffee shops and that get handed out on Delta Airlines etc.  I just adore them.   I just love Nutella and Peanut butter . . . so when I found that they make a Lotus (Biscoff) Spread  I was thrilled and of course I had to buy some.  Oh boy that is some good.  I could eat it with a spoon.    All caramel rich and gooey . . .  lovely on crackers or plain biscuit/cookies.  Or sandwiched between two . . .  just sayin!


 photo SAM_7315_zps2d199fc4.jpg

My breakfast cereal of choice has always been homemade granola.   I like to make my own.  That way I can control the fat and sugar in it. And I can add plenty of nuts and dried fruit.  I just think homemade granola tastes a lot better than any store bought one.  End of.  I've been making my own for years and years.   It's rather spoiled me for wanting anything else.

 photo SAM_7316_zpsde4e9a41.jpg

This particular version here today uses raw cashew nuts and pecans . . .  and pumpkin seeds, so it's nice and nutty.  I also like to add big flakes of unsweetened coconut.   They are almost like coconut shavings really.  I get mine in the baking section of Marks and Sparks.    I also like to use old fashioned rolled oats, as I like the bigger flakes of oats.  They get all nutty tasting.  

 photo SAM_7321_zpsbbef0140.jpg

This time I used large sticky raisins and dried cranberries . . . I like to use coconut oil for my fat in the granola, because it's supposed to be good for you and I love the flavour it gives.  This time . . .  I melted it with some of that gorgeous Lotus Spread . . .  some honey and a bit of brown sugar.  Oh man . . .  is this ever gorgeous.  A new favourite.  I eat it for breakfast with a dollop of no fat Greek yogurt and some honey drizzled over top. This is my idea of heaven.

  photo SAM_7323_zps42b3a671.jpg

*Biscoff (Lotus) Granola*
Makes 19 servings

If you love Biscoff, or Lotus caramelized biscuits, you will love this delicious granola which is very easy to make.   

200g of old fashioned rolled oats (2 1/2 cups)
75g of unsweetened coconut flakes
60g of shelled pecans (1/2 cup)
60g of raw cashew nuts (1/2 cup)
35g of pumpkin seeds (1/3 cup)
3 TBS soft light brown sugar
50g of coconut oil (1/4 cup)
45g of Biscoff or Lotus spread (1/4 cup)
112g of honey (1/3 cup, I used Manuka)
150g of dried fruit (I used a mixture of cranberries, sour cherries and raisins, 1 cup)   

 photo SAM_7322_zps59ba2f39.jpg   


Preheat the oven to 165*C/325*F/ gas mark 3.  Lightly butter a large rimmed baking tray.
Mix the oats, coconut flakes, nuts, and pumpkin seeds together in a large bowl.  Heat the coconut oil, biscoff spread, honey brown sugar in a saucepan until everything is melted and amalgamated. Pour this mixture over the dry ingredients and toss to coat well and spread it throughout.  Spread in an even layer on the baking tray.  
 

Bake in the heated oven for 25 to 30 minutes, giving it a good stir every 10 minutes, until the granola is crisp and golden brown.  Take care that it does not burn. 

Allow to cool completely before stirring in the dried fruit.  Store in an airtight container for two to three weeks.

Sunday, 28 September 2014

Easy Oven Baked Pasta

 photo SAM_7303_zps091b3308.jpg

Sometimes you just feel really lazy, don't you?  It can't just be me, can it?  I confess . . .  I do have days when I feel really lazy and I can't get motivated to do much of anything, and yet I am absolutely starving!     That is when a recipe like this one here today comes in really handy.


 photo SAM_7304_zpscb573451.jpg

It might not look like very much, but don't let what it looks like fool you into thinking that this isn't very, very tasty.  It's fabulously tasty . . .  well as tasty as the jar of pasta sauce that you use.  Yes . . .  she shrieks in horror . . .  I do use a jarred pasta sauce once in a while!   Doesn't everyone?

 photo SAM_7306_zps13a82faa.jpg

I am not a culinary paragon of virtue.  I do have a store cupboard full of ingredients that I use from time to time . . .  when I am lacking in time, energy . . . and yes inspiration, because even I am not always "on."  I do buy quality pasta sauces when they are on offer . . .  I am not fond of no name or generic brands.  I have a particular fondness for Lloyd Grossman sauces . . .  and Napoli, which brings me to this dish here today.

  photo SAM_7308_zps82ec97eb.jpg

About a month or so ago, I found a jar of Lloyd's oven bake pasta sauce that I had picked up on offer a while back, just to try like.  I can't remember what flavour it was . . . I think it might have been the  Al Forno one with pancetta in it.  In any case, I made it and it was really tasty.   So tasty that I tried to pick up some more one day when I was at the shops . . .  to no avail, because they had plenty of his pasta sauces, but no oven bake pasta sauces.

 photo SAM_7309_zps8557ceec.jpg

And that is when I decided that I would try making my own version of it, using whatever pasta sauce I had in my larder, simply by adding some water and dry pasta to it and baking it . . .  and you know what???  It worked like a charm.  In fact it was perfect.  Result!  Pasta which has been baked in sauce is really very tasty . . .  and all you have to do is just sit there and let the oven do all of the work.  All you need is some salad and crusty bread on the side and Bob's your uncle! Even the Toddster rather liked this and that says a LOT!

 photo SAM_7313_zpse163e553.jpg


*Easy Oven Baked Pasta*
Serves 2 to 3


For those nights when you are singularly lacking in inspiration and time.  This leaves your hands free to do something else when it is baking.  

1 400g jar of pasta sauce, any flavour (approximately 2 1/2 cups)
300ml of water (1 1/3 cups)
150g of dry pasta (any short shape such as penne, 1 1/3 cups)
70g of grated cheddar cheese (2/3 cup)
a handful of buttered cracker or bread crumbs
2 TBS grated Parmesan Cheese    


 photo SAM_7312_zps14050fad.jpg

Preheat the oven to 200*C/400*F/ gas mark 6. 

Empty the sauce into a  1 1/2 litre casserole dish (about 1 1/2 quarts).  Whisk in the water to combine and then stir in the dry pasta. Bake in the preheated oven for 25 minutes.  Remove from the oven and stir well.  Stir half of the cheese into the dish.  Combine the remaining cheese with the buttered crumbs, and Parmesan Cheese and sprinkle this evenly over top.  Return to the oven and bake for a final 10 minutes at which time the pasta should be cooked properly and the top will be bubbling and golden brown.   Let stand for about 5 minutes prior to serving. 

Sorry for my absence of the past couple of days!  I had no internet connection, well not a lasting one anyways!  Hopefully it's now been sorted!  I missed you! ☺

Friday, 26 September 2014

Custard Corncake with Berries and Honey

 photo SAM_7283_zps5a222f2f.jpg

In America there is a debate between bakers in the south and bakers in the north about whether there is sugar in a proper cornbread or not.  Up north, and in Canada actually, we use some sugar in our cornbread and our corn muffins.  Down south they do not.     In their eyes, once sugar is added . . .  it becomes a cake.

 photo SAM_7284_zpsc8451210.jpg

Cake or bread, I'm not really bothered.  I only care that it tastes good, and this delightful breakfast corn "cake" here today is fabulously delicious to say the least!   I have chosen to call it a cake, but you call it what you will.   Any name at all is irrelevant when it comes to deliciousness in my oho!

 photo SAM_7286_zpsaf4467d1.jpg

Who cares what it is called when all you want to do is to grab your fork and dive down into that awesome creamy, crispy, blueberry awesomeness????

  photo SAM_7289_zpse33741c3.jpg

With it's crisp cornbread-like texture . . .  it's creamy custard like squidginess . . .  and all those berries, who wants to quibble about whether it's a cake or a bread?

 photo SAM_7290_zps143dbacd.jpg

And with that extra drizzle of honey on top . . .  I just want to get stuck into this . . .  and enjoy every crispy, squidgy, berrylicious bite!  You will too!!!  I guarantee!  This is the perfect weekend breakfast/brunch dish!

  photo SAM_7288_zps61df3ad0.jpg

*Custard Corncake with Berries and Honey*
Makes 4 to 6 servings


A deliciously moreish cake stogged full of fresh berries and a magical custard filling.   Drizzled with honey and served at room temperature this is fabulous.

2 TBS unsalted butter
70g of plain flour (1/2 cup)
85g of cornmeal or coarse polenta (1/2 cup)
1/2 tsp baking powder
1/4 tsp bicarbonate of soda (baking soda)
1/4 tsp fine sea salt
1 large free range egg
120ml of buttermilk (1/2 cup)
2 TBS liquid honey (I like clover honey)
1/2 tsp vanilla

you will also need
100g of blueberries (fresh or frozen) (1 cup)
120ml of heavy cream (1/2 cup)
liquid honey to drizzle  

 photo SAM_7296_zps52cd4734.jpg

Preheat the oven to 190*C/375*F/ gas mark 5.  Place the butter in an 8 or 9 inch round non-stick baking tin.  Place the tin in the oven for about 3 minutes to melt the butter.  Remove.

 photo SAM_7295_zps6d288bd5.jpg

While the butter is melting, whisk together the flour, cornmeal, baking powder, baking soda and salt.   In a liquid measure whisk together the egg, buttermilk, honey and vanilla.  Add the liquid ingredients to the dry all at once, mixing only to just combine.  Tilt the melted butter to cover the whole of the baking pan and then tip the remainder into the cake batter.   Stir again, just to combine.  Scrape the batter into the baking pan and spread it out.  Sprinkle the berries evenly over top.  Pour the cream over top of the berries and batter.  Don't mix it together.  Never fear, the cream will sink into the batter and fruit as it bakes, beautifully.


 photo SAM_7298_zps8fa08fea.jpg


Bake in the oven for 20 to 30 minutes until a toothpick inserted in the centre comes out clean.  Allow to cool in the tin for 20 minutes before cutting into wedges to serve, drizzled with more honey if desired. 

Note - You can keep this cake refrigerated for up to 3 days.  Reheat gently in a slow oven or a toaster oven until warm.

Thursday, 25 September 2014

Flaky Goat Cheese and Chive Biscuits

 photo SAM_7279_zps5a921d7a.jpg

I am a huge fan of quick breads . . .  muffins, loaves . . .  scones, biscuits.   Scones and biscuits are really quite similar.   The basic ingredients are essentially the same . . .  flour, butter or shortening, milk or cream, leavening, and a bit of salt and possibly sugar. The method of preparation, too, is pretty similar . . . you sift the dry ingredients, cut in the fat, and add the liquid. As with biscuits, the scone dough is rolled and cut into shapes.

 photo SAM_7270_zpsbe7a7601.jpg

I think the difference  lies mainly in the type of fat which is used, and in how you incorporate it.  Traditionally in biscuits the fat is cut in with a pastry blender and in scones it is rubbed in with the fingertips.   In a scone, more often than not you will use butter and in a biscuit . . .  vegetable fat of some sort, but that is not always the case . . . and too, scones tend to be more on the sweet side than the savoury.

 photo SAM_7272_zpsdfd6900d.jpg

 These flaky savoury breads I am showing you here today are called biscuits . . .  but they use butter instead of vegetable oil and the fat is rubbed into the flour mixture, instead of cut into it with a pastry blender . . .  so in those respects they are more like scones . . .  but they are not sweet in the least.  These are also a bit sturdier than a scone . . .

  photo SAM_7271_zpsa7f6ab95.jpg

Which is not to say that they are heavy, because they are not heavy in the least.  These are delightfully light and filled with lovely layers . . .  flaky buttery layers . . .  with pockets oozing with rich soft goats cheese . . .

  photo SAM_7276_zps803a5407.jpg

and lovely little flecks of oniony chives.   These go wonderfully with soups and stews . . .  with sliced meats and cheeses.   Heck they would even be fabulous with bacon and eggs for breakfast.

 photo SAM_7277_zps17f5eb12.jpg

We enjoyed them today with hot mugs of soup.  They went down a real treat.  I had halved the recipe because I did not have enough goats cheese to do a full recipe.  I forgot to pick some up when I did my shopping yesterday . . .  but happily they turned out just beautifully, despite halving the recipe.  Flaky.  Rich.  Savoury.  Moreish.

  photo SAM_7278_zps64fe3704.jpg

*Flaky Goat Cheese and Chive Biscuits*
Makes 16 2-inch square biscuits 
Printable Recipe     

Flaky and delicious with lots of buttery and cheesy layers!

280g of plain flour (2 cups or 10 ounces)
2 tsp baking powder
1/2 tsp bicarbonate of soda (baking soda)
3/4 tsp fine sea salt
1/2 tsp freshly ground black pepper
135g of grated Parmesan cheese (3/4 cup, or 1 3/4 ounces)
6 TBS cold unsalted butter, cut into 1/2 inch chunks
3 TBS chopped chives
179g of fresh goats cheese, divided (about 1 cup in total)
180ml of buttermilk (about 3/4 cup)    

 photo SAM_7273_zps6262fb04.jpg


Preheat the oven to 220*C/425*F/ gas mark 7.  


Sift the flour, baking powder and soda into a bowl.  Whisk in the salt, pepper and parmesan cheese.   Drop in the butter.  Work it into the flour mixture using your fingertips or a pastry blender, until you have the butter about half incorporated and half pea sized bits remaining.   Stir in the chives and crumble in half of the goats cheese.   Add the buttermilk a bit at a time, stirring it in with a fork, until the dough just begins to clump together and there are no dry floury bits remaining.  You may need all of the buttermilk, or less, or more, depending on your flour and the day.  Gently knead in the bowl a few times to form a ball.  

 photo SAM_7279_zps5a921d7a.jpg

Tip the dough out onto a lightly floured surface.  Roll out into a rectangle which is 1/2 inch thick and roughly twice as long as it is wide.  Turn the dough so that the long side is facing you.  Mentally divide the dough in quarters lengthwise.  Crumble 2/3 of the remaining goats cheese into the centre two quarters.  Fold the outer two quarters over to meet in the centre from the short edges.  Turn the dough so that the short side is facing you.   Sprinkle the remaining goats cheese down one half of this and fold the other half over to enclose, like a book.   Pat out gently to flatten slightly and then roll it up into a loose spiral beginning at the narrow end.  Pat the dough out into an 8 inch square that is about 3/4 inch thick.  Trim the edges with a sharp knife and then using a straight up and down cut with a sharp knife, cut into 16 2-inch squares.  Place them onto a baking sheet which is lined with baking paper, leaving several inches in between each.

 photo SAM_7282_zps78bcff14.jpg


Bake for 15 to 18 minutes until they are well risen and golden brown.   Allow to cool for five to ten minutes prior to indulging.   Best on the day they are baked, but these will keep at room temperature for several days.  Reheat in the oven for a few minutes to crisp up.


Note - You can successfully cut the recipe in half and it works fine.  Also you can freeze the biscuits prior to baking for use at another time.  Freeze solid on the baking sheet and then pack into zip lock bags to bake off when you like.  Partially thaw prior to baking.

Wednesday, 24 September 2014

Blackberry and Clotted Cream Shortcakes


One of our favourite things to eat here in the UK at this time of year are blackberries and they are pretty much free for the asking, as they grow  wild in the hedgerows all across the country.  They are quite prolific and need little or no care really, which is probably why they can be found in such abundance.  They can be somewhat of a nuisance to home gardeners whose aim is to have a very manicured garden, as they do have a habit of popping up in the most diverse of places, their canes travelling beneath the ground.  I, for one, don't really mind.  We love blackberries and cannot get enough of them when they are at their best, eating them fresh as often as possible . . .  and I  try to freeze as many as I can as well, for winter time treats.   We grown our own in our garden . . .  well, I say that.  We actually planted tayberries, but they've become blackberries for the most part.  The blackberries which grow in the hedgerow bordering our property have taken over somewhat and intermingled with them, so what we have now is a happy mixture of them both.


 photo shortcakes1_zpse3951b45.jpg

When I lived on the banks of the Georgian Bay in Ontario, Canada, in the small farming community of Meaford the hillsides leading down to the bay on the Westward side were filled with wild blackberry canes.  I have lovely memories of afternoon's spent picking these lovely berries with my sister.   They are ferocious berries to pick in many ways, as they come adorned with thorny branches, but when you arm yourself with gloves and long sleeves you are always more than rewarded with lovely beautiful delicious berries.

  photo shortcake2_zpsddb52e83.jpg

It won't be long now before they are finished and so I took advantage of the last of our fresh ones to make us some delicious Blackberry and Clotted Cream Shortcakes.  This lovely dessert makes the most of some of our favourite things here in the UK  . . .  lovely short and buttery scones . . .  beautiful sweet and tart berries . . .  and rich and delicious clotted cream.

 photo shortcake4_zps3b49925d.jpg

Clotted cream is a product which is found here in the UK and can be very difficult and in fact impossible to replicate anywhere else in North America because of the laws in North America which forbid the use of unpasturized milk in their dairy products . . .  but you can use full fat creme fraiche or mascarpone cheese and these will be almost as delicious . . .

  photo shortcakes3_zps41d2ffc2.jpg

*Blackberry and Clotted Cream Shortcakes*
Makes 8
Printable Recipe


Imagine a crumbly, buttery shortcake biscuit stogged full of lovely rich clotted cream and sweet blackberries . . . this is a little bit of heaven on a sunny autumn day.


300g self rising flour (about 2 1/4 cups)
1 tsp baking powder
a pinch of salt
140g cold butter, cut into bits (10 TBS)
100g sugar (1/2 cup)
75ml buttermilk (5 TBS)
1 large free range egg, beaten


For the filling:
500g fresh blackberries (a generous pound)
3 TBS sugar
275 pot of clotted cream (about a cup, can use softly whipped double cream if you cannot get clotted cream.)
Icing Sugar for dusting over the tops


Pre-heat the oven to 190*C/375*Fgas mark 5. Line a baking sheet with some parchment paper, or lightly grease it and dust with flour. Set aside.


Measure the flour into a bowl along with the baking powder and a pinch of salt. Whisk it all together and then tip in the cold butter. Working with the tips of your fingers, quickly rub the butter into the flour mixture until the mixture resembles fine crumbs. Stir in the sugar.


Beat the egg and buttermilk together. Make a well in the centre of the flour mixture and tip in the wet. Gently work it all together with a fork until it forms a soft, sticky dough.


Tip it out onto a floured surface and knead the mixture a couple of times. (it will be quite sticky) Pat out, about an inch thick and then using a sharp cutter (3 inch round) dipped in flour cut out 8 rounds and place each one on the prepared baking sheet at least 2 inches apart. (Alternately you can just shape the dough into one large round about 8 inches in diameter and place it onto the prepared baking sheet.)


Place into the heated oven and bake for 30 to 35 minutes until nicely risen and golden brown and a skewer comes out clean when inserted in the middle. Remove from the oven and let cool on a wire rack until needed.


To make the filling, lightly mash the blackberries together with the sugar. Split the shortcakes in two through the middle. Place the bottom halves onto dessert plates and spread with some clotted cream. Spoon some of the mashed berries over each and then top with the tops of the shortcakes. Dust with icing sugar and serve. (if you are using one large cake, do the same except with the whole cake on a larger serving plate. Cut into slices to serve.)


Twitter Delicious Facebook Digg Stumbleupon Favorites More