Thursday, 2 July 2015

Food 4 the 4th,with picnic chicken, potato salad and a killer Berry Tiramisu

  photo SAM_6801_zps6d0f2e52.jpg

Happy Independance Day to all of my American friends.  I thought I would show you a quick, easy and tasty meal that you could serve to your friends and family on the 4th.  A meal which you could do ahead of time, leaving your hands free to enjoy all of the festivities of the day!   This is the type of food I like to eat in the summer.  Light and fresh, and easy to prepare.


 photo SAM_6796_zps2a2eefda.jpg

We do eat a lot of chicken in this house.  It's such a versatile meat and goes with just about anything.  I always have boneless chicken breasts in the freezer.  Just perfect for this delicious chicken recipe.  I have adapted it from the Betty Crocker website.

 photo SAM_6794_zps3d18ca21.jpg

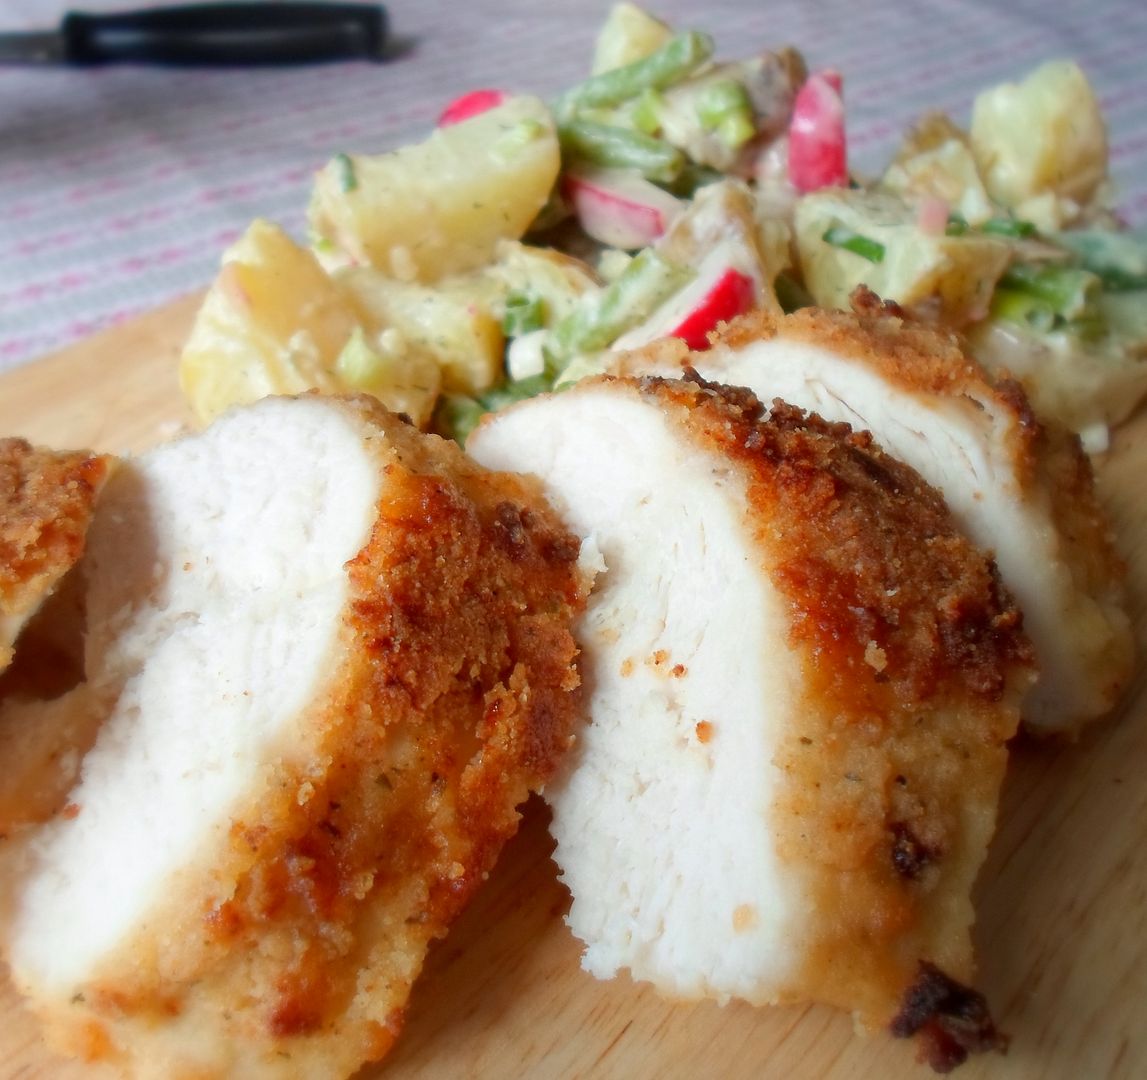
It always turns out moist and delicious, and let's face it . . . chicken breasts are so very easy to get wrong.   I hate dried out chicken breasts . . . cardboard is every bit as palatable . . .

 photo SAM_6793_zps45911cf2.jpg

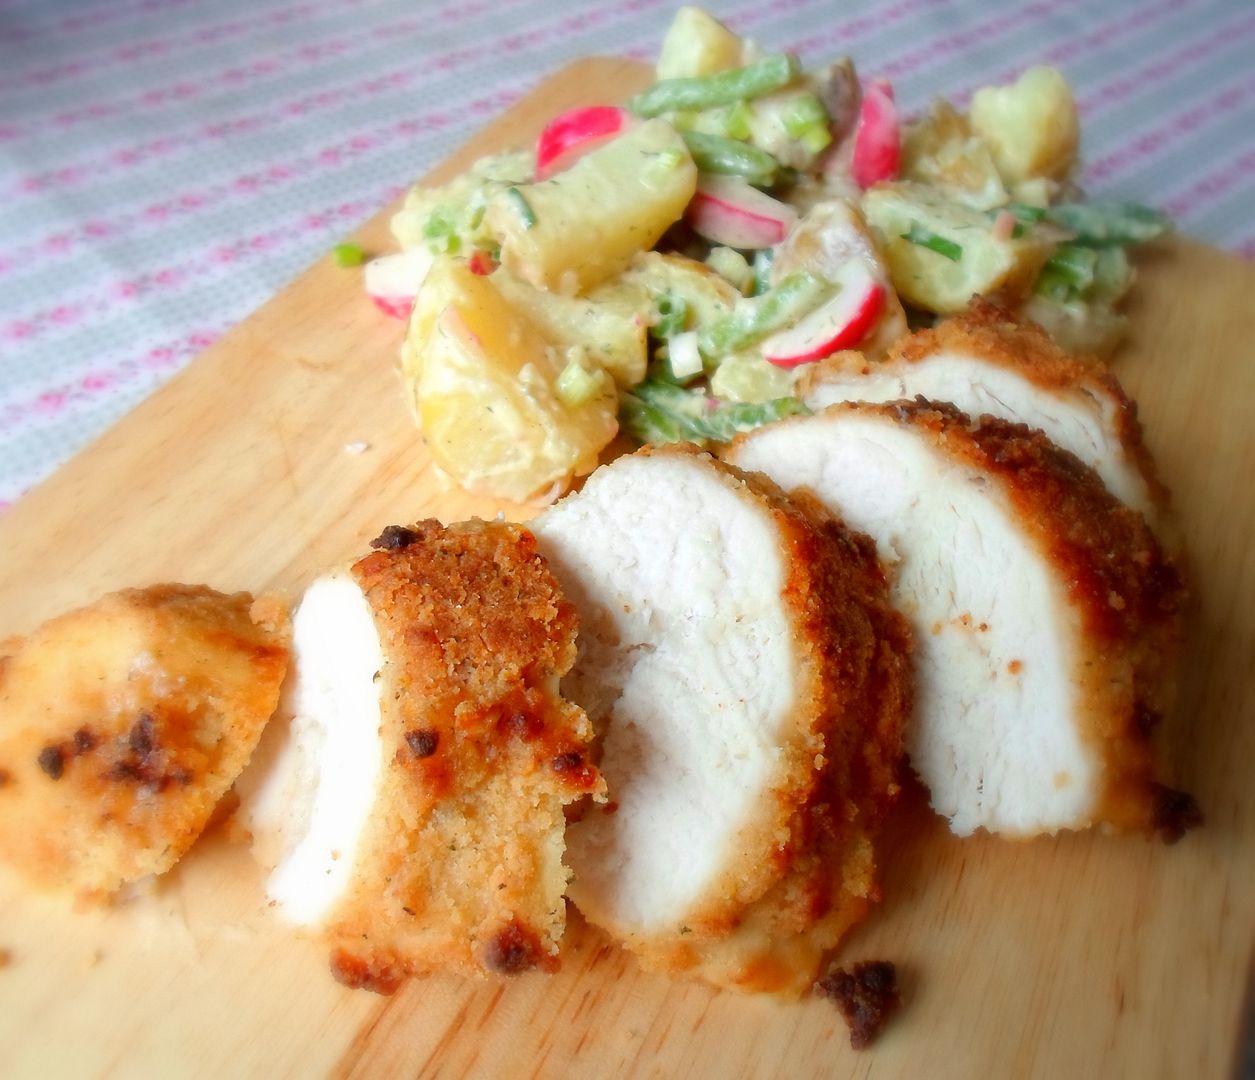
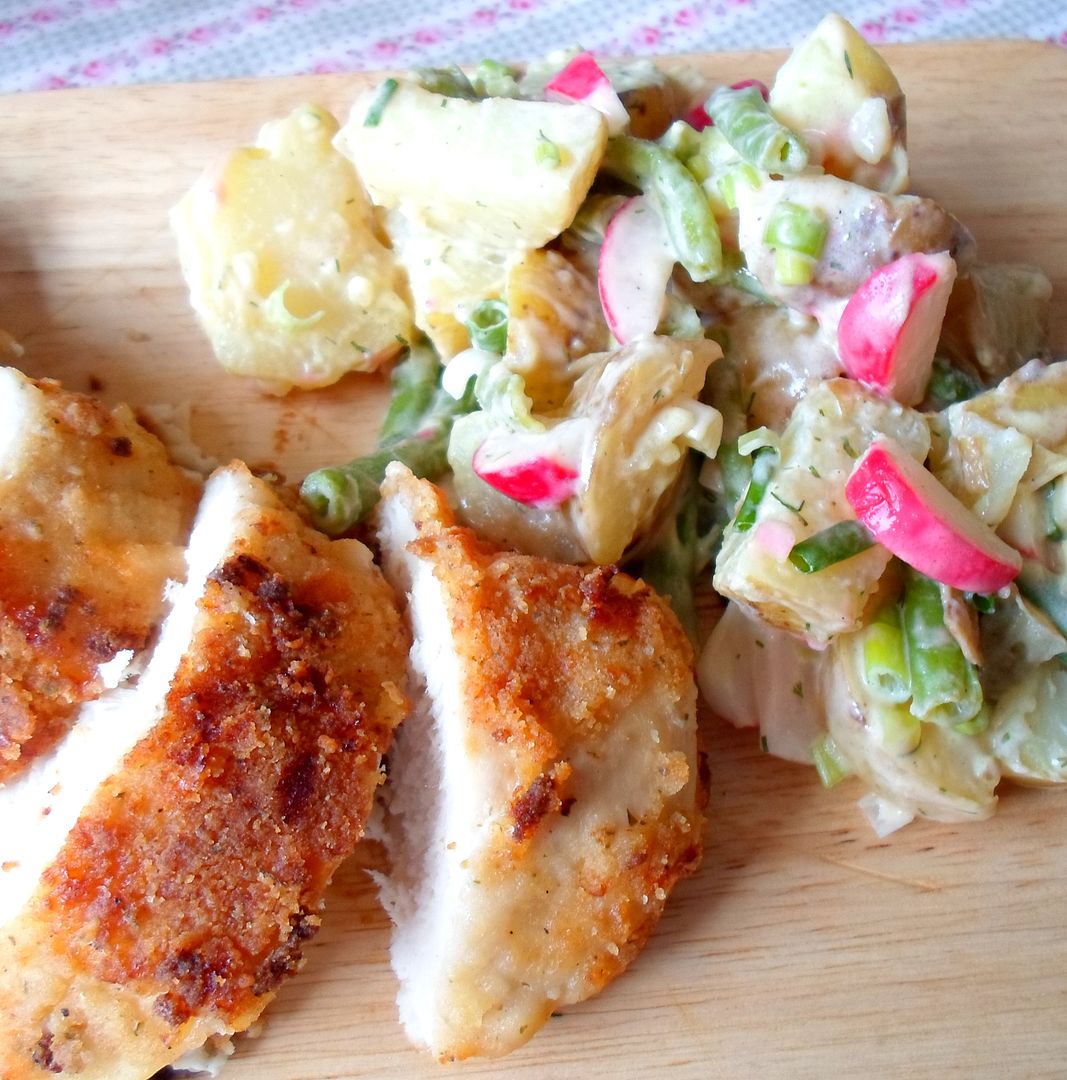
These are always moist and delicious, easy to make and perfect for eating cold with salads, or hot . . . as you like.   They are great both ways.   The chicken is dipped in buttermilk and then rolled in a tasty coating and baked just until golden brown on the outsides, yet still moist inside.   These are fabulous!   You can also do chicken tenders in this way.  Just cut the baking time down!

  photo SAM_6795_zpsa897f69f.jpg

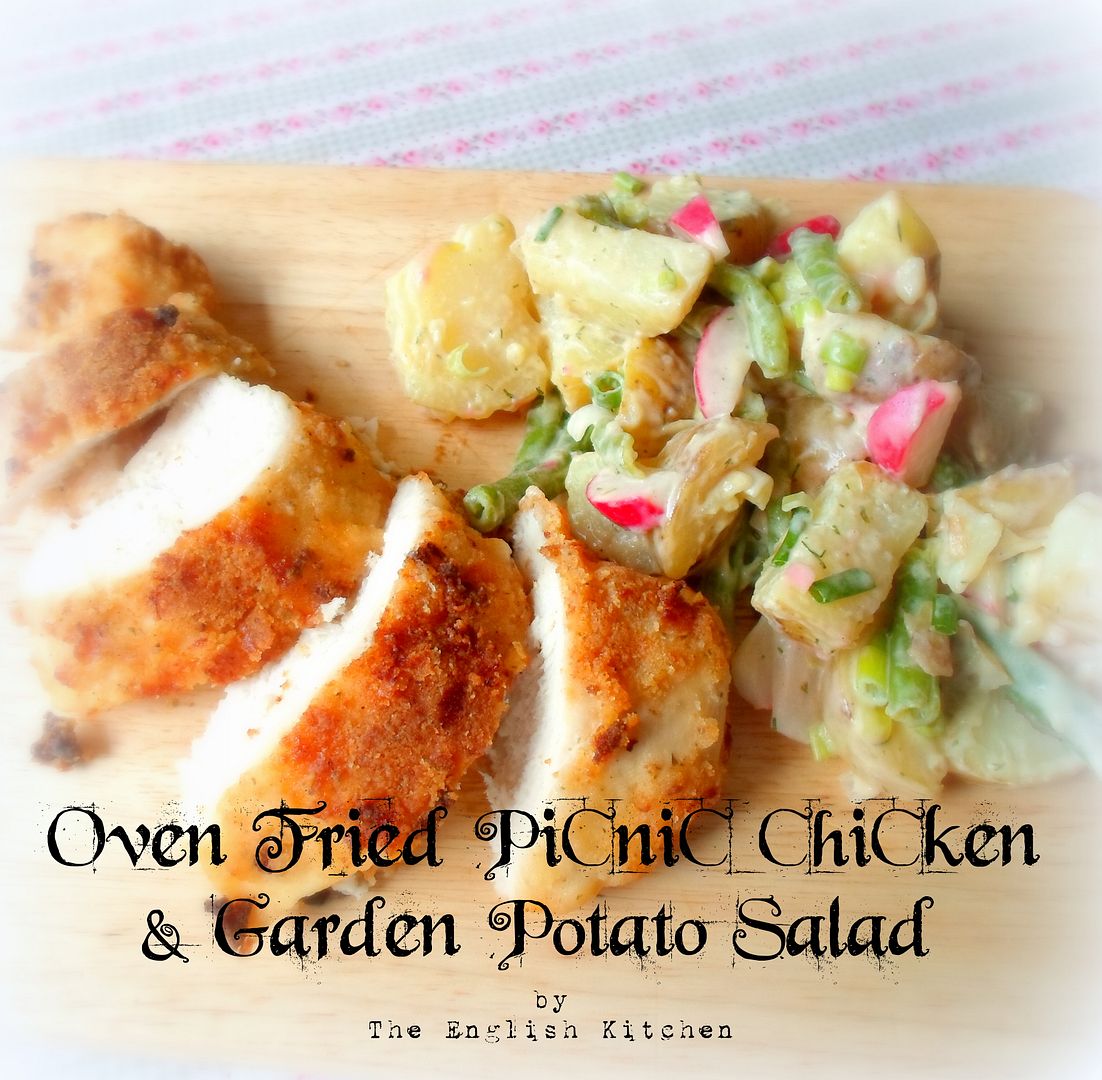
*Oven Fried Picnic Chicken*
Serves 4  
A tasty and easy way to prepare chicken to bring with you on picnics or for those summer evenings when you want something tasty to serve with your salad!  Adapted from a recipe found on the Betty Crocker site.

4 boneless skinless chicken breasts, rinsed and dried
1/3 cup of buttermilk
1/2 cup cornflakes
1/2 cup of Bisquick biscuit mix, or plain flour
1 package of dry ranch dressing mix
(you can also use a substitution noted at bottom of recipe)
low fat cooking spray oil
Preheat the oven to 200*C/400*F/ gas mark 6.   Spray a shallow baking sheet with cooking spray.  Set aside.

Tip the buttermilk into a bowl.   Put the cereal, biscuit mix (flour) and ranch dressing mix into the bowl of a mini food processor.  Blitz to combine well and crumble the cereal.  Tip this mixture into a plastic food storage bag.  Roll your chicken breasts in the butter milk, turning to coat, one at a time.  As you coat them, drop them into the bag with the dry mixture and give them a shake in it to coat.  Place them onto the baking sheet, presentation side down.   Repeat until all four breasts are coated.   Spritz well with the cooking spray.   Bake for 25 minutes. Flip them over and spritz them again with the cooking spray.  Bake for a further 15 to 20 minutes or until the juices run clear when pricked at the thickest part.  Serve hot or cold.

Note:   As  a substitute for the ranch dressing mix, combine  2 TBS dry parsley, 1 tsp dried dill weed, 1 tsp garlic powder, 1 tsp onion powder, 1/2 tsp dried basil and 1/2 tsp ground black pepper in a mortar.   Crush with a pestle until fairly fine. Use as above.  If you want to use it as a salad dressing, combine 1 TBS of the mix with 1/3 cup of mayonnaise and 1/4 cup of milk.

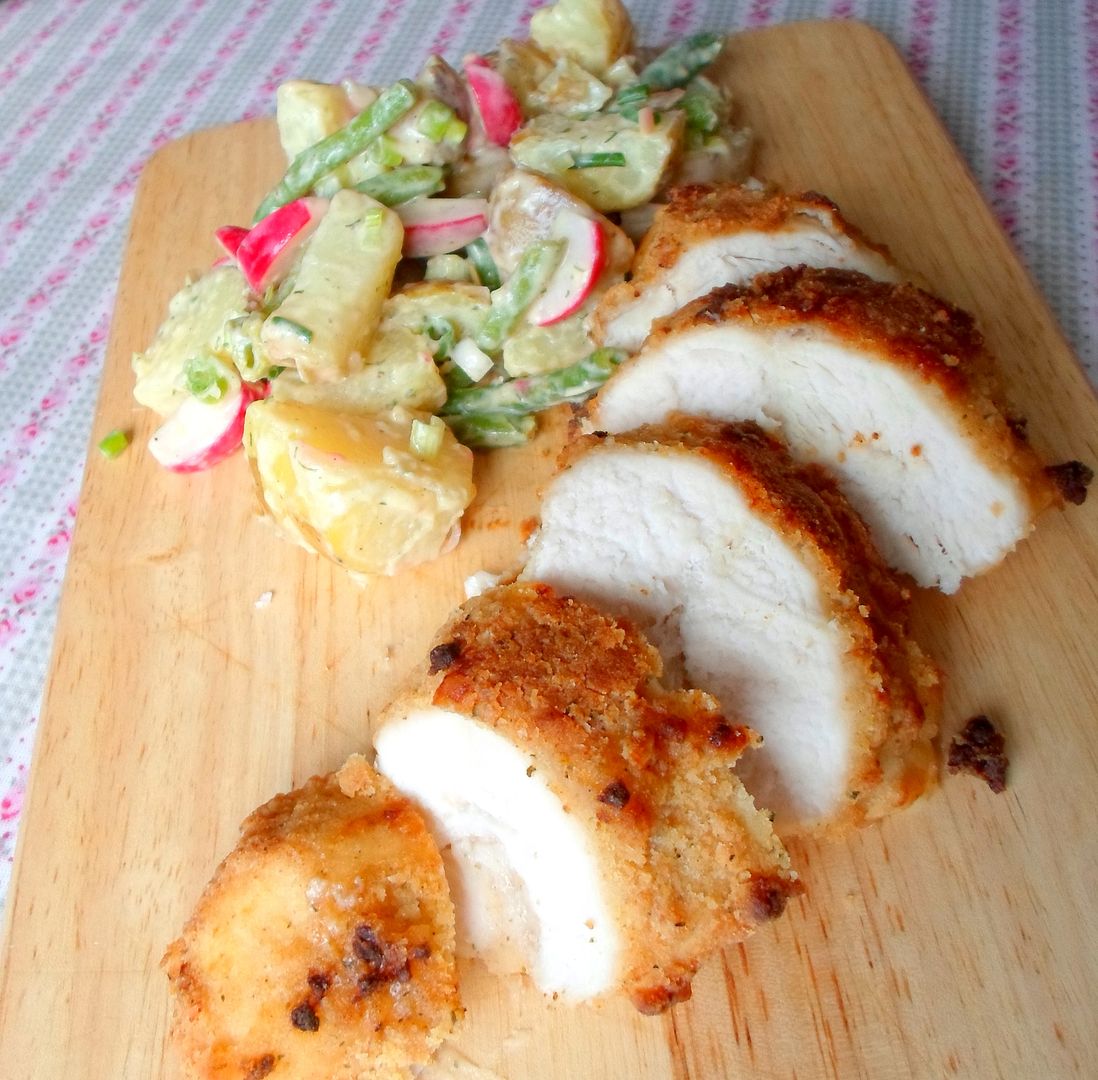
Of course a tasty salad goes well with these.  I like a tossed salad myself . . . but the Toddster is a meat and potatoes kind of a guy . . . so I like to make this creamy garden Potato salad, which meets both of our desires.   He gets to please his meat and potatoes soul . . . and I get part of my daily dose of veg . . . both in a tasty salad.   This dressing is a type of honey mustard, creamy delish!!

 photo SAM_6786_zps8a2449d1.jpg

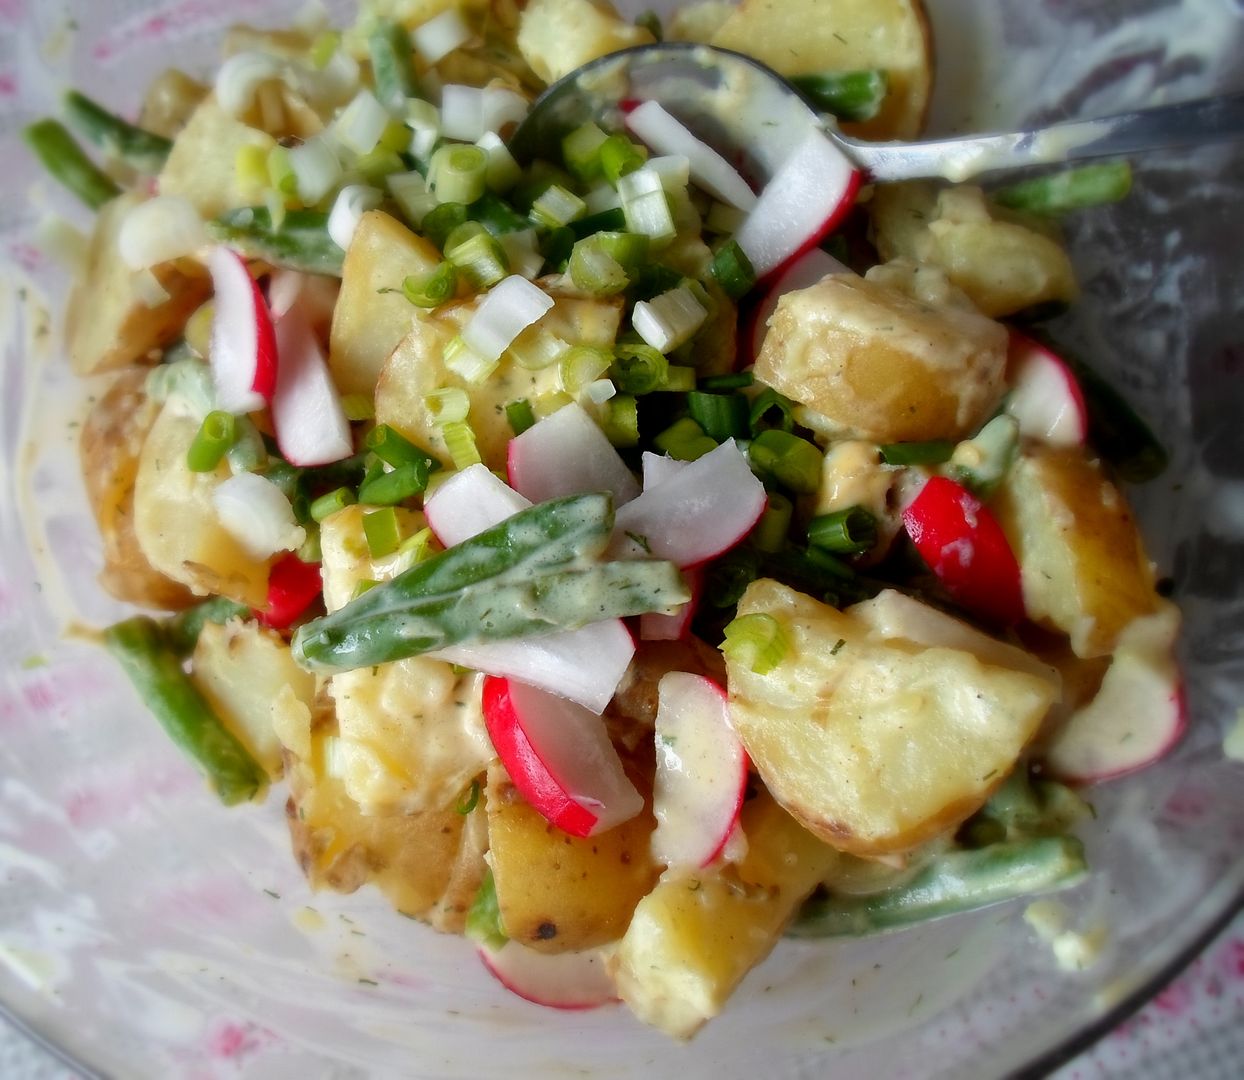
*Creamy Garden Potato Salad*
Serves 6 to 8
Printable Recipe

A delicious potato salad with a punchy low fat Honey Dijon mayo dressing.  The green bush beans and radishes add a bit of crunch and colour.

1 pound of small new potatoes
2 TBS Cider Vinegar
4 TBS low fat mayonnaise
2 TBS honey Dijon mustard
1/4 tsp cayenne pepper
fine sea salt and freshly ground black pepper to taste
3 to 4 spring onions, chopped
(white and green parts)
a handful of radishes, trimmed and chunked
a handful of bush green beans, trimmed and cut in half crosswise
1 TBS Dill Weed (or a handful of fresh dill, finely chopped)

 photo SAM_6785_zpsec09db67.jpg

Place the potatoes in a pot of lightly salted water to cover.  Bring to the boil and then simmer on medium heat until tender, about 15 minutes.  Add the green beans for the last 5 to 6 minutes of cooking time.

While the potatoes are cooking whisk together the vinegar, mayonnaise, mustard, and cayenne pepper along with salt and pepper to taste.    Set aside.

Drain the potatoes and beans once they are tender.  Leave in the colander and place the colander over the hot pot.  Allow to cool until you can easily handle.  Cut the potatoes into halves or quarters.  Place the warm potatoes and beans into a bowl.  Pour the dressing over top of the warm vegetables.  Add the onion, radishes and dill weed and gently toss together.

Serve at room temperature.

  photo strawberries1_zpsgnfvp2ez.jpg

If you are looking for a simple and delicious dessert why not try Strawberry Tiramisu!  Easy to make and very pretty to look at.  If you really want the colours of the flag you can add a layer of fresh blueberries.  Very pretty!
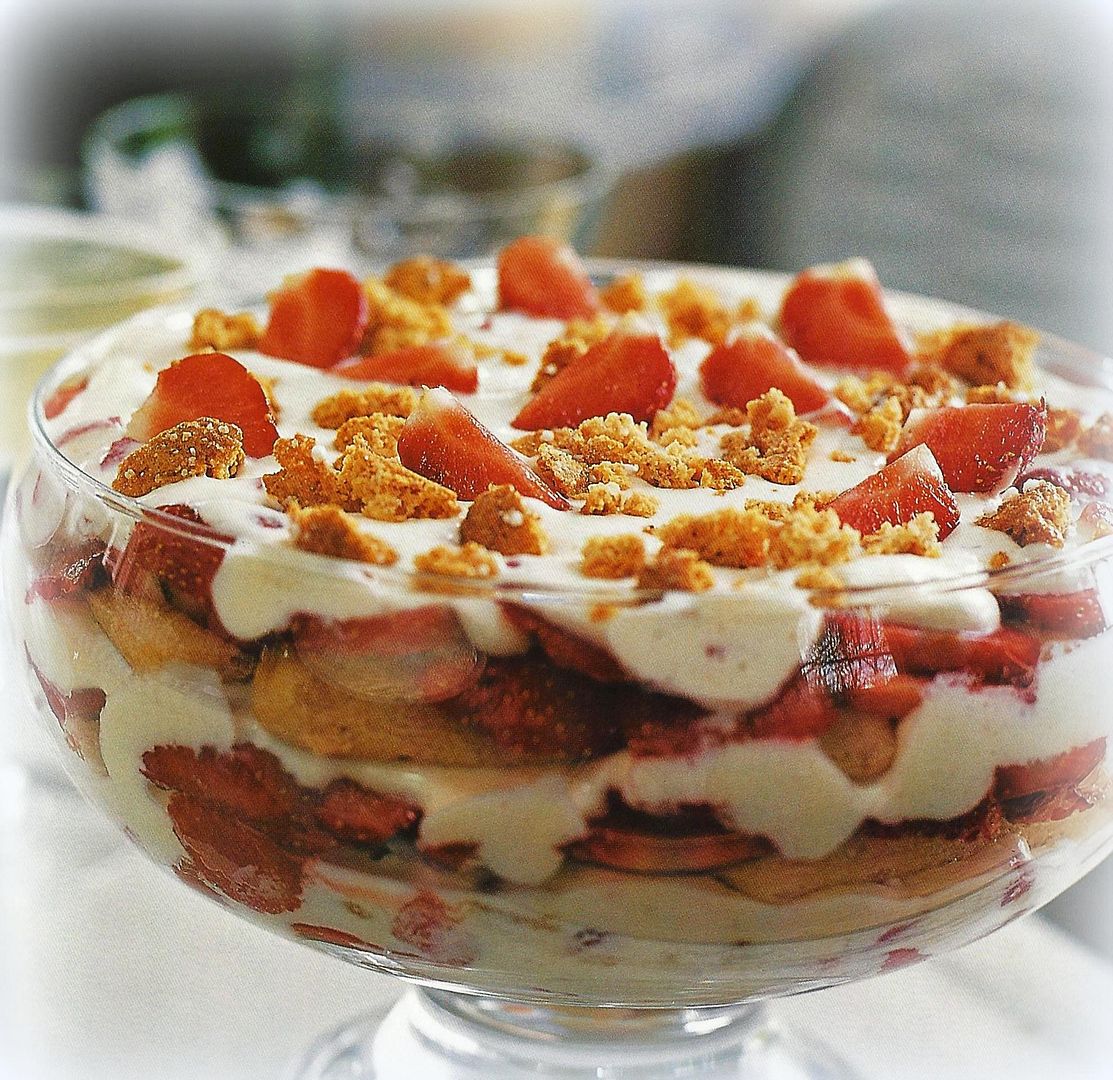
 photo Strawberry Tiramisu_zps0hctc7tc.jpg

*Strawberry Tiramisu*
Serves 6
An easy and deliciously fruity version of an old favourite!  Sure to please!  As this contains raw eggs, do take care if serving to the elderly or the very young.  You may also use pasturized eggs if you are really concerned.


400g fresh strawberries (a scant pound, almost 3 cups)
5 amaretti biscuits (crisp almond meringue type of cookies)
2 large free range eggs, separated
40g of sugar (3 1/2 TBS)
1/4 tsp vanilla extract
4 TBS white rum (I don't do alcohol and so I just use extra apple juice and 1/2 tsp rum flavouring)
250g of mascarpone cheese at room temperature (a generous cup)
3 TBS whipping cream
100ml of pressed apple juice (1/2 cup, not from concentrate, cloudy apple juice)
100g sponge fingers (Lady fingers, 3/4 of a package)


Hull the berries.  Weight out 100g (2/3 cup) and chop them finely.  Slice the remaining berries and set aside.  Crush the amaretti biscuits coarsely by placing them into a plastic bag and bashing them with a rolling pin.  You want them to be about the size of coarse bread crumbs.


Whisk the egg yolks until they are pale yellow and fluffy.   Whisk in the sugar gradually as you go.   Whisk in the vanilla and a TBS of the rum.  Put the cheese in a bowl and beat with a wooden spoon to soften, then gradually whisk in the egg yolk mixture, whisking it until you have a smooth and lump free combination.   Whisk the egg whites with a clean whisk in a separate bowl until soft peaks form.  Fold the chopped berries into the mascarpone mixture and then carefully fold in the egg whites.  

Whisk the whipping cream until soft folds appear.  Fold this into the mascarpone mixture also.  Fold in about 1/3 of the crushed amaretti.


Mix the remaining rum with the apple juice in a bowl.   Dip some of the sponge fingers in this mixture and then lay them across the base of a glass serving bowl.   Reserve some of the sliced berries for decoration.   Arrange a layer of the remainder of the berries over the soaked sponge fingers.   Cover with a layer of the mascarpone cream.  Repeat with one or two more layers of soaked biscuits, sliced berries and the mascarpone cream, finishing off with the cream mixture.   Chill overnight, or for at least five hours.  About an hour before you wish to serve it, scatter the remaining amaretti crumbs over top and decorate with the reserved sliced berries.   Chill until ready to serve.

Wheyhey, the new Protein Ice Cream

 photo protein ice cream_zpsaauwsopy.jpg

I was recently asked if I would like to try this new protein ice cream by Wheyhey!

 "Making sure you have enough protein in your diet is essential to getting the most out of your body - and life! Protein is the building block for all human cells, the second most abundant component of the human body after water, and can help with everything from losing weight to muscle repair and skin anti ageing! Protein is made up of amino acids of which there are 9 known as ‘essential’, and 11 other ‘non-essential’ and ‘conditional’ amino acids."

Wheyhey is made using a whey protein isolate, which contains  9 essential and 11 non essential amino acids that the human body needs.  Whey protein isolate is a by-product of the cheese making process and it’s 100% natural and considered to be easily and rapidly digested.

This ice cream is designed to not only taste good, but also do you good at the same time.  Each pot contains 20g of protein.  It's also sugar free and suitable for use by diabetic, being naturally sweetened by a natural sweetener called Xylitol in all of their flavours. (Xylitol is a derivative of tree bark and it’s what you find in sugarfree gum and toothpaste.) Wheyhey protein ice cream helps keep your blood sugar levels stable by slowing the absorption of glucose into the blood stream.

So now you know all the healthy stuff about it, but bottom line . . .  does it taste good?

  photo DSCN2102_zpsnucusaen.jpg

I quite liked the strawberry and the banana, but I am not fond of chocolate flavoured milk anything . . .  not ice cream, not milk, not hot chocolate . . . so I didn't really care for that, but don't take my word for it because I am not fussed.   A chocolate milk lover might find it exceptionally tasty.  It just wasn't me.  Also the vanilla pot I think might have melted and then been frozen again as it had a really weird  texture . . .

 photo DSCN2100_zpsjdf1kccd.jpg

which you can see in the middle pot in this photo on the top line.  It was foamy and airy and almost a bit like Styrofoam.  It did say on the pot not to refreeze if it melted, so I really couldn't make an honest judgement on it's flavour.

It comes in four  flavours . . . Banana, Vanilla, Chocolate and Strawberry, and is free of sugar,  additives and chemicals . . .  which can't be bad actually.  I often worry about all the chemicals we ingest nowadays.  (That can't be good for us I am sure.  So it's nice to see a product that tastes nice and is additive, sugar and chemical free.)

From the sports perspective ingesting more protein makes sense and this is a pretty tasty way to get it.

From the weight loss perspective, upping your protein intake helps to keep you feeling fuller for longer, cuts cravings and helps slow the absorption of glucose into the bloodstream, which is also a plus. 

It is available online now at Ocado and at Musclefood and is available in the single serving sizes and a larger family size. 

Follow them on Facebook

Follow them on Twitter

Follow them on Instragram

Wednesday, 1 July 2015

Bacon, Tomato & Basil Toastie

 photo DSCN2087_zpsjw8cabru.jpg

I wanted to present to you today a simple and quick toastie sandwich that is perhaps a bit lower in fat than your usually toastie sandwich.  Not only is is quick and easy but it's quite delicious as well, but then you probably already know that because if you have been reading me for a while, you will know I never show you anything that I don't think is delicious!


  photo DSCN2088_zpszgjua3bi.jpg

This is a little bit different than your usual BLT sandwich.  I use grilled back bacon, which is very lean.  I like the dry cured oak smoked, but you can use whatever you want.   In North America, I would use back bacon.

 photo DSCN2089_zps61xv4g1v.jpg

Along with the grilled bacon, I have grilled sliced tomatoes.  They cook quickly and the grilling makes otherwise not so tasty tomatoes, delicious . . . helping to release some of their natural sweetness and juices.  You can tuck some slivers of garlic in them as well if you want.

  photo DSCN2090_zpstg2pkkva.jpg

I used whole wheat whole grain bread, for extra goodness and nuttiness.   The bread is also grilled.

 photo DSCN2092_zpskagwt57w.jpg

I dress the sandwich with a fabulous basil mayonnaise, which is as simple as chopping fresh basil and stirring it into regular or low fat mayonnaise.  A grinding of black pepper and Bob's your uncle!  Everybody is happy!

 photo DSCN2091_zps0eoyyebs.jpg


*Bacon, Tomato & Basil Toasty*
Serves 1

A healthy, quick and easy version of the traditional bacon and tomato sandwich which goes down a real treat.  Portions are given for one, but can easily be increased to serve more. 

2 extra lean bacon rashers (fat side clipped at 1/4 inch intervals)
1 medium tomato, sliced
2 slices of stoneground whole meal or whole grain bread
1 TBS mayonnaise
2 tsp chopped fresh basil
balsamic vinegar to taste
fine sea salt and freshly ground black pepper to taste 


 photo DSCN2094_zpshekofmya.jpg 

Preheat the grill to high. Whisk the mayonnaise and basil together and set aside. Place the bacon rashers on a grill tray and cook for 2 minutes.   Add the tomato slices to ther tray and cook for a further 2 minutes.  Turn the bacon over and add the bread to the tray.  Pop back under the grill and let the bread go golden on one side, then flip over and lightly toast on the other side. 


 photo DSCN2095_zpsgygzga1u.jpg 

Remove the grill tray from the oven.   Set one slice of the toasted bread aside and keep warm.  Spread the other slice of bread with the basil mayonnaise and replace it on the grill tray.  Top with the bacon rashers and the sliced tomatoes.  Drizzle with a bit of balsamic vinegar and dust with some salt and black pepper to taste.  Pop back under the grill for a further 2 minutes.   Serve immediately, topped with the other slide of toasted bread.  Cut on the diagonal to serve.

Tuesday, 30 June 2015

Macaroni Roma

 photo DSCN2077_zpsennr4dpi.jpg

As promised yesterday I am back today with a delicious recipe created to use up some of those tasty leftovers from the pot roast!  This is a simple casserole that really is tasty and so very simple to make.  If you can boil water and have been thrifty enough to save some meat and some of that fabulous gravy, you can make this!

  photo DSCN2078_zpsyqiz9k7q.jpg

I love pasta as you know  . . .  Todd, he's not so fond (as you also know) but he didn't seem to mind this overly much.  I found the recipe in a very old cookbook of mine called "Twice is Nice."   by Edna K Damerell.  It's a great book.  There's lots of fabulous ideas in it.   I bought this book back in the mid 1980's, so it's been with me for a very long time.

 photo DSCN2079_zpsrgsralqw.jpg

Cooked elbow macaroni is seasoned with some herbs and then layered in a casserole dish  along with chopped leftover roast beef, sliced onions, leftover gravy, cream and cheese.

  photo DSCN2081_zpsyydtuzwx.jpg

You bake it for a little while and then you lay some sliced tomatoes on top and sprinkle on some herby buttered crumbs and bake it for a little while longer, with the end result being something which is very tasty, not to mention visually appealing and quite economical.  I hate waste, don't you?  This is a great way to prevent that and to make a little meat go a long way.

 photo DSCN2080_zpsdba3hbf7.jpg


*Macaroni Roma*
Serves 6

A delicious way to use up some of the leftovers from that Sunday Lunch! 

230g of uncooked macaroni (2 cups)
1 tsp salt
1/8 tsp black pepper
1/8 tsp dried oregano
1/8 tsp dried basil
1/8 tsp garlic powder
2 cups of diced leftover cooked beef
1 medium red onion, peeled, sliced and separated into rings
120g of finely diced cheddar cheese (1 cup)
60g of grated Parmesan Cheese (1/3 cup)
225ml of leftover gravy (1 cup)
225ml single cream (1 cup)
1 tomato sliced
2 TBS fine dry bread crumbs
1/8 tsp dried thyme
1 TBS butter

 photo DSCN2082_zpsbz8ri98d.jpg 

Cook the macaroni according to the package directions.  Drain well.   Return to the pot and toss together with the pepper, salt, garlic powder,  oregano and basil.


Mix the gravy and the cream together.

 photo DSCN2083_zpsvuxdjqij.jpg


Preheat the oven to 180*C/350*F/ gas mark 4.  Butter a 1 litre casserole dish.  (1 quart)


Layer in the dish as follows:  1/2 macaroni, 1/2 the beef, 1/2 the onion, 1/2 of both cheeses, 1/2 the gravy/cream mixture.   Repeat the layers.  Loosen the mixture gently with a knife so that the sauce filters down through the layers.

  photo DSCN2085_zpsuzh0tsbc.jpg

Bake for half an hour in the preheated oven.  Remove from the oven and lay the sliced tomato on top.  Melt the butter and mix together with the bread crumbs and the thyme.   Sprinkle this mixture over top of the casserole and bake for 10 minutes longer, until golden brown.

Monday, 29 June 2015

Onion Pot Roast

 photo DSCN2070_zpslgvchggz.jpg

I normally wouldn't show you two beef recipes in a row, but I was meant to show you this last week and am only now just getting around to it.   We don't eat beef very often and we would only ever very rarely have it two days in a row!  This is a pot roast recipe which I have been using for years and years.  It is a tried and true and something my family always looked forward to me cooking.


 photo DSCN20691_zpsydladiqa.jpg

I think that I got the original recipe from off a packet of dry onion soup mix.  In fact, I know I did.  I have adjusted and tweaked it so much through the years that is only now very faintly resembles the original recipe.


 photo DSCN2071_zpsoetdtiun.jpg

It's such a simple roast to cook, and perfect for the cheaper, less tender kind of roasts such as chuck, or blade, rump or brisket.   The meat always comes out tender and delicious.

  photo DSCN2072_zpso6dn380m.jpg

It has a fabulous gravy also.   Perfect for spooning over the cooked meat and plenty of hot mash.

 photo DSCN2073_zpsio5ccmkl.jpg

The recipe is as simple as banging everything into a lidded casserole dish, or roaster, popping it into a low oven and then waiting.   Which makes it perfect for on those days when you have plenty else on your plate.  I often cook it when we have church so that it is waiting for us when we get home.

 photo DSCN2074_zpspidkbg7i.jpg

It basically cooks itself.   No browning needed.   Cooks itself.  Tender meat.  Flavourful gravy.   What more could you want??

  photo DSCN2070_zps3goy46ac.jpg

*Onion Pot Roast*
Makes 4 to 6 servings
with leftovers

This is a delicious pot roast which I have been making for years and years.  I do believe that I got the original idea from off of a packet of onion soup mix, but I have adapted it in so many ways through the years, it's now all mine.  This so simple to make.  There is no need for browning or anything.  Just pop it all into a roasting tin with a lid, or dutch oven, cover tightly and roast in a slow oven until tender. 
 
1 3lb boneless beef rump or rolled brisket roast
1 onion, peeled and chopped
450ml of beef broth (2 cups)
225ml of apple juice (1 cup)
1 (4 serving size) packet of dry onion soup mix
1 large bay leaf broken
1/2 tsp dried thyme
1 TBS balsamic vinegar
1 TBS soft light brown sugar
4 large carrots, peeled and cut into thirds
1 small swede (rutabaga), peeled and cut into 2 inch chunks
salt and black pepper to taste 


For the gravy:
35g of flour shaken in a jar with 110ml of cold water until smooth
(1/4 cup flour shaken with 1/2 cup of cold water)

 photo DSCN2075_zpszgf1arwi.jpg


Preheat the oven to 165.C/325*F/ gas mark 3.   Have ready a lidded roaster/casserole dish large enough to hold the meat and vegetables.


Place the prepared vegetables in the bottom of the casserole or roaster.  Season the meat all over with salt and pepper and lay on top of the vegetables.   Sprinkle with the dry onion soup mix and thyme.   Whisk together the beef broth, apple juice, vinegar and brown sugar.   Pour over top of the meat and vegetables. Tuck in the bay leaf.  Cover tightly.


Roast for about 3 1/2 hours without disturbing.   Remove the lid and roast for a further half an hour, until the meat is very tender and lightly browned.   Remove from the oven.  Remove the meat to a plate, cover lightly with foil and set aside to rest.  Scoop out the vegetables to a bowl and keep warm.   Remove and discard the bay leaf.


If the roaster/casserole is flame proof, place on top of a stove burner and turn on to medium heat.  If not, pour the juices into a sauce pan and proceed.  Whisk in the flour which has been shaken with the cold water.  Cook over medium heat, whisking constantly until the gravy boils and thickens.   Reduce to low and cook for at least five minutes.

Serve the meat sliced with some of the gravy spooned over top.

Tune in tomorrow to see what deliciousness I created with the leftovers!

Note- This will make lots of delicious gravy.   Any that doesn't get used can be frozen in containers ready to use at a later date in pot pies, etc.

Tasty Grilled Chicken Sandwiches and Navaho Tacos and Farmers Choice


 photo Farmers Choice logo_zpsi4gf5nli.png

 Farmer’s Choice are an online butchers, green grocers and deli that deliver completely free range, British meats and produce to homes across the UK.  As a guest author on their page today I am offering up several delicious recipes designed to help you keep your cool in these lovely summer temperatures we are enjoying now and hope to enjoy over the coming weeks, so break out the grill and the electric frying pan, coz you're in for a real treat! 


Grilled Chicken, Bacon and Ranch Sandwiches are sure to please, from the sugar peppered bacon to the tangy marinated chicken!  With some cheddar melted on top and it all tucked into a toasted bun slathered with a tangy ranch dressing and garnished with lettuce, there isn't much here that isn't pretty tasty or pleasing! 


Navaho Tacos are sure to become a firm family favourite with it's crisp naan-like fry bread on the bottom, topped with a zippy ground beef filling and traditional taco toppings!  You can either cook them in a skillet on top of the stove or in an electric skillet.  Either way you won't be needing to heat up an oven and the family will be over the moon! 

Not only are all of these delicious recipes but they are also really simple to make and, of course you can purchase almost all of your ingredients from the people at Farmer's Choice.


You will find this and many other recipes on the Farmer's Choice site.   All the convenience of online grocery shopping with the added pleasure of supporting your local farmers.  Quality ingredients at a good price, British sourced and home grown.  You can't get much better than that!

Sunday, 28 June 2015

Creamy Garlic Mushrooms

 photo DSCN2113_zpsaklevr07.jpg

One thing we really enjoy eating in the summer months are great grilled steaks.  There is nothing nicer than a steak cooked properly and served up with something scrumptious on the side.   Today I cooked our favourite Creamy Garlic Mushrooms to have with some simple grilled steaks that I had grilled on our electric grill.   They went down a real treat!

  photo DSCN2114_zpsefcmqhnk.jpg

This is a side dish that is so very simple to make and yet tastes like you have slaved all day over a hot stove to create . . .  well maybe not a whole day, but at least slaved in part!

 photo DSCN2116_zpsbwqroy6x.jpg

It's rich and indulgent without going over the top.  I bet you even have all of the ingredients in your refrigerator right now to make it.

 photo DSCN2117_zpscqfespjs.jpg

I have served them with steak, but they are equally at home with pork or chicken . . .

  photo DSCN2118_zpsj3yxwcpd.jpg

They're even delicious served simply spooned over hot and crisp slices of buttered toast for a quick and easy vegetarian entree.

 photo DSCN2119_zpslwubrh0h.jpg

Mmmm . . . mmmm . . .  mmmm . . .  they be some good.  Portions are given for two, but they can easily be multiplied to feed more.

 photo DSCN2121_zpstwmwq9bn.jpg

*Creamy Garlic Mushrooms*
Serves 2

These delicious, tender and flavourful mushrooms are fabulous served with grilled meats or chicken.   They're also pretty tasty served on crisp slices of buttered toast! 

225g of button mushrooms (Halve if large) (1/2 pound)
2 cloves of garlic, peeled and minced
2 heaped dessertspoons of Cream cheese (about 4 TBS)
1 TBS Dijon mustard
4 TBS double cream
1/2 tsp dried thyme
1/2 tsp dried parsley flakes
fine sea salt and freshly ground black pepper to taste
1 tsp olive oil


 photo DSCN2122_zpstitokyjr.jpg

Heat a large skillet and add the oil.   Add the mushrooms.  Cook, stirring occasionally, over medium heat, until the mushrooms are golden and have released a little of their juices.  Add the garlic.   Cook and stir until quite fragrant without browning.  Turn the heat to low.   Season with some salt and black pepper and add the herbs.   Whisk in the double cream, cream cheese and mustard.  Heat through and serve.  (Don't boil or the cream cheese may split.)

 photo DSCN2123_zpsfpbcicyv.jpg

I know what you are thinking.   That IS one mighty delicious looking steak!   The people at Donald Russell recently asked me if I would like to try their Pave Rump Steaks.  They didn't have to ask me twice.   I do so love a good steak.

  photo DSCN2110_zps07ienpj0.jpg

These continental cut Pave Rump steaks are cut to be firm and juicy.  Naturally lean, this outdoor reared UK bred and grass fed beef is traditionally matured for a minimum of 35 days and is trimmed by hand from the centre of the rump muscle by their expert butchers.  They do suggest that because these steaks are very lean you take care not to overcook them.

 photo DSCN2112_zpsemmedbgr.jpg

Which as you can see . . . I did not.   Normally I wouldn't choose to grill a rump steak.   Seriously.  I have to say however, I did grill these, and they were, no word of a lie, some of the most delicious steaks that we have had in a very long time.   They were tender and filled with flavour.  We both really enjoyed them a lot!  I would buy these steaks.  I absolutely would.  Hands down better than any I have ever bought in the shops.

I cooked them on my OptiGrill, taking them off as soon as the rare beep sounded and they were cooked perfectly.   They were also very large.  I cooked two of the four I was sent, and in all honest, I think they would have easily fed four people.  They were very thick.

  photo DSCN2124_zpsfhojug9y.jpg

As an additional treat they included several packs of their Hand Made Pork Sausages, which I cooked this morning for our breakfast.
 
Hand made with care by their butchers, Donald Russell sausages are made with tasty, pork shoulder, combined with delicious seasonings and made using natural casings. Ideal for quick and tasty meals anytime, they can be also be cooked from frozen.


 photo DSCN2127_zpssypteouu.jpg

I have to say that I am not normally a fan of British Breakfast Sausage.  I do like the Cumberland and spicier varities of British bangers, but the breakfast ones, not so big on that.   Amazingly we found these sausages to be very flavourful, meaty and succulent, with a texture that wasn't at all unappealing.  We quite quite enjoyed!

A bit about the company:

"Donald Russell opened its doors to trade customers in 1974. In its early years, Donald Russell supplied gourmet meats to a growing number of highly reputed restaurants and hotels in the UK and worldwide, from Kensington Place and Simpson's-in-the-Strand to the Raffles Hotel in Singapore and The Grand Hotel, Monte Carlo.

They still supply many of them today, including some of the most reputable Michelin-starred names in the restaurant industry, from our London office where they can be nearer to many of their trade clients. However, due to a rapidly changing market place and a demand from the chefs to have the produce in their own homes , Donald Russell Direct was born and of course still delivers gourmet meat to households across the UK today.

Over the past decade donaldrussell.com has managed to build a reputation as THE place to buy meat online. This is an up-to-the-minute way of purchasing your goods with cooking tips and advice available at the click of a button."

I have to say my meat arrived in perfect condition, packed in dry ice and perfectly frozen.  I was very impressed.  Many thanks to the people at Donald Russell for affording me this opportunity to try out these lovely steaks and sausages.  It was really good meat and I felt like I was eating like a Queen, and then lo and behold, I discovered that they supply the meat for HRM.   ☺

Note - Although I was sent the meat and sausages for free, I was not required to write a positive review.   Any opinions are truly my own.

Twitter Delicious Facebook Digg Stumbleupon Favorites More